


Comment Moderation in Flask
As an administrator of a website, one of the things you would want to do is to moderate what users say publicly to each other. This is a very common task, and having it implemented in your Flask website can help sanitize the contents. In this tutorial, I will show you how you can implement the feature.

You can browse the source code on this repository on GitHub.
Create A Simple Flask Application
We will need a simple application to test the Flask server. I have created one already here. We will build on it and add a comment moderation feature. If you would like to know how the application in the link was built, you can read the start a flask server tutorial.
Application Configurations
To receive comments on our application, we need to provide forms that users can fill. The information that users pass through the forms will be used to populate our comments section. So, how can we make forms in Flask?
Flask provides the flask-wtf extension, a wrapper around the WTForms package. Let us install it in our virtual environment:
(comment_moderation)$ pip3 install flask-wtf
As our application grows, certain configurations will be needed. So far, we have not needed to use any configuration in our application. However, most Flask applications expect certain configurations to be set. One such configuration is the SECRET_KEY. It is a variable whose value is a cryptographic key useful in the generation of signatures and tokens. Flask-WTF uses it to protect web forms against a nasty attack called Cross Site Request Forgery or CSRF (pronounced as 'sea-surf'). This value, as the name suggests, is meant to be a secret.
If you look carefully, I have a module called config in the top-level directory. Following the principle of separtion of concerns, all the configurations that our application will need will be added here.
config.py: Secret key configuration
import os


class Config(object):
    # Form
    SECRET_KEY = os.environ.get('SECRET_KEY') or 'you-will-never-guess'
I am sourcing the value of SECRET_KEY from an environment variable. If the value is missing, I have provided a safe fallback by hardcoding a string. The environment variable is a secret and should not be added to version control. I will create a new file called .env which will have the actual value of SECRET_KEY. .gitigonore file we already have ignores this file from version control, so it is safe to create it in the top-level directory.
(comment_moderation)$ touch .env
I will use the following method to generate the value of the SECRET_KEY:
(comment_moderation)$ python3 -c 'import os; print(os.urandom(16))'

# Random Output
b'\x1eh\xfcIWC\x91\xd7\xb3\xfd\x02dK\xe0\xb5z'
Hard to guess, right? I will add this value to my environment variable.
.env: Add secret configuration keys
SECRET_KEY=b'\x1eh\xfcIWC\x91\xd7\xb3\xfd\x02dK\xe0\xb5z'
With the variable set, we can now update our application instance to read and apply our configurations.
app/__init__.py: Register the config module in the application instance
from flask import Flask
from flask_bootstrap import Bootstrap
from config import Config # < ------------ update

app = Flask(__name__)
app.config.from_object(Config) # < ------------ update

boostrap = Bootstrap(app)

from app import routes, errors
I began by importing the Config class from the top-level directory. I have used the app.config.from_object(Config) to create an instance of our Config class. The lower name config comes from python to indicate the config module whereas the upper case is the actual Config class.
Flask Web Forms
The Flask-WTF package uses Python classes to represent web forms. The form classes define the variable fields we would like to have in our forms.
Define Comment Form
Let us begin by creating a simple comment form. The information we want from a user of our application are their username, their email addresses, and the content they would like to share on our application. We will begin by creating an empty forms module in the app/ sub-directory.
(comment_moderation)$ touch app/forms.py
Let us now create the class that defines all the fields we want in our comments form.
app/forms.py: Create a user comment form
from flask_wtf import FlaskForm
from wtforms import StringField, SubmitField, TextAreaField
from wtforms.validators import DataRequired, Email


class CommentForm(FlaskForm):
    username = StringField('Username', validators=[DataRequired()])
    email = StringField('Email', validators=[DataRequired(), Email()])
    comment = TextAreaField('Comment', validators=[DataRequired()])
    submit = SubmitField('Post')
flask-wtf has a base class called FlaskForm which is needed. The variable fields are defined using StringField, TextAreaField and the SubmitField from wtforms. To ensure that the user does not submit empty data, we attach DataRequired. This will prevent them from clicking the Post button if any of the fields above are empty. The Email validator will ensure that the email address is valid.
You will need to install email-validator to use the Email validator.
(comment_moderation)$ pip3 install email-validator
Display Comment Form
The next step is to display this form in our templates. We will use the index.html file to display our comment form.
app/templates/index.html: Display comment form
{% extends 'base.html' %}
{% import 'bootstrap/wtf.html' as wtf %} <!-- Update -->
{% block app_context %}
<div class="row">
<div class="col-md-12">
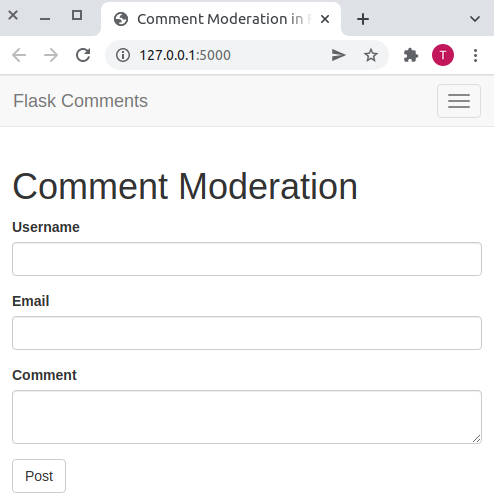
<h1>Comment Moderation</h1>
</div>
</div>
<div class="row">
<div class="col-md-6">
{{ wtf.quick_form(form) }} <!-- Update -->
</div>
</div>
{% endblock %}
I have used Bootstrap to quickly display my comment form, though you can manually display the same form using raw HTML.
With the form ready to be displayed, we will now update our index() view function to render it.
app/routes.py: Render the comments form
from app import app
from flask import render_template
from app.forms import CommentForm # < ---- update


@app.route('/')
@app.route('/index')
def index():
    form = CommentForm() # < ---- update
    return render_template('index.html', form=form) # < ---- update
Start your flask server in the terminal by running the command flask run. Navigate to http://127.0.0.1:5000/ to see the comments form displayed.
Working with a Database
After a user clicks the Post button, we will need to store the user data in a database. This data will persist even if a user closes the application. The database will also allow us to retrieve all the data about our users.
Since this application is small, we will use an SQLite database. That does not mean that as the project grows and becomes bigger SQLite will not be a suitable choice. It is still a great choice for bigger applications. Typically, SQLite stores data in a file on the disk, and there is no need to run a database server like MySQL and PostgreSQL.
Flask provides the Flask-SQLAlchemy extension to help us manage our database. It is a Flask-friendly wrapper around the popular SQLAlchemy package. As an Object Relational Mapper, SQLAlchemy is a Python library that allows us to manage our database using classes, objects, and methods instead of tables and SQL. An ORM aims to translate these high-level operations into database commands.
To install the Flask-SQLAlchemy extension, run the following command in the terminal:
(comment_moderation)$ pip3 install flask-sqlalchemy
Database Migrations
Continued use of a database may result in the need to modify the original database schema. We may need to add a new field in the database to now collect users' email addresses, data that originally did not exist. So, when the structure of the database changes, we need to update the database schema by migrating to the modified schema.
We will use flask-migrate to perform this migration. Install it in the virtual environment by running the following command in the terminal:
(comment_moderation)$ pip3 install flask-migrate
Database Configuration
SQLite, being the most convenient choice in developing small applications, expects certain configurations from Flask-SQLAlchemy. We first provide the location of the database in the application through the SQLALCHEMY_DATABASE_URI configuration variable. This variable will source its value from the DATABASE_URL environment variable.
config.py: Database Configuration
import os
basedir = os.path.abspath(os.path.dirname(__file__)) # < ---- update


class Config(object):
    # Form
    SECRET_KEY = os.environ.get('SECRET_KEY') or 'you-will-never-guess'

    # Database
    SQLALCHEMY_DATABASE_URI = os.environ.get('DATABASE_URL') or \
        'sqlite:///' + os.path.join(os.path.dirname(__file__), 'app.db')
    SQLALCHEMY_TRACK_MODIFICATIONS = False
If DATABASE_URL does not exist, then I have provided a fallback value where I am configuring a database called app.db in the top-level directory. The SQLALCHEMY_TRACK_MODIFICATIONS configuration option is set to False to disable a feature of Flask-SQLAlchemy that tracks every modification on the database.
Database Instance
The database will be referenced through a database instance. We will create a db variable that will be used to access the database.
app/__init__.py: Database Instance
from flask import Flask
from flask_bootstrap import Bootstrap
from config import Config
from flask_sqlalchemy import SQLAlchemy # < ---- update
from flask_migrate import Migrate # < ---- update

app = Flask(__name__)
app.config.from_object(Config)

boostrap = Bootstrap(app)
db = SQLAlchemy(app) # < ---- update
migrate = Migrate(app, db) # < ---- update

from app import routes, errors, models # < ---- update
Database Models
Our model will contain columns that will store a user's name, email address, and comment. All these data are of type VARCHAR (in database jargon) and are limited to a specified number of characters. They are strings.
Let's create a new module called models.py that will contain our database models.
(comment_moderation)$ touch app/models.py
The translation of our database into code will look like this:
app/models.py: Comment table Schema
from app import db
from datetime import datetime


class UserComment(db.Model):
    id = db.Column(db.Integer, primary_key=True)
    username = db.Column(db.String(64), index=True)
    email = db.Column(db.String(120), index=True)
    content = db.Column(db.String(255))
    timestamp = db.Column(db.DateTime, index=True, default=datetime.utcnow)
    user_id = db.Column(db.Integer, db.ForeignKey('user.id'))

    def __repr__(self):
        return f'Comment: {self.content}'
I have added a timestamp column to the schema of the Comment model. This column will be used to sort the comments by their timestamps. Note how I carefully use utc.now and not utc.now(). I am passing the function itself and not the result of calling it.
Database Migration
With every change we might make to the database schema, we would like the flexibility of applying the new changes and work with the modified schema. Also, if we change our minds about the database structure, we should be able to easily roll back to the previous version. As seemingly difficult as it is, we can use the flask-migrate extension to do this. Alembic maintains a history of the changes that have been made to the database in a migrations repository.
To create a migrations repository, run the following command in the terminal:
(comment_moderation)$ flask db init

# Output
  Creating directory /home/harry/software_development/python/practice_projects/comment_moderation/migrations ...  done
  Creating directory /home/harry/software_development/python/practice_projects/comment_moderation/migrations/versions ...  done
  Generating /home/harry/software_development/python/practice_projects/comment_moderation/migrations/script.py.mako ...  done
  Generating /home/harry/software_development/python/practice_projects/comment_moderation/migrations/alembic.ini ...  done
  Generating /home/harry/software_development/python/practice_projects/comment_moderation/migrations/README ...  done
  Generating /home/harry/software_development/python/practice_projects/comment_moderation/migrations/env.py ...  done
  Please edit configuration/connection/logging settings in '/home/harry/software_development/python/practice_projects/comment_moderation/migrations/alembic.ini' before proceeding.
Remember that the flask command relies on the environment variable FLASK_APP to determine where our application is located. In the top-level directory, you should be able to see a migrations repository which has a versions subdirectory. This folder and all its files are now part of our applications and should be committed to our version control along with all other code.
To create our first migrations script, which will include the comments from our application users, run the following command in the terminal:
(comment_moderation)$ flask db migrate -m "user comment table"

# Output

INFO  [alembic.runtime.migration] Context impl SQLiteImpl.
INFO  [alembic.runtime.migration] Will assume non-transactional DDL.
INFO  [alembic.autogenerate.compare] Detected added table 'user_comment'
INFO  [alembic.autogenerate.compare] Detected added index 'ix_user_comment_email' on '['email']'
INFO  [alembic.autogenerate.compare] Detected added index 'ix_user_comment_timestamp' on '['timestamp']'
INFO  [alembic.autogenerate.compare] Detected added index 'ix_user_comment_username' on '['username']'
INFO  [alembic.autogenerate.compare] Detected removed index 'ix_comment_timestamp' on 'comment'
INFO  [alembic.autogenerate.compare] Detected removed table 'comment'
  Generating /home/harry/software_development/python/practice_projects/comment_moderation/migrations/versions/5fc3f28ab1bc_user_comment_table.py ...  done
The -m option is used to specify a message that will be included in the migration history. If you check the versions subdirectory, you will notice that we have a new file called XXX_user_comment_table.py. This file contains two important functions: upgrade() and downgrade(). The upgrade() function will be called when the migration is applied. The downgrade() function will be called when the migration is rolled back.
To apply these changes to the database, run the following command in the terminal:
(comment_moderation)$ flask db upgrade

# Output
INFO  [alembic.runtime.migration] Context impl SQLiteImpl.
INFO  [alembic.runtime.migration] Will assume non-transactional DDL.
INFO  [alembic.runtime.migration] Running upgrade -> 5fc3f28ab1bc, user comment table
You will add the migration scripts to source control and commit it. If at any one point
you would like to roll back the changes, you can run the flask db downgrade
command, though this is less likely in a production system.
Update the Database
Since all user information is now stored in our User database which is linked to the Comment database, we can now query the database to display all comments. Every time a request to render our index page content is made, we will query the database to display all comments.
The first step is to update our database every time new data comes through the Comments Form.
app/routes.py: Update the database
from flask.helpers import url_for
from werkzeug.utils import redirect
from app import app, db
from flask import render_template, flash, redirect, url_for
from app.forms import CommentForm
from app.models import UserComment # < ----- update


@app.route('/', methods=['GET', 'POST'])
@app.route('/index', methods=['GET', 'POST'])
def index():
    form = CommentForm()
    if form.validate_on_submit():
        user = UserComment(
            username=form.username.data,
            email=form.email.data,
            content=form.comment.data)
        db.session.add(user)
        db.session.commit()
        flash('Your comment has been posted!')
        return redirect(url_for('index'))
    return render_template('index.html', form=form)
form.validate_on_submit() is used to validate the form. If the form is valid, the user object is created and added to the database. Otherwise, the index page will be displayed. I have added a flash message to notify the user that their comment has been posted. To see the message, we need to update our base.html template.
app/templates/base.html: Show flash message
<!-- Contents of all our pages will go here -->
{% block content %}
    <div class="container">

        {% with messages = get_flashed_messages() %}
            {% if messages %}
                {% for message in messages %}
                    <div class="alert alert-success" role="alert">
                        {{ message }}
                    </div>
                {% endfor %}
            {% endif %}
        {% endwith %}

        {% block app_context %}{% endblock %}
    </div>
{% endblock %}
Try to post a comment. If all goes well, then you should be able to see the flash message.

Display Comments
We will display the comments on the index page. So, let us update our index() view function to display the comments.
app/routes.py: Display comments
from flask.helpers import url_for
from werkzeug.utils import redirect
from app import app, db
from flask import render_template, flash, redirect, url_for
from app.forms import CommentForm
from app.models import UserComment


@app.route('/', methods=['GET', 'POST'])
@app.route('/index', methods=['GET', 'POST'])
def index():
    users = UserComment.query.all() # < ----- update
    form = CommentForm()
    if form.validate_on_submit():
        user = UserComment(
            username=form.username.data,
            email=form.email.data,
            content=form.comment.data)
        db.session.add(user)
        db.session.commit()
        flash('Your comment has been posted!')
        return redirect(url_for('index'))
    return render_template(
                           'index.html',
                           form=form,
                           users=users) # < ----- update
We query our UserComment database using the UserComment.query.all() function. This function returns a list of all the comments made by users in the database. We can then loop through the list and display the comments on the index.html page.
app/templates/index.html: Display comments
{% extends 'base.html' %}
{% import 'bootstrap/wtf.html' as wtf %}

{% block app_context %}
    <div class="row">
        <div class="col-md-12">
            <h1>Comment Moderation</h1>
        </div>
    </div>
    <!-- Display all user comments -->
    <div class="row">
        <div class="col-md-12">
            {% for user in users %}
                <table class="table table-striped">
                    <tr valign="top">
                        <td>{{ user.username }} says:<br>{{ user.content }}</td>
                    </tr>
                </table>
            {% endfor %}
        </div>
    </div>
    <!-- End of displaying user comments -->
    <hr>
    <div class="row">
        <div class="col-md-6">
            {{ wtf.quick_form(form) }}
        </div>
    </div>
{% endblock %}
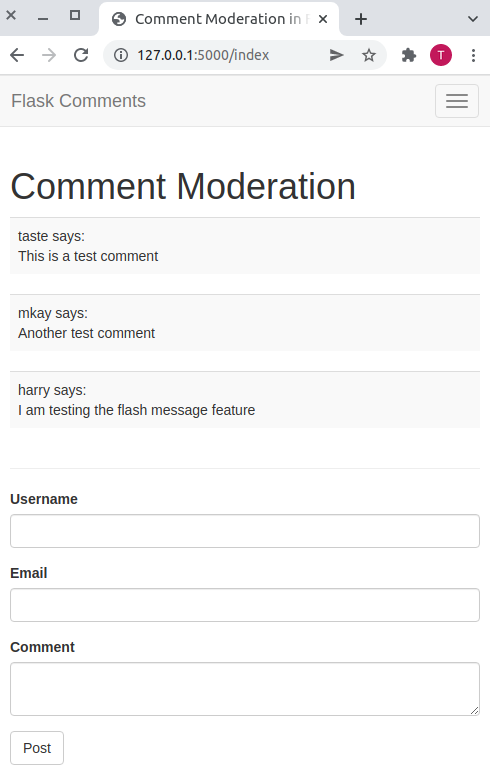
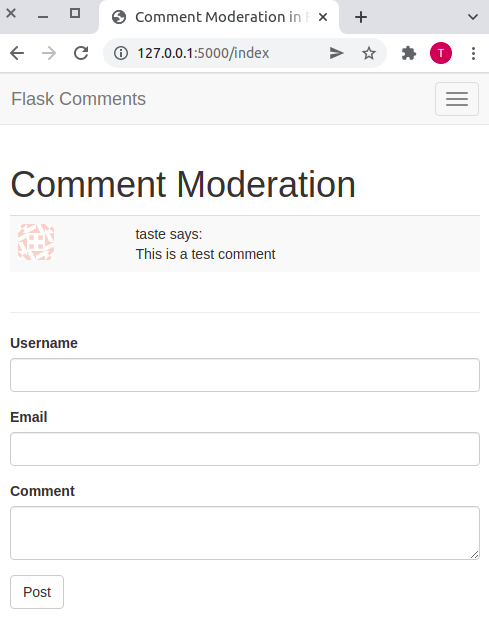
You should be able to see this:
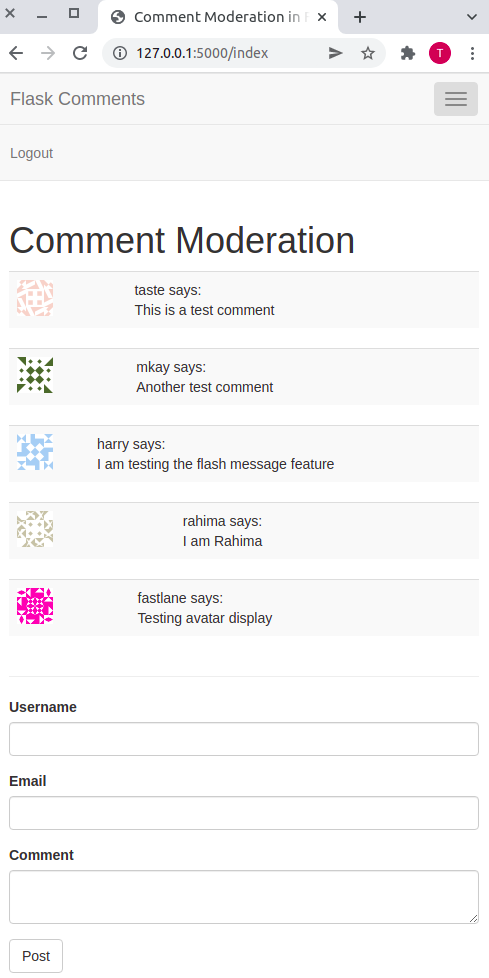
User Avatar
So far so good. The last thing I would like to add to every user is an avatar. This avatar will be displayed in each user's comment. To add an avatar to each user, we will need to update our UserComment model.
app/models.py: User Avatar
from hashlib import md5


class UserComment(db.Model):
    # ...
    def avatar(self, size):
        digest = md5(self.email.lower().encode('utf-8')).hexdigest()
        return f'https://www.gravatar.com/avatar/{digest}?d=identicon&s={size}'
Here, I am making use of the gravatar service to generate an avatar for each user using the avatar() function. This function takes two arguments:
self: The current user object.size: The size of the avatar.
To request an avatar for a user, a URL of the format https://www.gravatar.com/avatar/<hash> is used, where hash is the MD5 hash of a user's email address. To generate the MD5 hash, we first convert the email address to lowercase and then encode it using the utf-8 encoding before passing it to the hash function. You can learn more from the gravatar documentation.
We then need to update our table to ensure that a user's avatar is displayed alongside their comments.
{% for user in users %}
    <table class="table table-striped">
        <tr valign="top">
            <td><img src="{{ user.avatar(36) }}"></td>
            <td>{{ user.username }} says:<br>{{ user.content }}</td>
        </tr>
    </table>
{% endfor %}
![]()
Create An Admin User
It is the admin of the website who will have the ability to delete comments. Just as we created the anonymous user, we will create an admin user. But before we do that, I would like to ensure that the admin page is inaccessible to the anonymous user. To do so, I will implement another feature in the application which will allow us to manage user sessions.
Admin Model
We want to collect an admin's username, email address, and password while they create their accounts. Our model will define these columns and store the relevant data in the database.
app/models.py: Admin model
# ...
from werkzeug.security import generate_password_hash, check_password_hash


class Admin(db.Model):
    id = db.Column(db.Integer, primary_key=True)
    username = db.Column(db.String(64), index=True)
    email = db.Column(db.String(120), index=True)
    password_hash = db.Column(db.String(128))

    def __repr__(self):
        return f'Admin: {self.username}'

    def set_password(self, password):
        self.password_hash = generate_password_hash(password)

    def check_password(self, password):
        return check_password_hash(self.password_hash, password)
If there is anything that is not clear, please take some time to understand the code above. What I will point out here is the password_hash field. It is advised to NEVER store a user's password in the database. Instead, store a representation of it in the form of a hash. This is because a user's password is a sensitive piece of information and we do not want to expose our users to an attacker if the database is compromised.
I am using the generate_password_hash to generate a hash of the user's password. This function takes a password as an argument and returns a hash of the password. The check_password_hash function is used to check whether a user's password is correct. This function takes a hash and a password as arguments and returns a boolean value.
Create an admin migration script and apply these changes to our database.
(comment_moderation) $ flask db migrate -m 'admin table'
(comment_moderation) $ flask db upgrade
Admin Registration
We can now update our Admin model by registering a new admin. We will begin by creating an admin registration form.
app/forms.py: Admin Registration Form
from flask_wtf import FlaskForm
from wtforms import StringField, PasswordField, SubmitField
from wtforms.validators import DataRequired, Email


class AdminRegistrationForm(FlaskForm):
    username = StringField('Username', validators=[DataRequired()])
    email = StringField('Email', validators=[DataRequired(), Email()])
    password = PasswordField('Password', validators=[DataRequired()])
    confirm_password = PasswordField('Confirm Password', validators=[DataRequired()])
    submit = SubmitField('Register')
With the form created, we will now create a view function that will handle the registration of an admin user.
app/routes.py: Admin Registration
# ...

@app.route('register', methods=['GET', 'POST'])
def register():
    form = AdminRegistrationForm()
    if form.validate_on_submit():
        user = Admin(
            username=form.username.data, email=form.email.data)
        user.set_password(form.password.data)
        db.session.add(user)
        db.session.commit()
        flash('Congratulations, you are now a registered user! Login to continue.')
        return redirect(url_for('login'))
    return render_template('register.html', title='Register', form=form)
Let us create the template that will be used to display the registration form. First, we will create an empty file in the templates sub-directory.
(comment_moderation) $ touch app/templates/register.html
We will quickly display our form in the template with the help of flask-wtf.
app/templates/register.html: Display dmin Registration Form
{% extends 'base.html' %}
{% import 'bootstrap/wtf.html' as wtf %}

{% block app_context %}
    <div class="row">
        <div class="col-md-12">
            <h1>Register as Admin</h1>
        </div>
    </div>
    <div class="row">
        <div class="col-md-6">
            {{ wtf.quick_form(form) }}
        </div>
    </div>
{% endblock %}
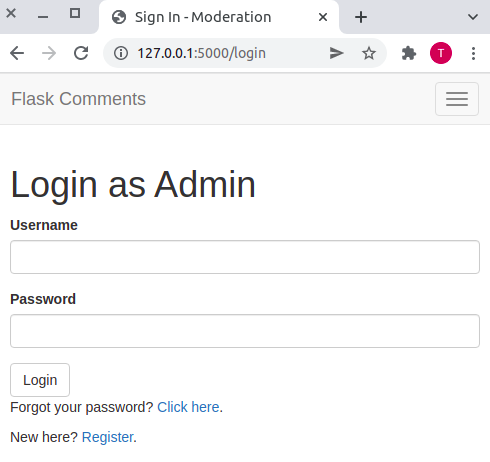
Navigate to http://127.0.0.1:5000/register to see the registration form.

Admin Login
Once the admin has been registered, he should be able to log in to access their account. This means we need to create a login form and a view function that will handle the login of an admin.
Flask provides the flask-login package which we will use to help us manage our user sessions. We will begin by first installing it in our virtual environment.
(comment_moderation) $ pip3 install flask-login
Like other extensions, we will initialize it in the application instance.
app/__init__.py: Initialize Flask-Login
# ...
from flask_login import LoginManager

# ...

login = LoginManager()
This extension will work with the Admin model, and therefore, expects certain properties and methods to be defined. There are four required items:
is_authenticated: This method returns a boolean value indicating whether the user is authenticated or not.is_active: This method returns a boolean value indicating whether the user is active or not.is_anonymous: This method returns a boolean value indicating whether the user is anonymous or not.get_id: This method returns the user's unique identifier.
Flask-login provides a mixin class called UserMixin. It will afford us the ability to use generic implementations that are appropriate for our Admin model.
app/models.py: Admin model
# ...

class Admin(UserMixin, db.Model):
    # ...
Because Flask-login literally knows nothing about databases, it will need the application's help to load the admin. We will use a user loader function to load the admin by their ID.
app/models.py: User Loader
from app import login

@login.user_loader
def load_user(id):
    return Admin.query.get(int(id))
With the Admin model fully prepared to handle user sessions, we will now create the login form.
app/forms.py: Admin Login Form
# ...
from wtforms import StringField, SubmitField, PasswordField, BooleanField

class AdminLoginForm(FlaskForm):
    username = StringField('Username', validators=[DataRequired()])
    password = PasswordField('Password', validators=[DataRequired()])
    remember_me = BooleanField('Remember Me')
    submit = SubmitField('Login')
The template that will be used to display the login form will be login.html. Let us create it and add the code below.
(comment_moderation) $ touch app/templates/login.html # create empty login.html
app/templates/login.html: Display Admin Login Form
{% extends 'base.html' %}
{% import 'bootstrap/wtf.html' as wtf %}

{% block app_context %}
    <div class="row">
        <div class="col-md-12">
            <h1>Login as Admin</h1>
        </div>
    </div>
    <div class="row">
        <div class="col-md-6">
            {{ wtf.quick_form(form) }}
            <p>
                Forgot your password? <a href="#">Click here</a>.
            </p>
            <p>
                New here? <a href="{{ url_for('register') }}">Register</a>.
            </p>
        </div>
    </div>
{% endblock %}
Finally, we will create the view function which will handle the login of an admin.
app/routes.py: Admin Login
from flask_login import login_user, current_user, logout_user


@app.route('/login', methods=['GET', 'POST'])
def login():
    if current_user.is_authenticated:
        return redirect(url_for('index'))
    form = AdminLoginForm()
    if form.validate_on_submit():
        user = Admin.query.filter_by(username=form.username.data).first()
        if user is None or not user.check_password(form.password.data):
            flash('Invalid username or password')
            return redirect(url_for('login'))
        login_user(user, remember=form.remember_me.data)
        return redirect(url_for('index'))
    return render_template('login.html', title='Sign In', form=form)
To make it easier for an admin to log in to their account, we will display a link in the navigation bar. If you noticed, the login page also contains a link to the registration page. So, there is no need to add a registration link beyond that. I have left out the forgot password link because it is beyond the scope of this tutorial. However, you can take it up as a challenge and learn how you can implement it in the application.
app/templates/base.html: Add a login link
{% block navbar %}
<nav class="navbar navbar-default">
    <div class="container">
        <div class="navbar-header">
            <button type="button" class="navbar-toggle collapsed" data-toggle="collapse" data-target="#bs-example-navbar-collapse-1" aria-expanded="false">
                <span class="sr-only">Toggle navigation</span>
                <span class="icon-bar"></span>
                <span class="icon-bar"></span>
                <span class="icon-bar"></span>
            </button>
            <a class="navbar-brand" href=" {{ url_for('index') }} ">Flask Comments</a>
        </div>
        <div class="collapse navbar-collapse" id="bs-example-navbar-collapse-1">
            <ul class="nav navbar-nav navbar-right">
                <li><a href=" {{ url_for('login') }} ">Admin</a></li>
            </ul>
        </div>
    </div>
</nav>
{% endblock %}
Now, if you click on the Admin link in the navigation bar, you will be redirected to the login page.
Admin Logout
As an admin, you would want to protect your account by ensuring you log out once you are done moderating user comments. The logout_user() method from flask_login handles this.
app/routes.py: Admin Logout
# ...

@app.route('/logout')
def logout():
    logout_user()
    return redirect(url_for('login'))
We will create a condition in our base template to display the logout link only if the user is logged in.
app/templates/base.html: Display the logout link
{% block navbar %}
<nav class="navbar navbar-default">
    <div class="container">
        <div class="navbar-header">
            <button type="button" class="navbar-toggle collapsed" data-toggle="collapse" data-target="#bs-example-navbar-collapse-1" aria-expanded="false">
                <span class="sr-only">Toggle navigation</span>
                <span class="icon-bar"></span>
                <span class="icon-bar"></span>
                <span class="icon-bar"></span>
            </button>
            <a class="navbar-brand" href=" {{ url_for('index') }} ">Flask Comments</a>
        </div>
        <div class="collapse navbar-collapse" id="bs-example-navbar-collapse-1">
            <ul class="nav navbar-nav navbar-right">
                {% if current_user.is_authenticated %}
                    <li><a href=" {{ url_for('admin_dashboard') }} ">Admin</a></li>
                    <li><a href=" {{ url_for('logout') }} ">Logout</a></li>
                {% else %}
                    <li><a href=" {{ url_for('login') }} ">Login</a></li>
                {% endif %}
            </ul>
        </div>
    </div>
</nav>
{% endblock %}
I have added the admin link to the navigation bar. This link will redirect an admin directly to the dashboard. I will discuss it in the next section below.
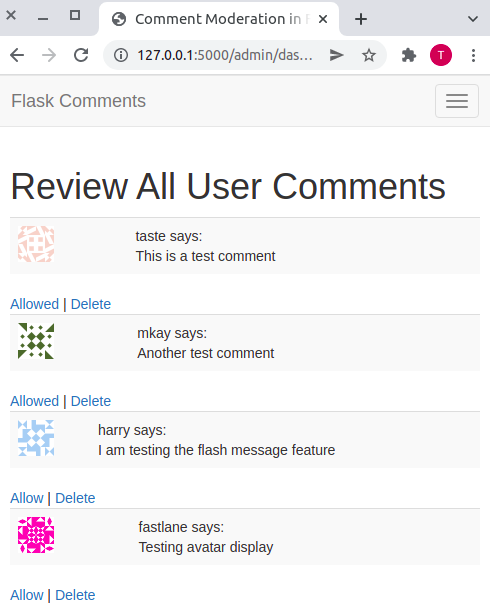
Admin Dashboard
As soon as a new admin has registered, they will access their account by passing in their credentials. If successful, they will be redirected to the admin dashboard. The dashboard will have all the posts made by anonymous users of our application together with two action links to allow or delete each comment.
For now, we will display all the user comments just as they can be seen on the index page.
(comment_moderation) $ touch app/templates/admin_dashboard.html # create empty admin_dashboard template
app/templates/admin_dashboard.html: Display Admin Dashboard
{% extends 'base.html' %}

{% block app_context %}
    <div class="row">
        <div class="col-md-12">
            <h1>Review All User Comments</h1>
        </div>
    </div>
    <div class="row">
        <div class="col-md-6">
            {% for user in users %}
                <table class="table table-striped">
                    <tr valign="top">
                        <td><img src="{{ user.avatar(36) }}"></td>
                        <td>{{ user.username }} says:<br>{{ user.content }}</td>
                    </tr>
                </table>

                <span>
                    <a href="#">Allow</a> | <a href="#">Delete</a>
                </span>
            {% endfor %}
        </div>
    </div>
{% endblock %}
The view function to render the admin dashboard will be admin_dashboard().
app/routes.py: Admin Dashboard
# ...
from flask_login import login_required


@app.route('/admin/dashboard')
@login_required
def admin_dashboard():
    users = UserComment.query.all()
    return render_template('admin/dashboard.html', users=users)
I have added the login_required decorator to protect this page from unauthorized access.

Comment Moderation
We are now ready to implement comment moderation. At the end of this section, our application will only show comments that the admin has approved. To begin, I will add a new field in the UserComment model to store the moderation status of a comment.
app/models.py: Add comment moderation status
# ...

class UserComment(db.Model):
    id = db.Column(db.Integer, primary_key=True)
    username = db.Column(db.String(64), index=True)
    email = db.Column(db.String(120), index=True)
    content = db.Column(db.String(255))
    timestamp = db.Column(db.DateTime, index=True, default=datetime.utcnow)
    allowed_comment = db.Column(db.Boolean, default=False) # < ---- new field

# ...
I have set the default value of the allowed_comment field to False. This will ensure that all comments are initially set to False.
The next step is to add two view functions to allow and delete each comment.
app/routes.py: Allow and Delete Comment
@app.route('/admin/delete/<int:id>')
def admin_delete(id):
    user = UserComment.query.get_or_404(id)
    db.session.delete(user)
    db.session.commit()
    flash(f'Comment {id} deleted!')
    return redirect(url_for('admin_dashboard'))


@app.route('/admin/allow/<int:id>')
def admin_allow(id):
    user = UserComment.query.get_or_404(id)
    user.allowed_comment = True
    db.session.commit()
    flash(f'Comment {id} allowed!')
    return redirect(url_for('admin_dashboard'))
I am identifying each comment by its ID. First, I query the database for the first instance of a comment. Once retrieved the admin_delete() view function will delete the comment. The admin_allow() view function, on the other hand, updates the allowed_comment field to True. This action changes the status of a comment. Approved comments are those whose status is True, and they will be displayed on the index page.
To make it work, let us update the admin's dashboard links to include the links to the admin_delete() and admin_allow() view functions.
app/templates/dashboard.html: Add links to update and delete comments
{% extends 'base.html' %}

{% block app_context %}
    <div class="row">
        <div class="col-md-12">
            <h1>Review All User Comments</h1>
        </div>
    </div>
    <div class="row">
        <div class="col-md-6">
            {% for user in users %}
                <table class="table table-striped">
                    <tr valign="top">
                        <td><img src="{{ user.avatar(36) }}"></td>
                        <td>{{ user.username }} says:<br>{{ user.content }}</td>
                    </tr>
                </table>

                <span>
                    <a href=" {{ url_for('admin_allow', id=user.id) }} ">Allow</a>
                    |
                    <a href=" {{ url_for('admin_delete', id=user.id) }} ">Delete</a>
                </span>
            {% endfor %}
        </div>
    </div>
{% endblock %}
Display Approved Comments
Let us update our index() view function to display only approved comments.
routes.py: Display Approved Comments
# ...

@app.route('/', methods=['GET', 'POST'])
@app.route('/index', methods=['GET', 'POST'])
def index():
    users = UserComment.query.filter_by(allowed_comment=True).all() # < ----- update
    form = CommentForm()
    if form.validate_on_submit():
        user = UserComment(
            username=form.username.data,
            email=form.email.data,
            content=form.comment.data)
        db.session.add(user)
        db.session.commit()
        flash('Your comment has been posted!')
        return redirect(url_for('index'))
    return render_template(
           'index.html', form=form, users=users)
If you navigate to the index page, you will notice that no comments are being displayed. This is because, at this point, all comments have a default value of False for the allowed_comment field. To show comments on this page, you will need to allow them from the admin dashboard.
Notice how only one comment appears on the index page whereas the admin dashboard shows all comments.
Comment Moderation Complete
To ensure that we do not approve a comment twice, I will display an empty link reading allowed.
app/templates/admin_dashboard.html: Show allowed link
<span>
    {% if user.allowed_comment == 1 %}
        <a href=" # ">Allowed</a>
    {% else %}
        <a href=" {{ url_for('admin_allow', id=user.id) }} ">Allow</a>
    {% endif %}
    | <a href=" {{ url_for('admin_delete', id=user.id) }} ">Delete</a>
</span>
I have created a condition that checks if the allowed_comment field is True. If it is, the application will display the Allowed link redirecting to nowhere. If it is not, I will display the Allow link.
Conclusion
That is how you can add comment moderation to your flask application. I hope you enjoyed this tutorial and found it useful. Do you have any projects where you have implemented comment moderation? If so, I will be glad to check it out.
Share
If you enjoyed this article, you can share it with another person.
TweetNewsletter Subcription
Level up your skills.
We take your privacy seriously. Read our privacy policy. Unsubscribe | Resubscribe.Comments (1)

|
#1
Antony Stevenson
said :
|
To the gitauharrison.com owner, Great post!