


Email Verification Using Twilio SendGrid In Flask
When you search for how to send emails in Flask, you will come across a ton of content on how to do so. Below, you will learn how to utilize Twilio SendGrid to send emails from a flask application.
One possible use case for sending emails is when you want to enforce the authenticity of user emails in your application. A user who keys in their email address will be required to prove that they have access to the email by retrieving a token sent to their inbox.
Table of Contents
This article is divided into three major parts. Each part has subsections to help break down the contents further.
If you would like to browse the completed project, you can check out the Email Verification Using Twilio SendGrid And Flask repository on GitHub.
Working With SendGrid
At this point, you should have a SendGrid account. If not, review how to create a free account now. The first step would be to come up with a template for our email. Twilio Verify Service will use this template when emailing verification codes to users.
From the SendGrid dashboard, click on "Email API" located in the sidebar, then select "Dynamic Templates"
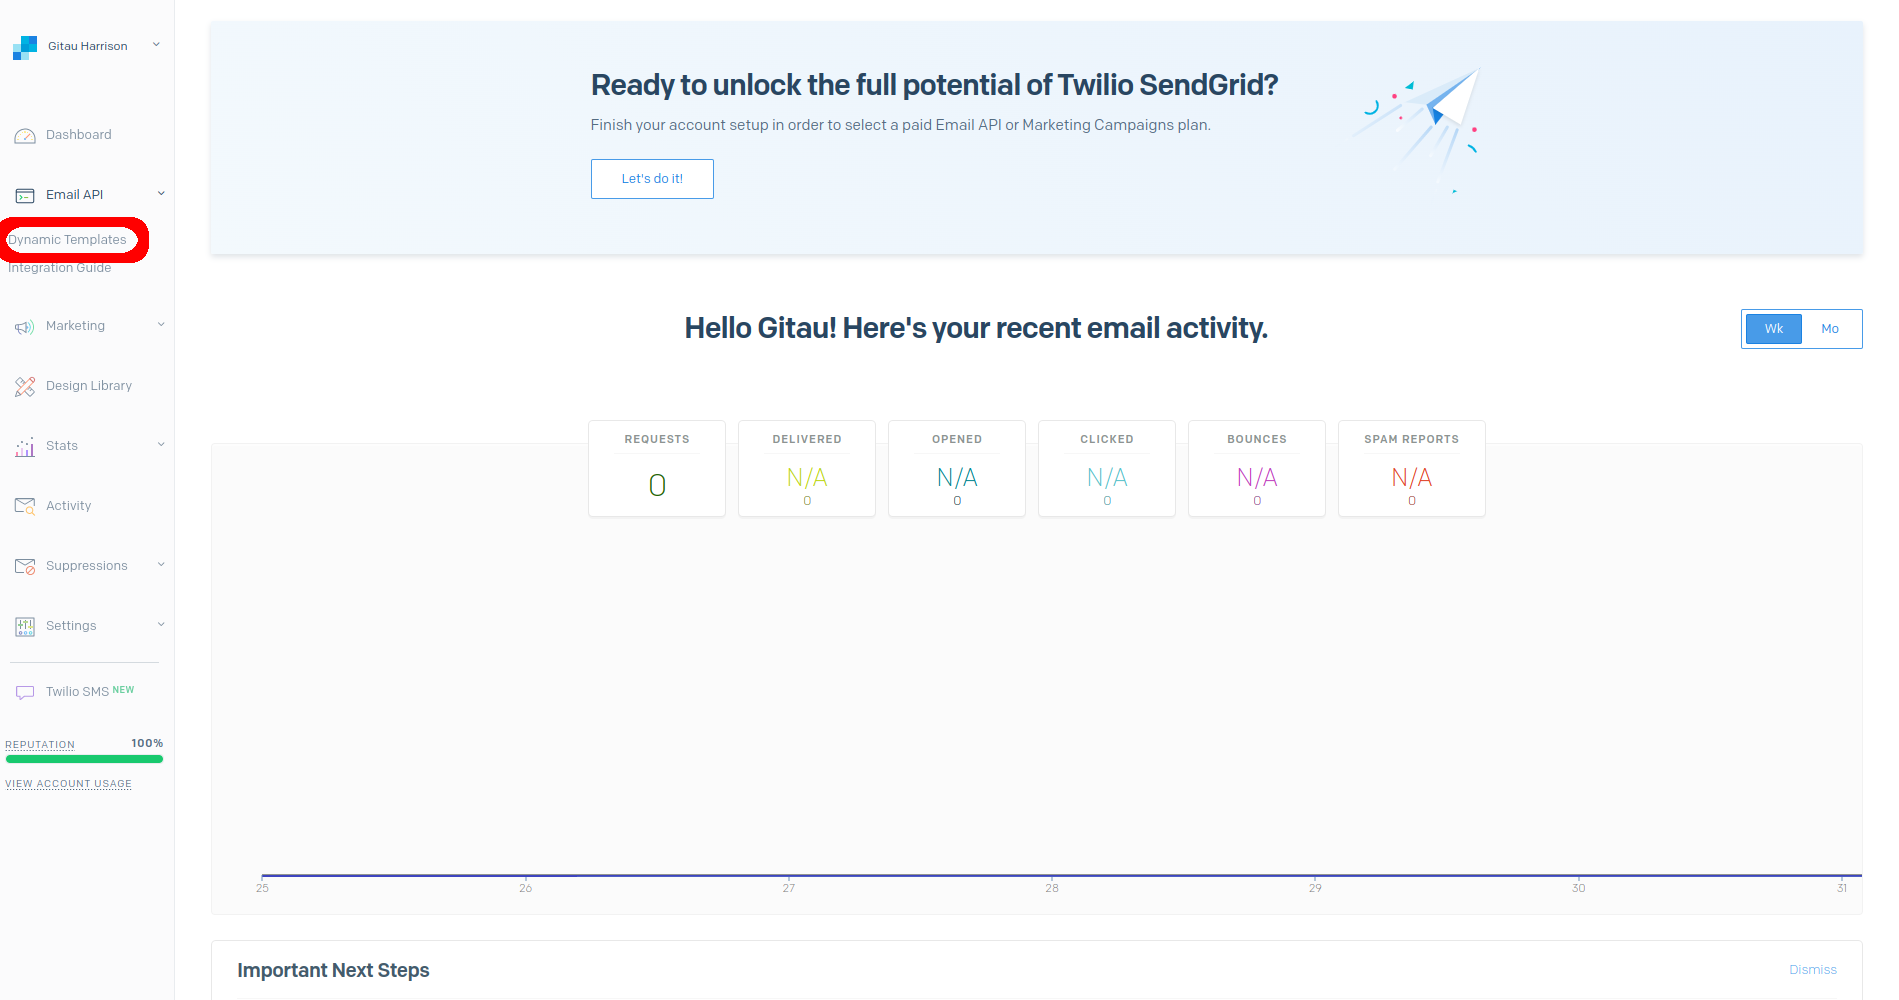
Click on the blue button "Create a Dynamic Template".
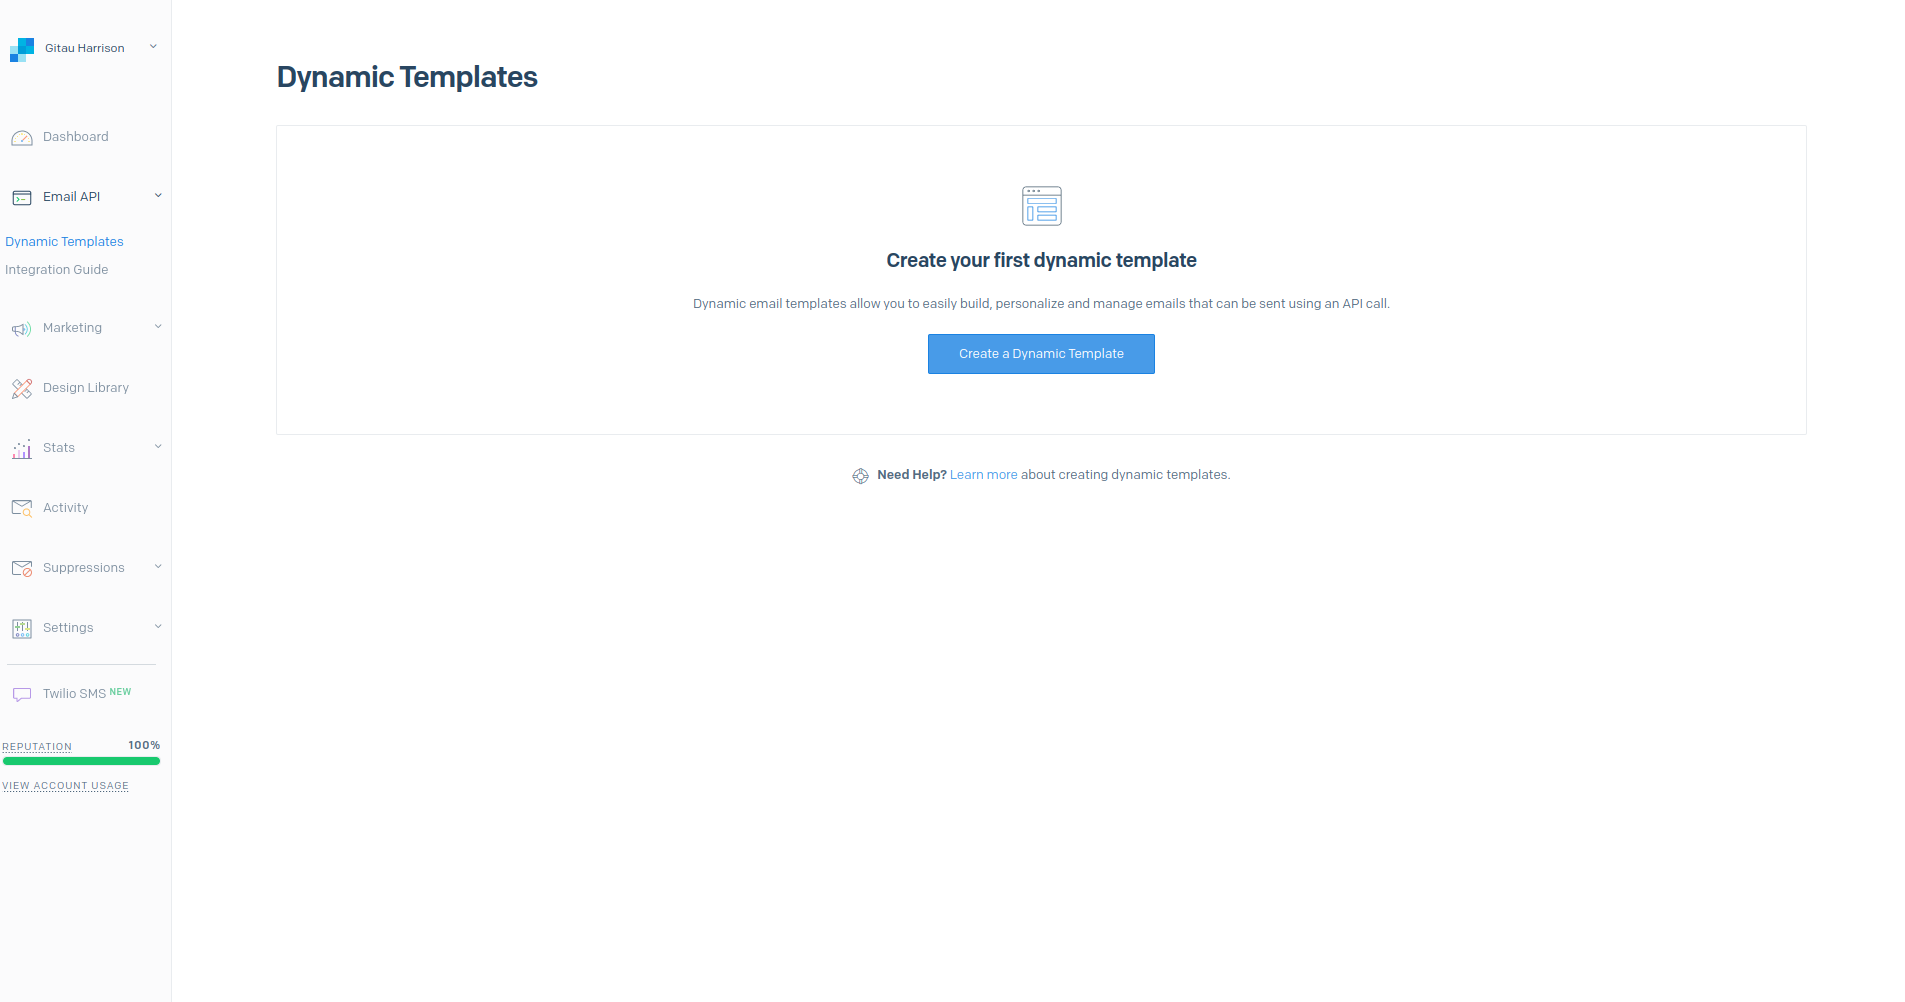
Provide a name for your template. This name will be visible only to you.
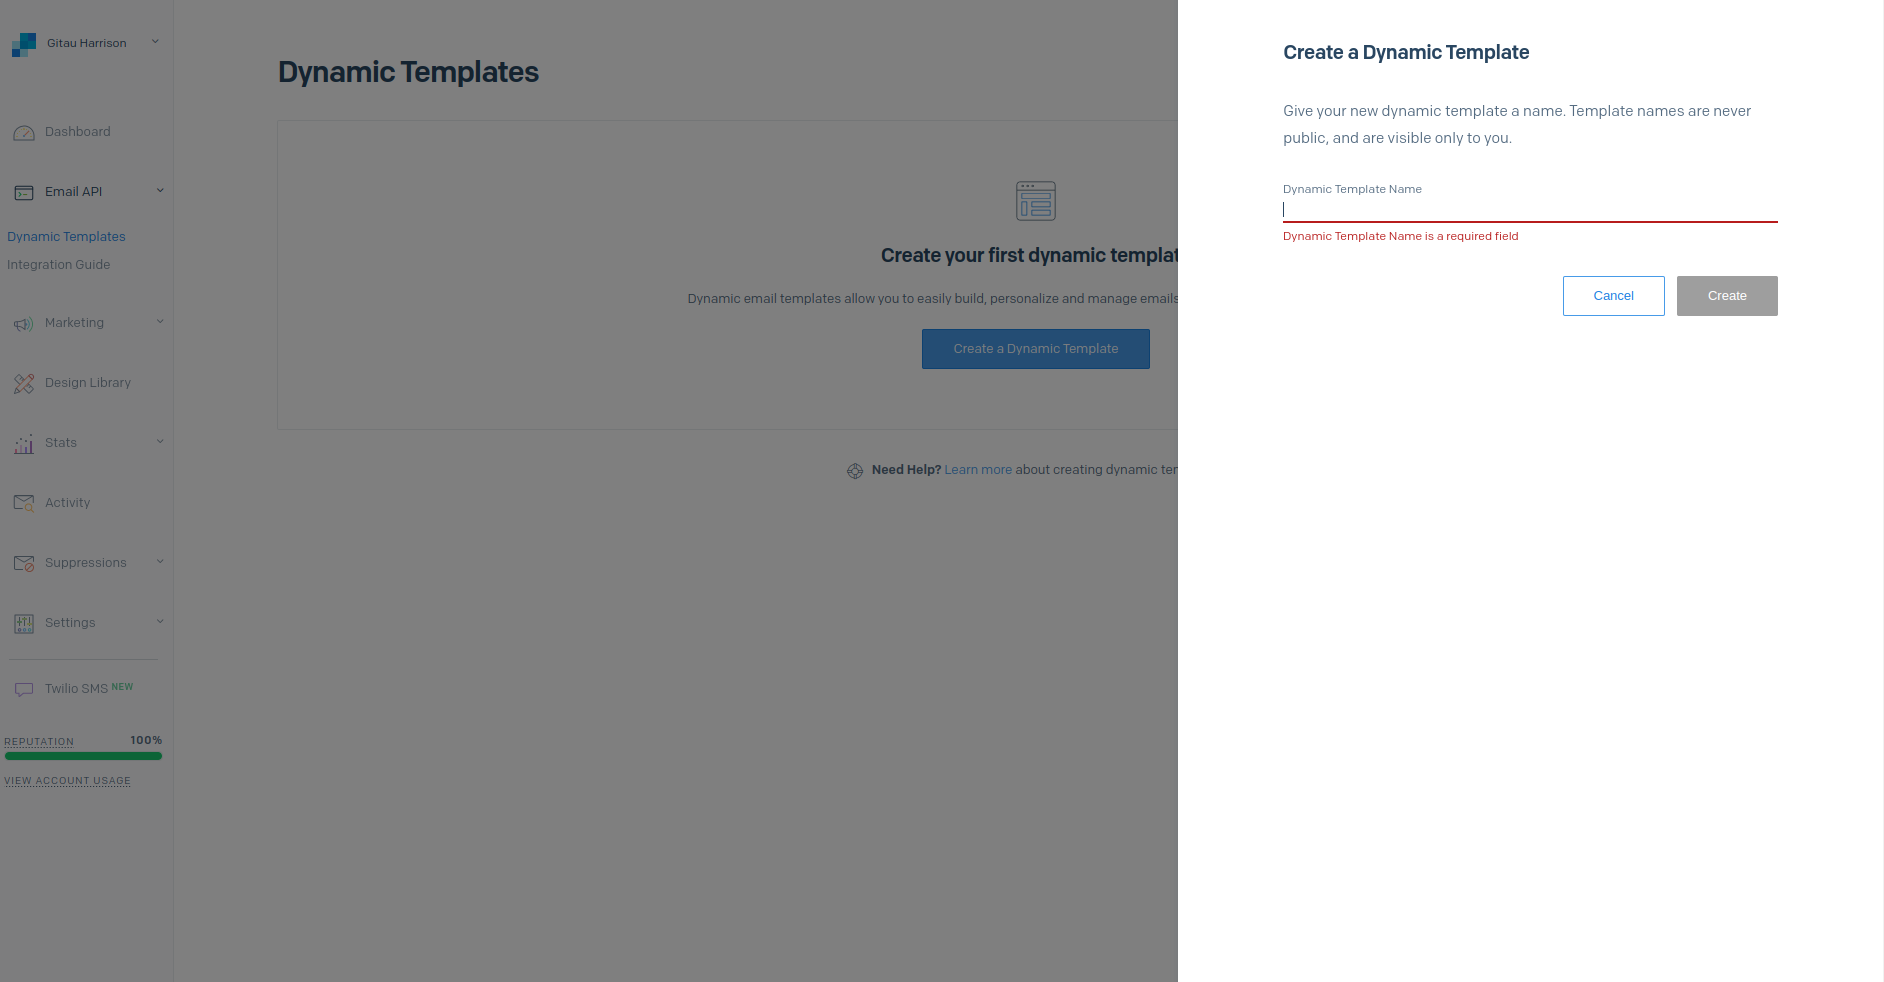
Click on the template name, and you can add a version of it. Feel free to create one for yourself, or use SendGrid's Email Designs.
Add the dynamic
variable anywhere within your template. You can add it within apelement as follows:<p></p>. In my case above, added the variable within the orange button. You will not see any data shown at the moment. If you would like to learn more about available dynamic data that can be used with the templates, please check the docs.
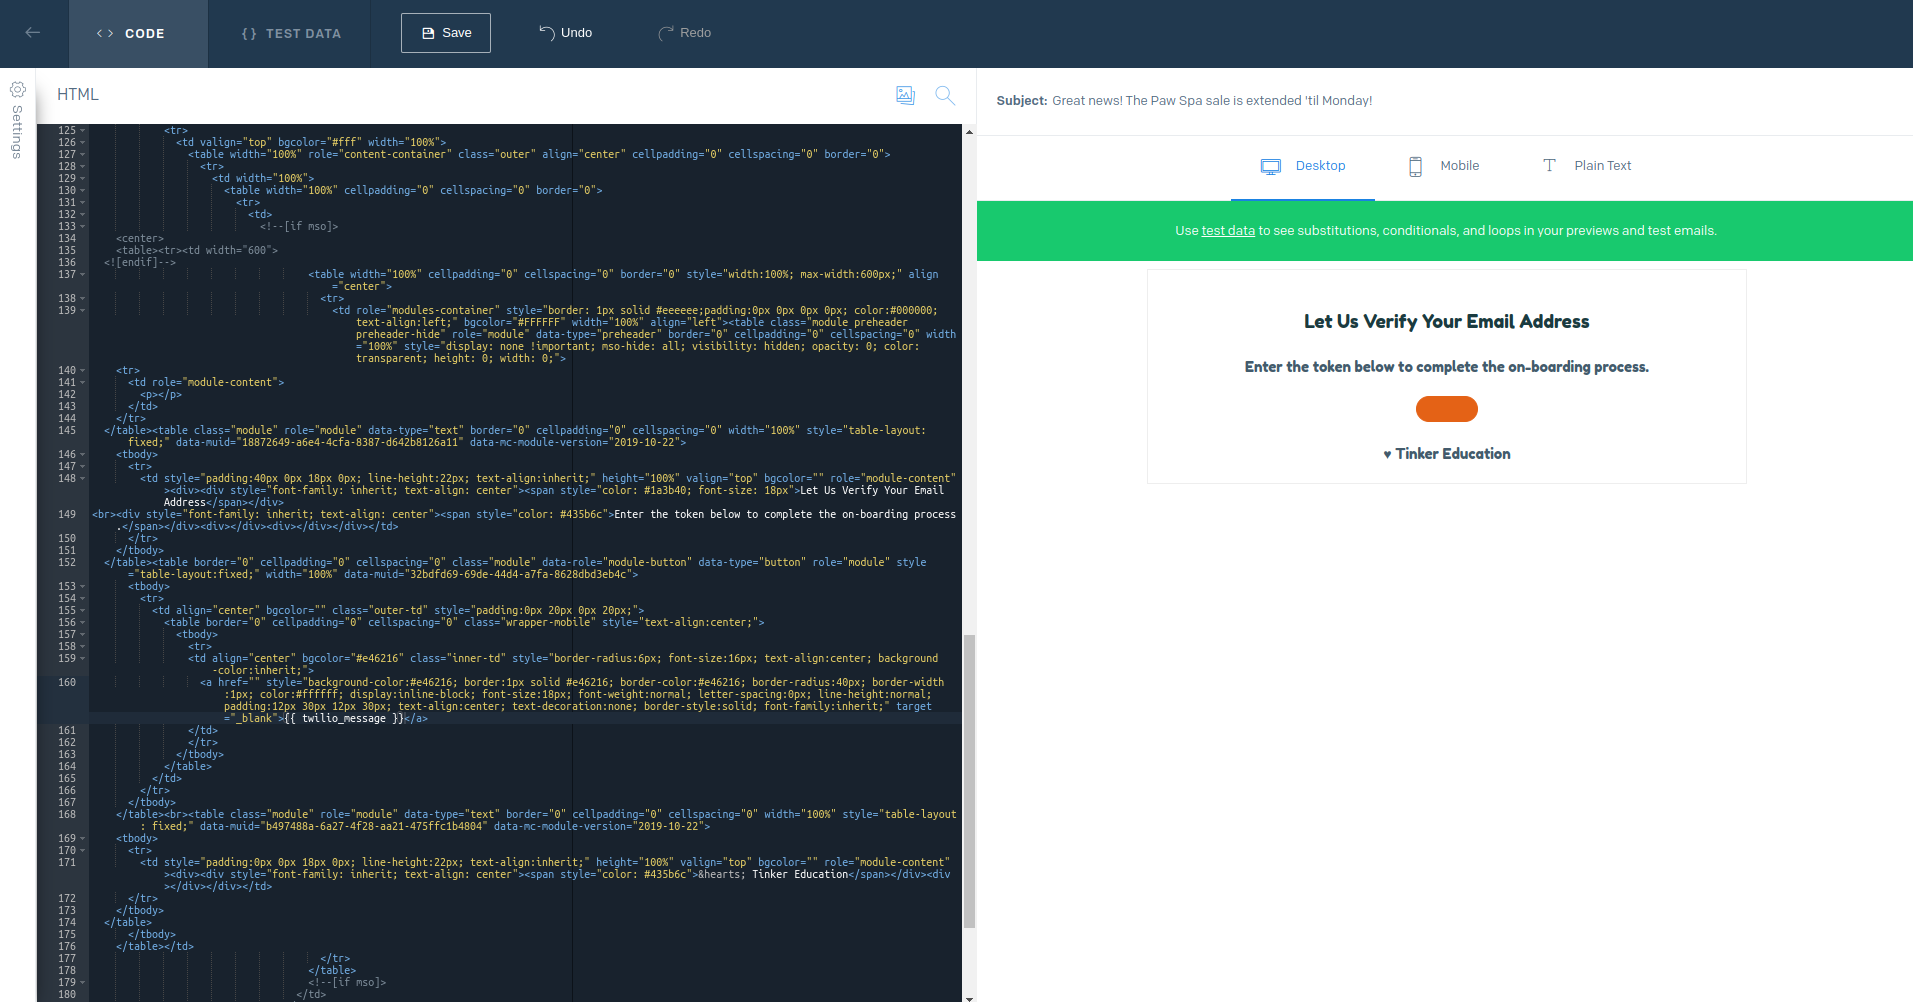
Once happy with the template, click on "Settings" within the HTML editor to provide a version name and a subject.
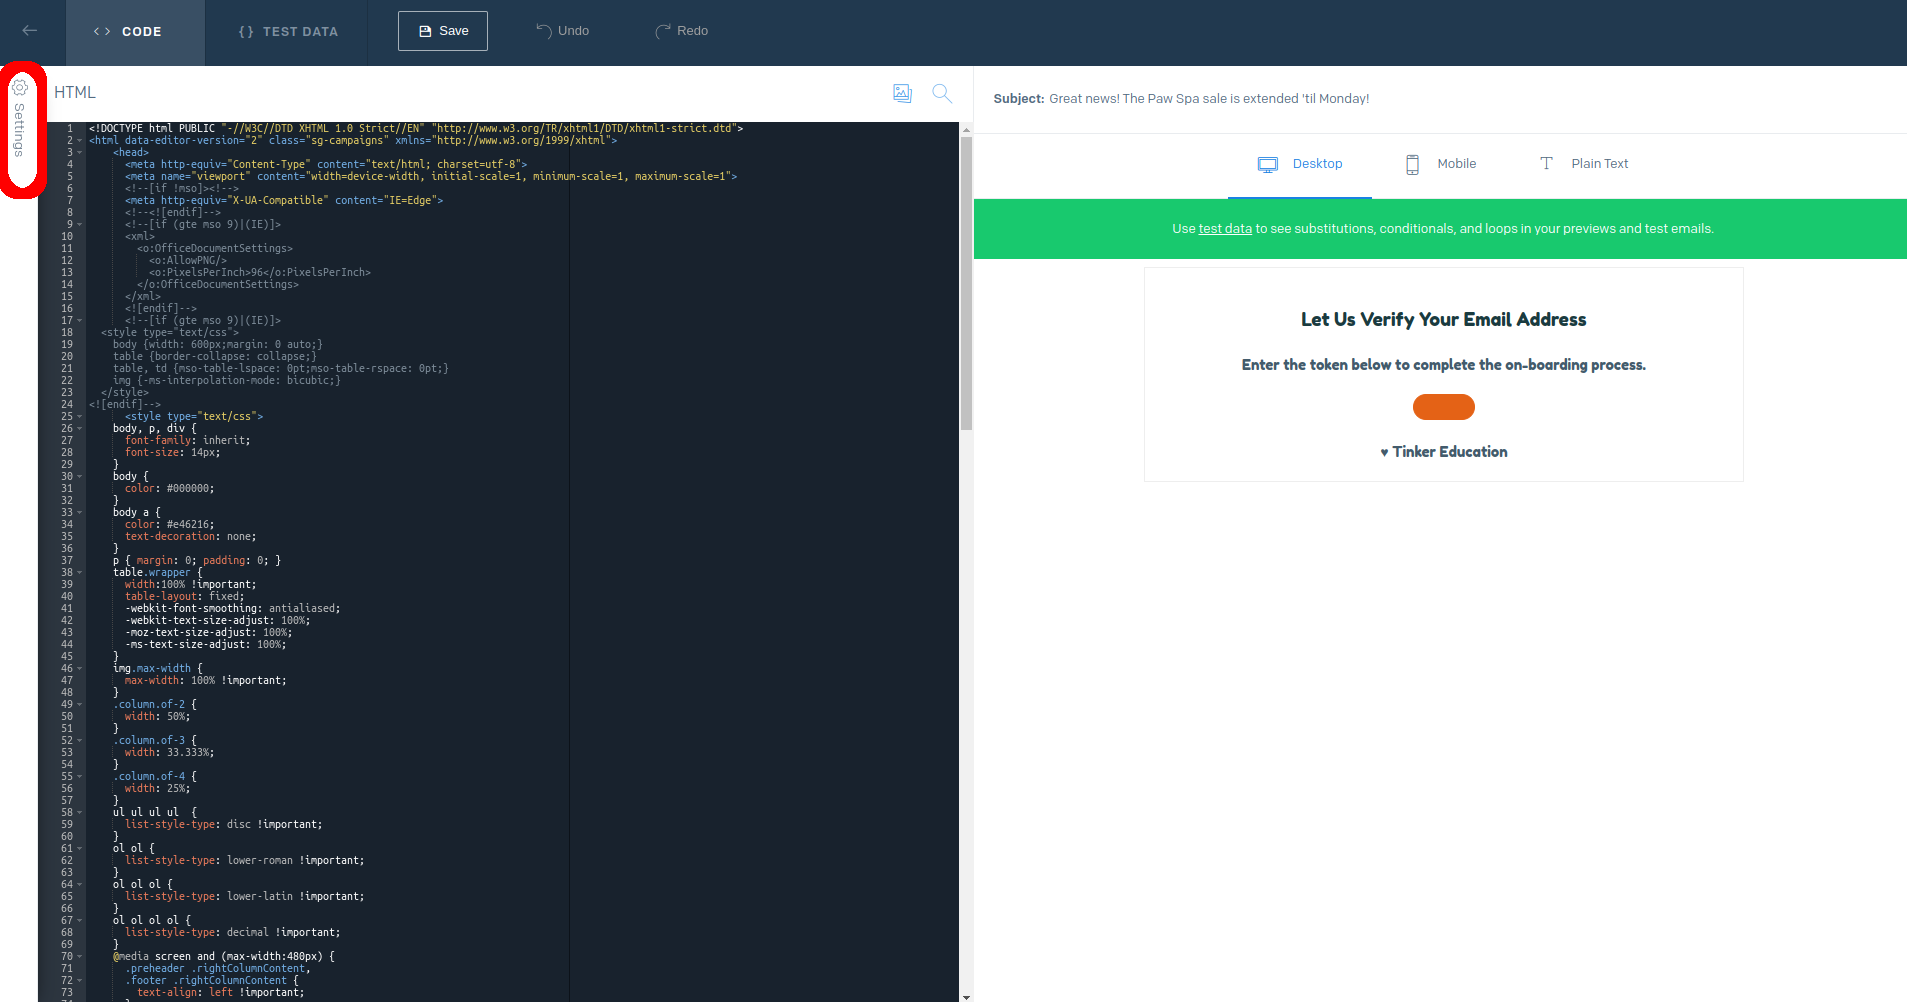
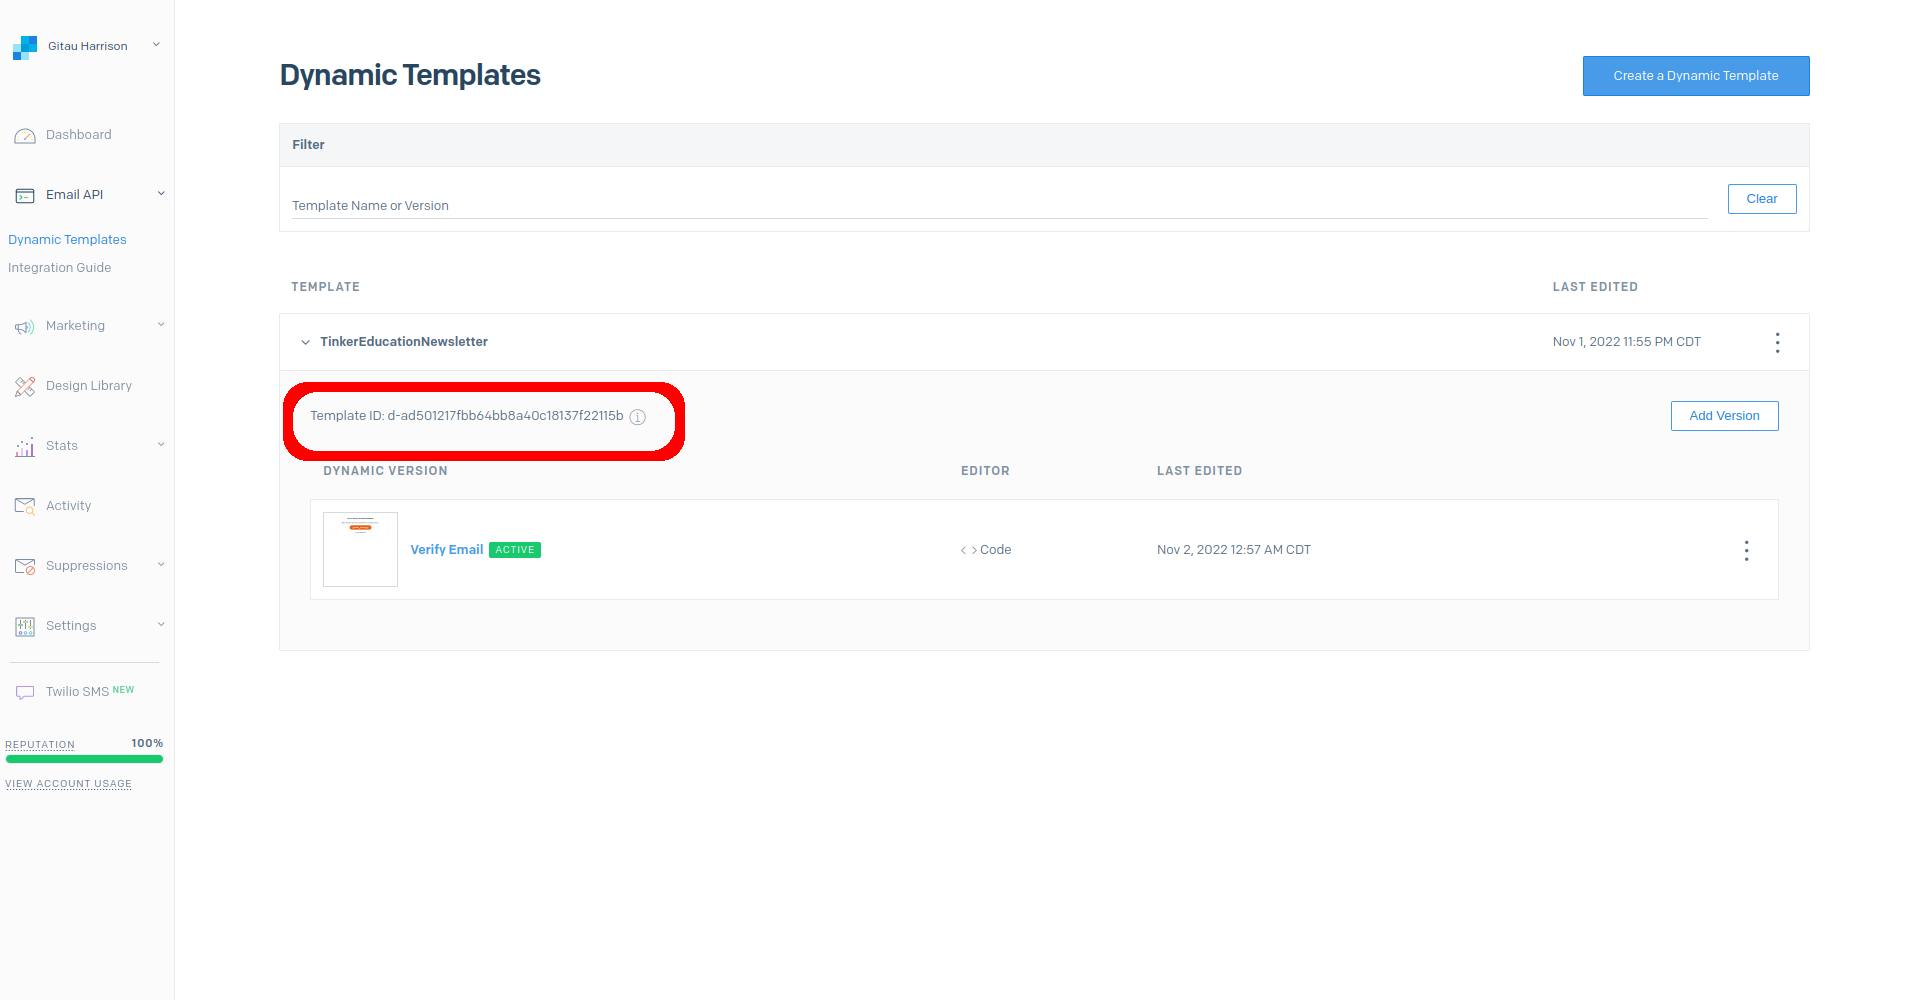
Save your work by clicking on the "Save" button. The new template will have a template ID assigned to it. We will use this ID to configure our Twilio Account.
Creating an API
The second part of our configuration is to create an API key that Twilio can use when sending verification emails to users. In our Sendgrid Dashboard, select "Settings" and then the "API Keys".
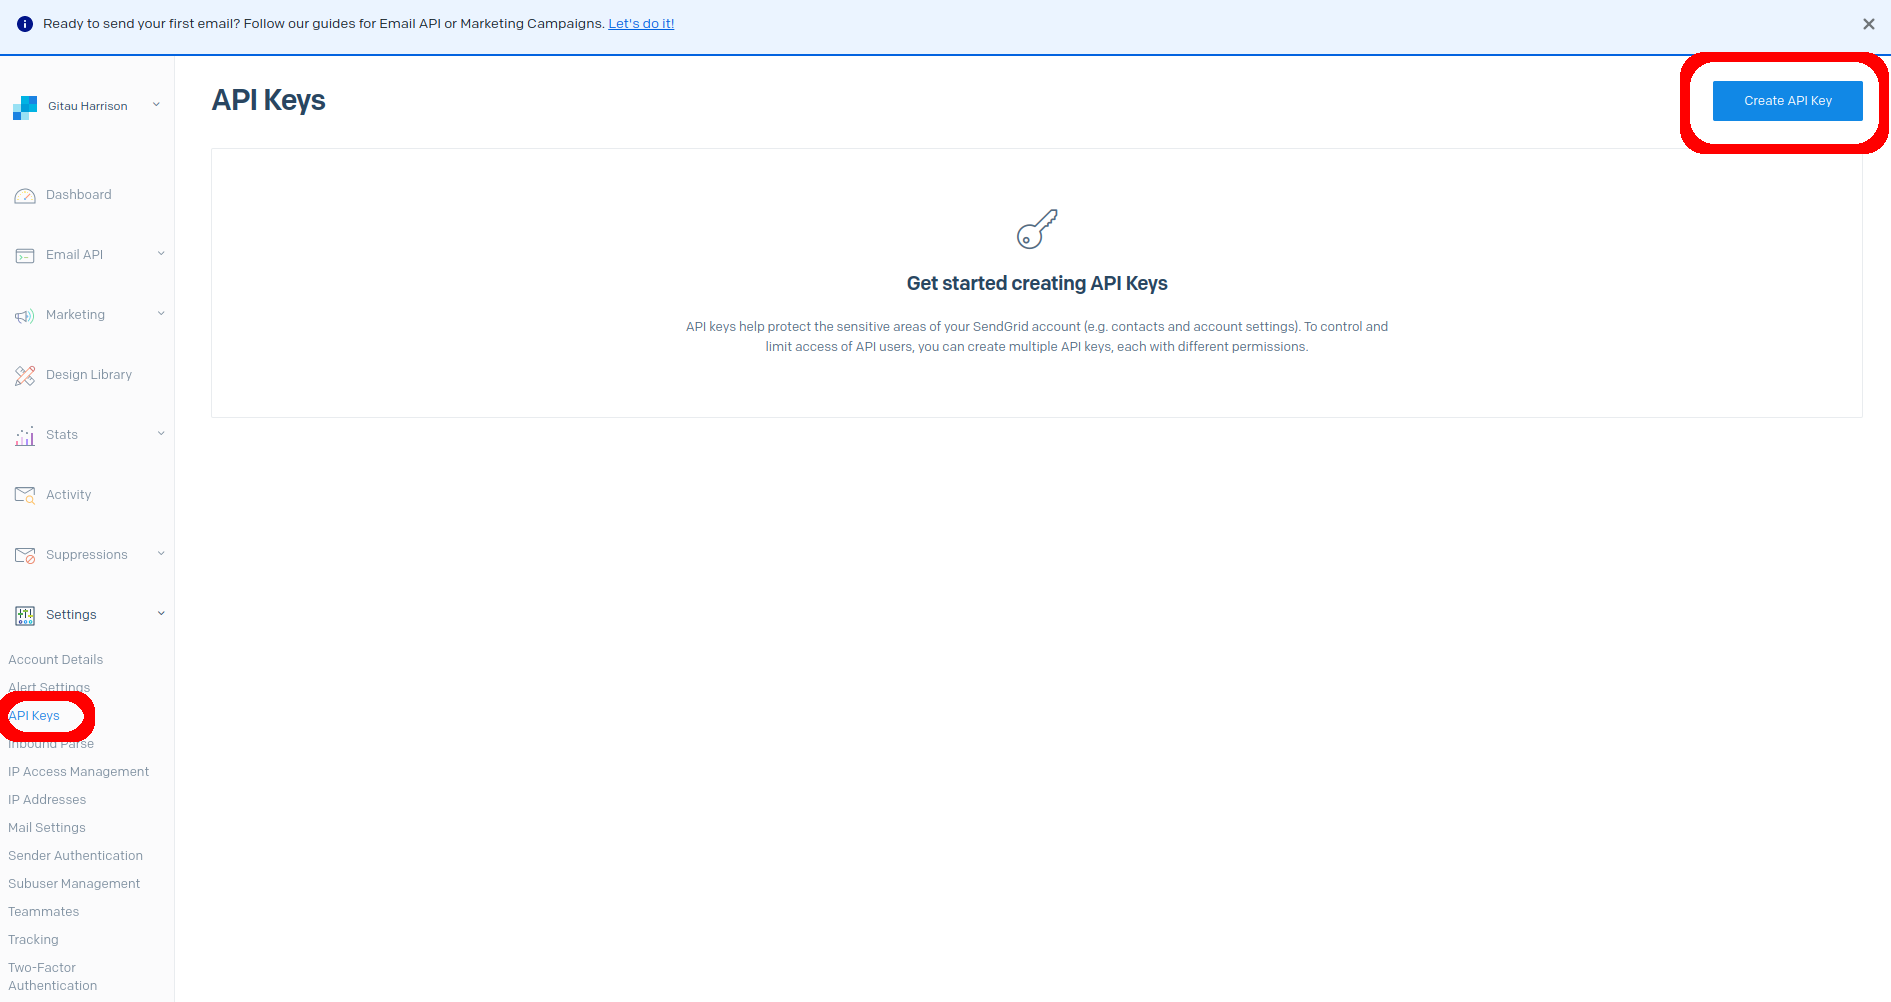
Click on the "Create API Key", then give it a friendly name.
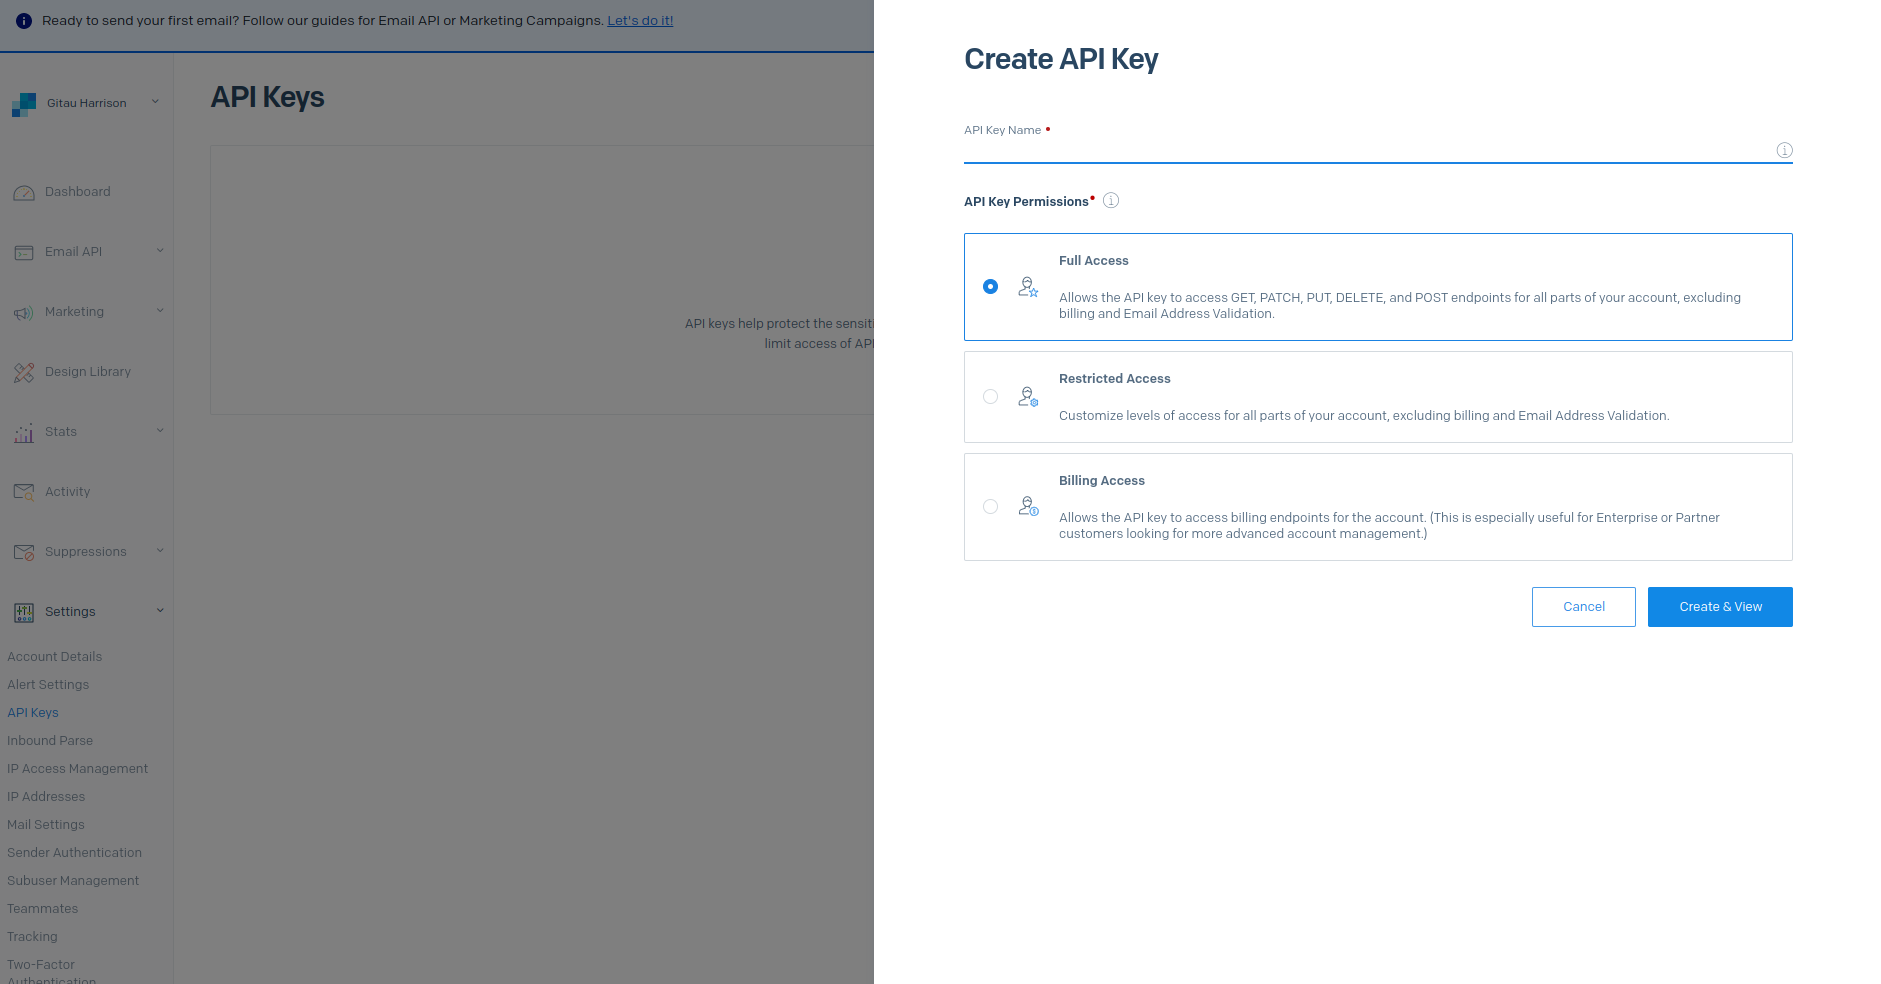
When you click the "Create and View" button, an API key will be created. Make sure to save it somewhere, preferably in your .env file.
Create Email Integration
From now, we will move to our Twilio account to complete the configuration and link it to SendGrid. From the Twilio Console, click on "Verify" Service to access Email Integration found in.
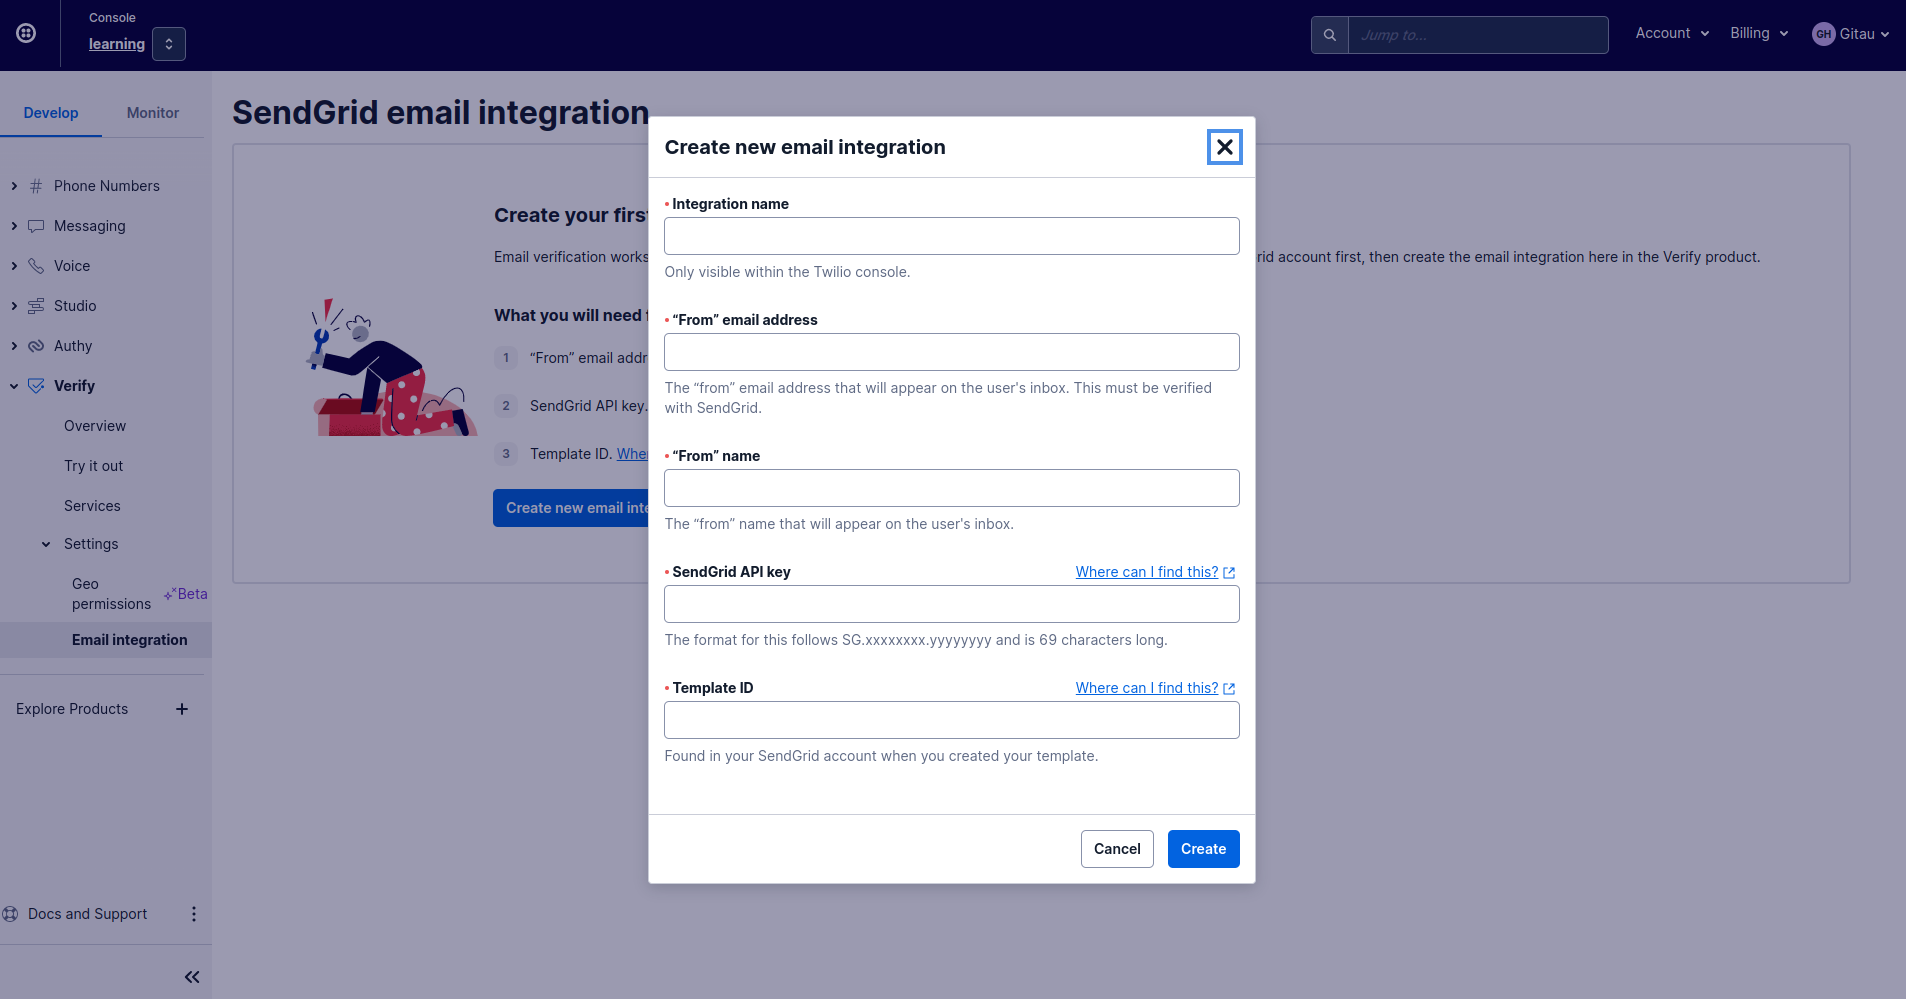
For the SendGrid API key, you will need to retrieve the earlier copy saved in the .env file. The template key is found on your SendGrid Dynamic templates page. Click Save to store the email integration.
Create A Verify Service
Explore Twilio's products catalog to Find "Verify" within the Account Security section. You can pin this to access it easily in the future.
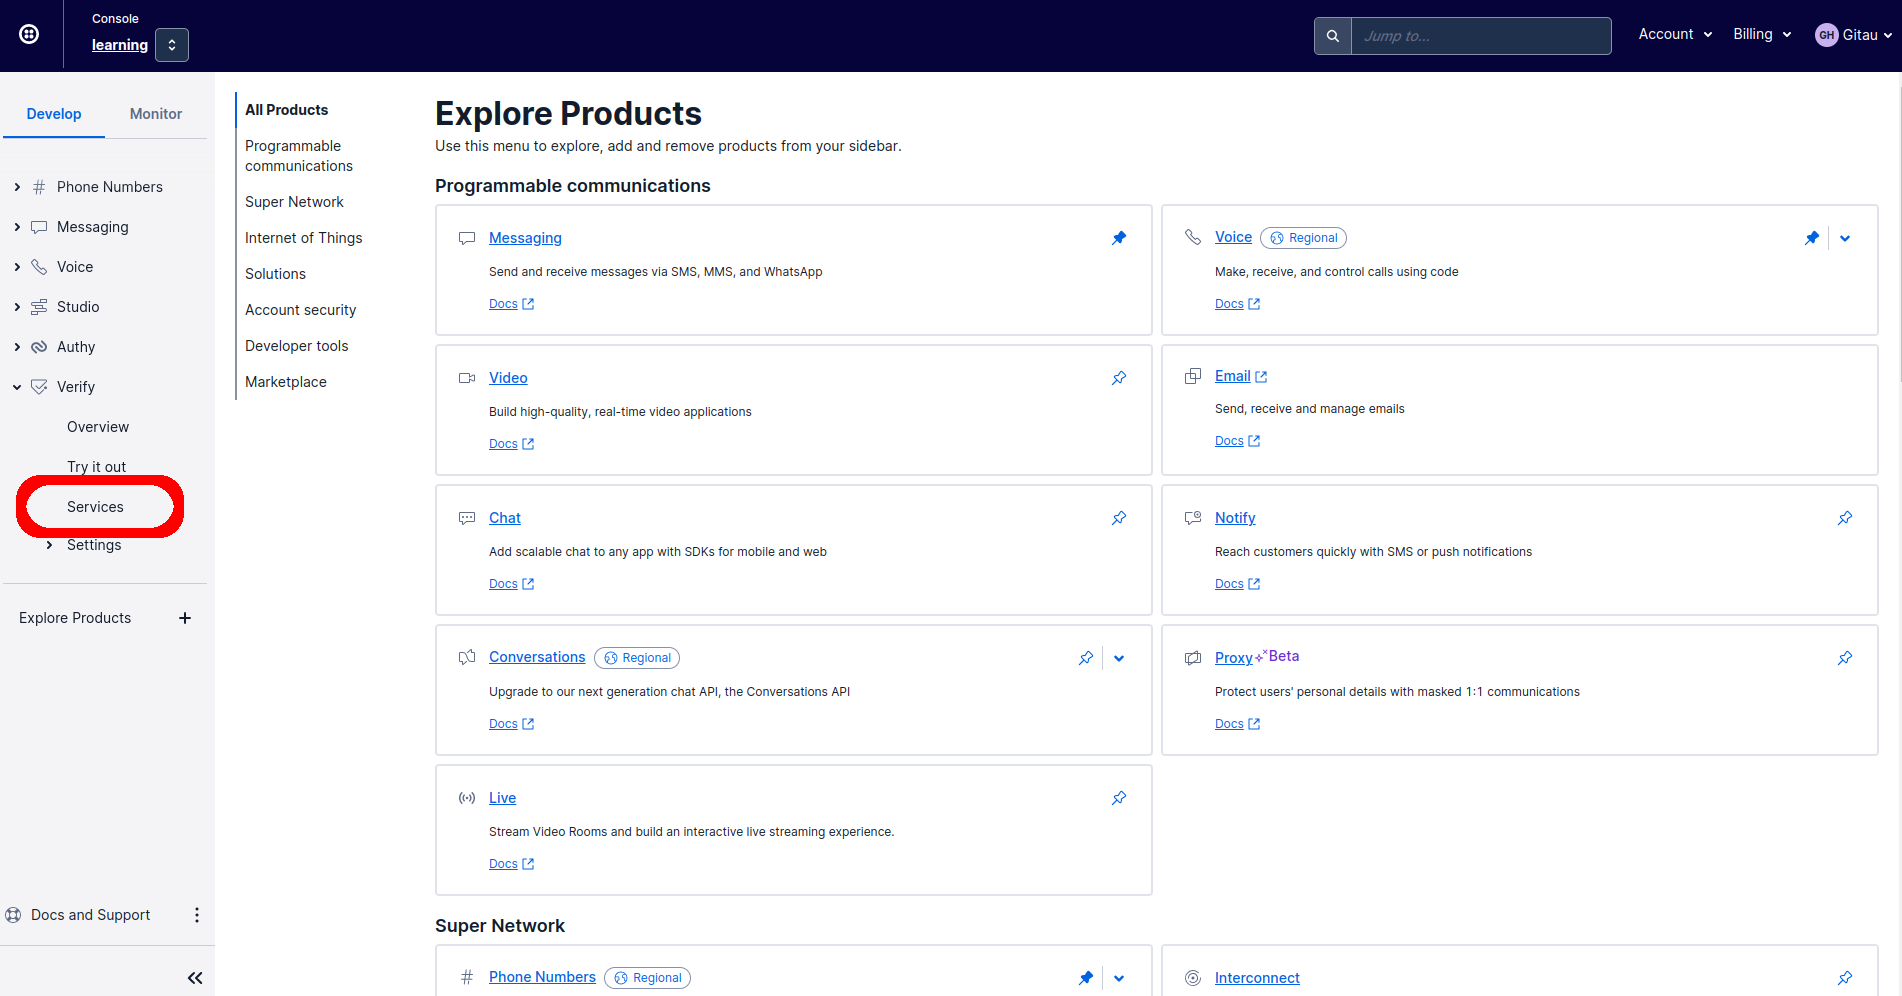
You will be redirected to a page listing all the applications utilizing the Verify service. Of interest is the "Create New" button. Click on it to create a new service.
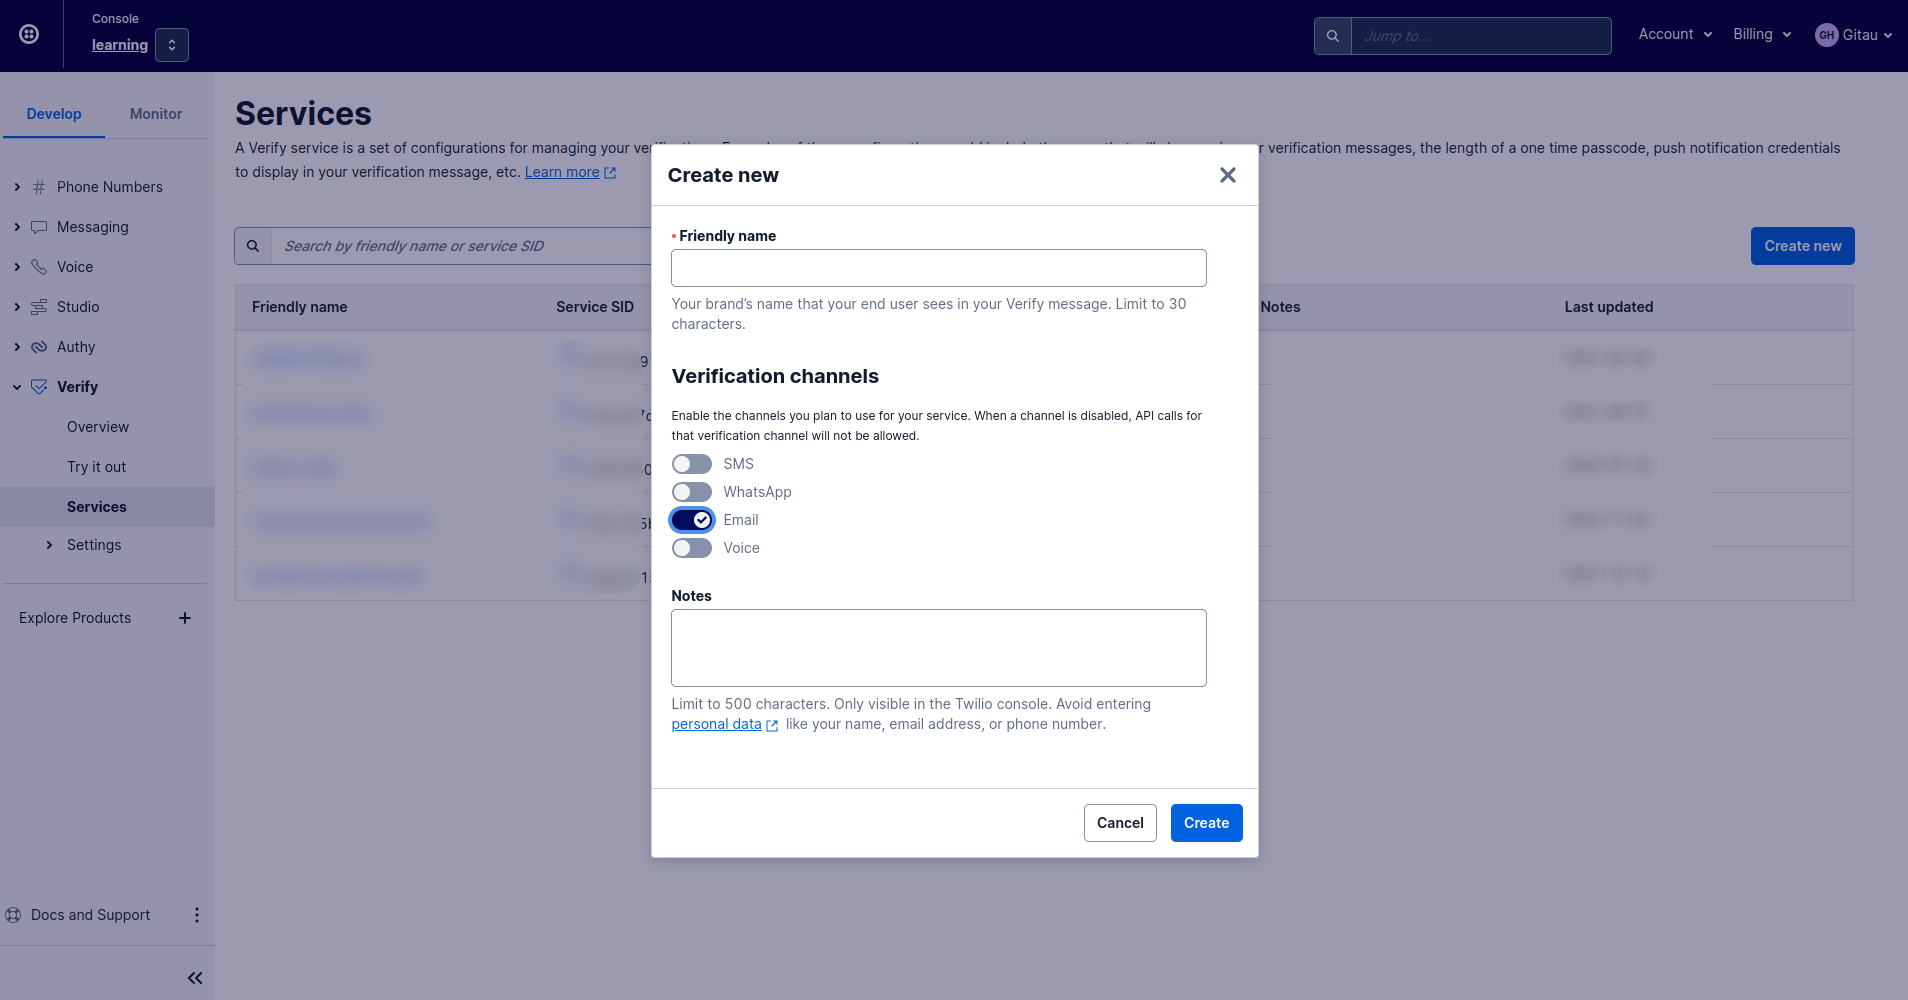
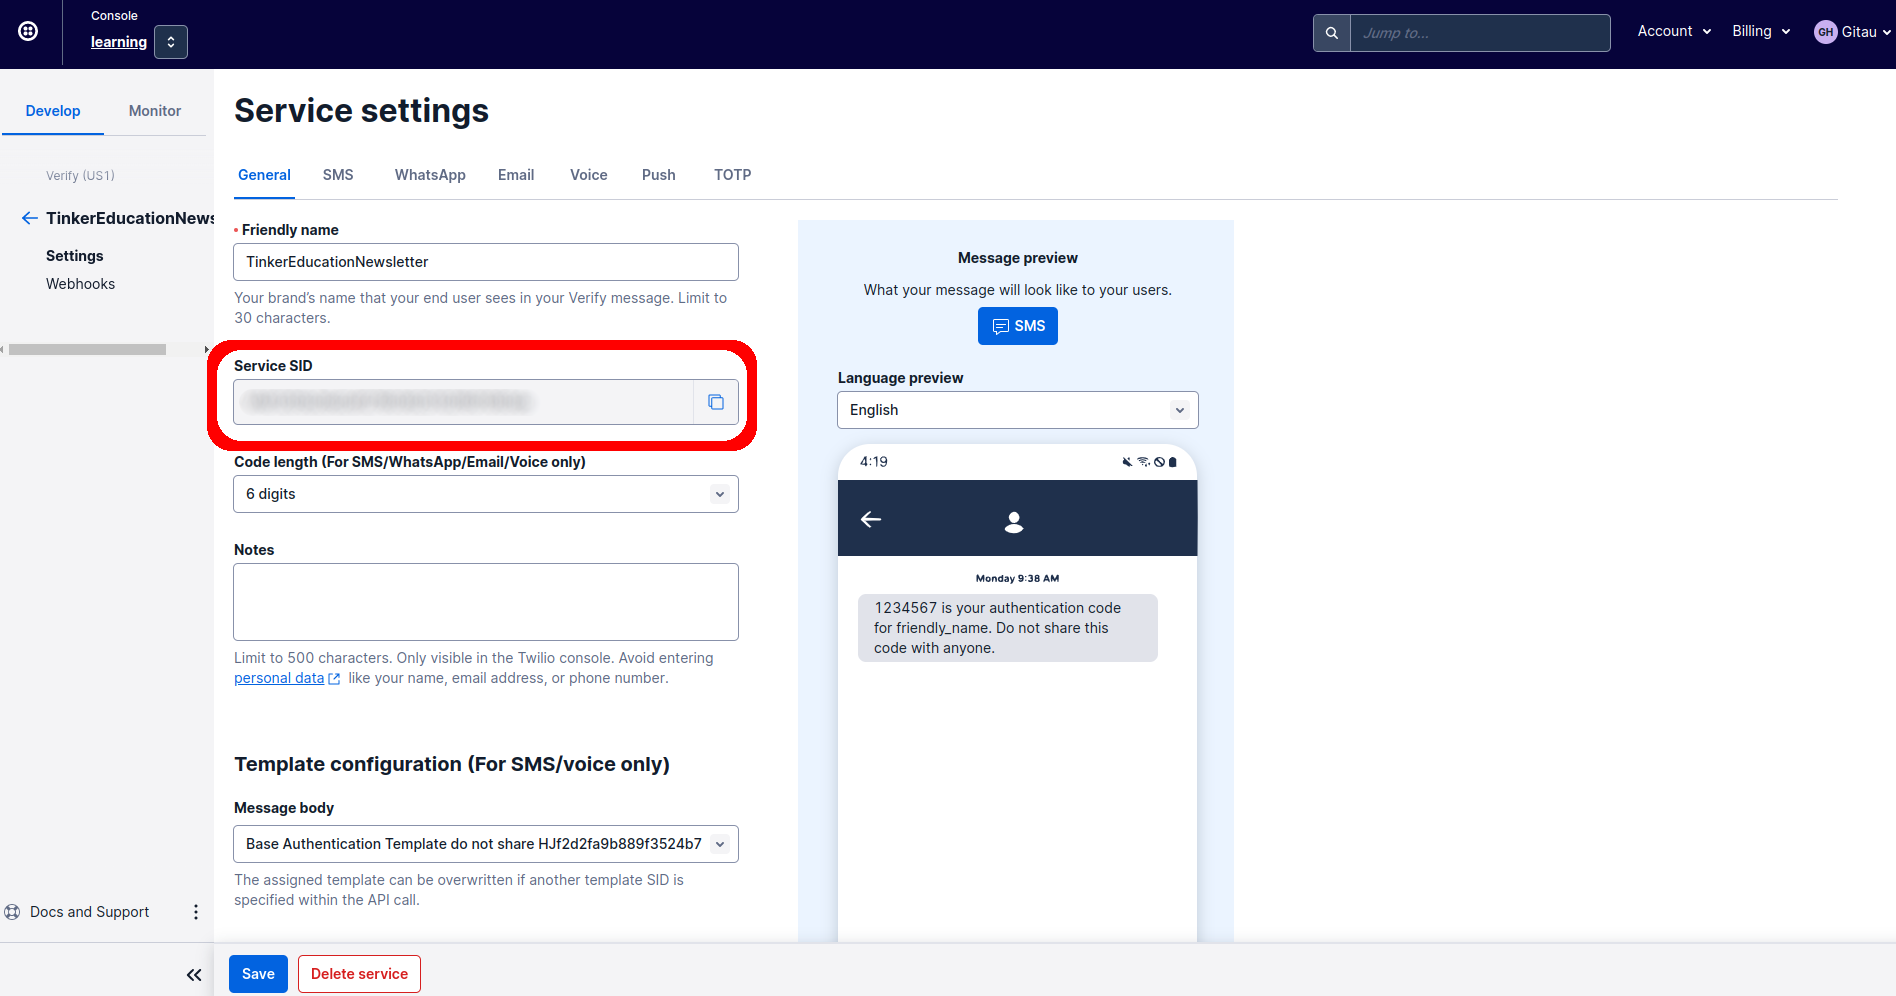
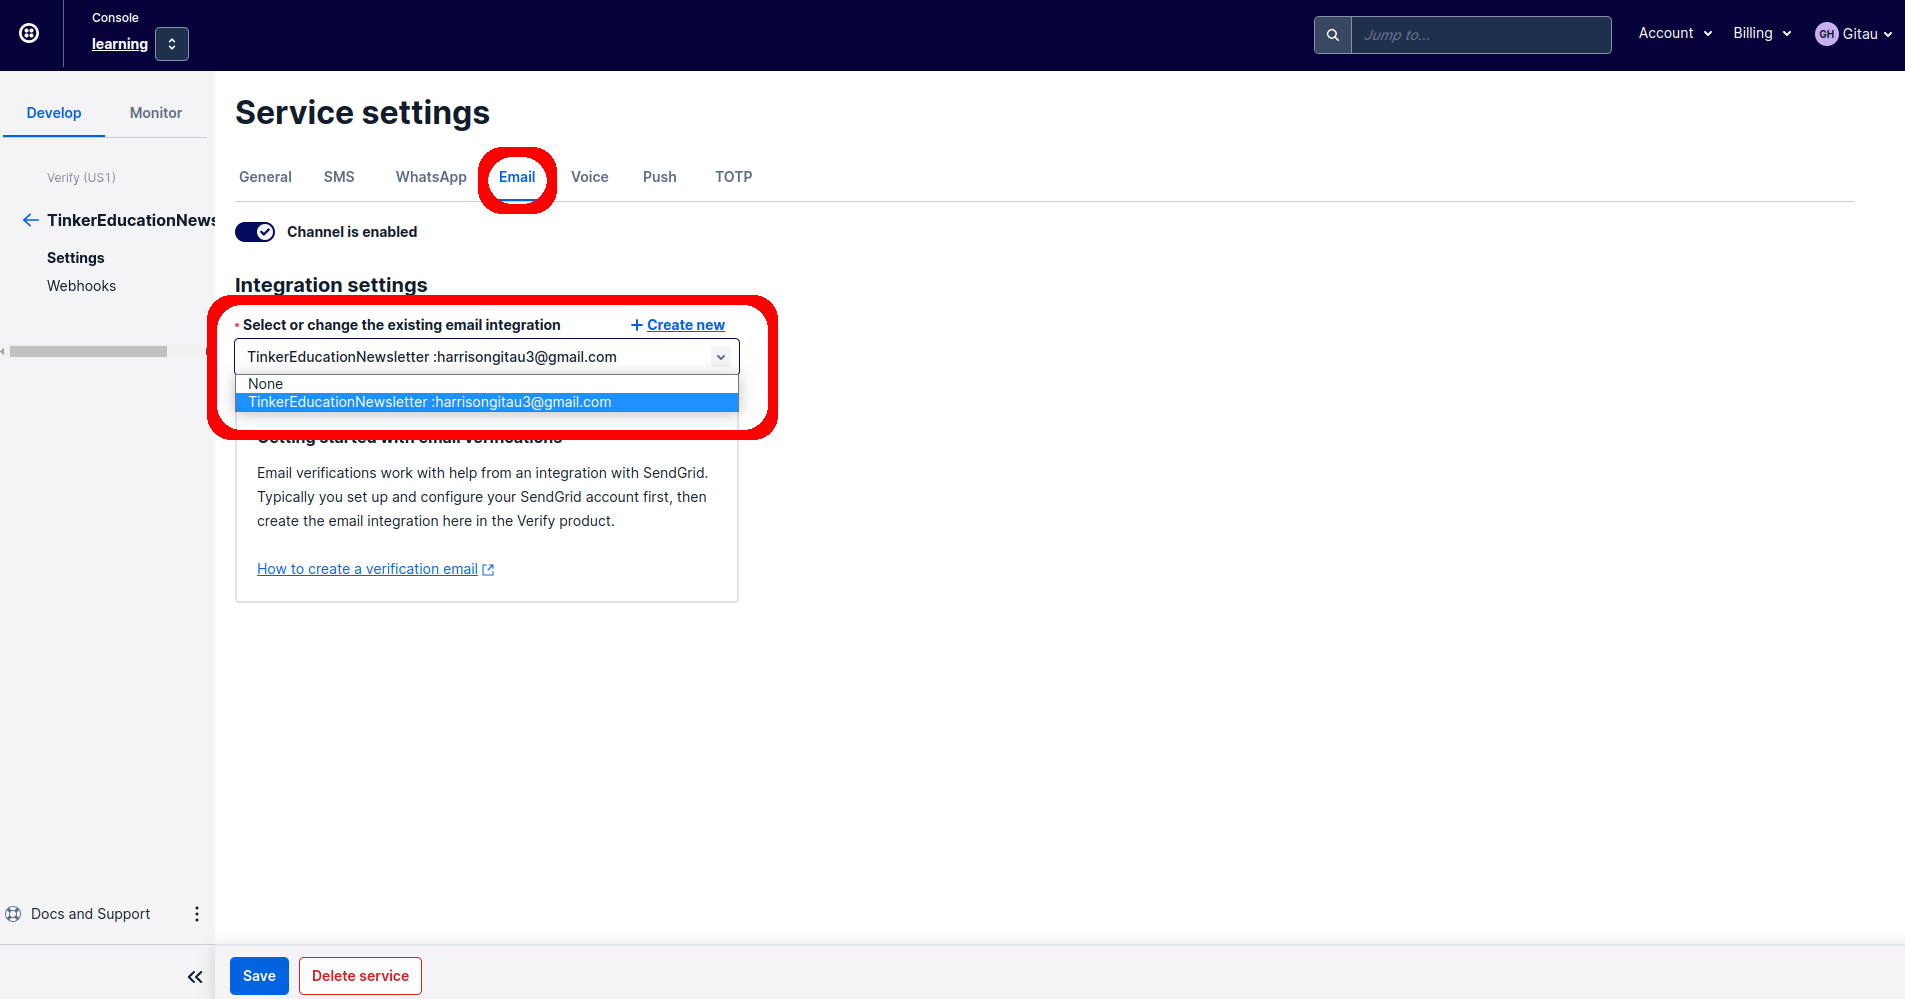
Remember to toggle the "Email" option before creating this new service. You will be redirected to the new service's settings page. We will use the Service SID later.
You may be redirected to select your email integration created earlier. An alternative way to ensure that email is enabled is to click on the Email tab of the Service settings page.
Project Setup
I have already created a sample application we can use to build our project. You can find the code in this GitHub repository. To use it, check the Testing section of the README.md file.
Install Twilio
Besides the dependencies installed through the requirements.txt file, we will need to also install twilio within our active virtual environment. Run this command below:
(venv)$ pip3 install twilio
You can read the Twilio documentation to learn more on the installation process.
Create Email Form
Our home page is going to feature a simple web form where a user will only need to enter their email address. We will use the flask-wtf package to help us create this form. In your terminal, run this command:
(venv)$ pip3 install flask-wtf email-validator
We will create a forms module within our app subfolder to define the fields we want to have in the form. From the top-level directory, create this module by running:
(venv)$ touch app/forms.py
Then, let us update the module with the following code:
# app/forms.py

from flask_wtf import FlaskForm
from wtforms import StringField, SubmitField
from wtforms.validators import DataRequired, Email


class EmailForm(FlaskForm):
    """Emal form"""
    email = StringField('Email', validators=[DataRequired(), Email()])
    submit = SubmitField('Send')
We have used the class EmailForm() to define what fields we want, in this case, it is only the email field together with a submit button.
Web Form Configuration
To help protect our form from a nasty attack called Cross-Site Request Forgery (Csrf in short), Flask expects us to initialize a SECRET_KEY configuration. We can do so by creating a config module in the top-level directory.
(venv)$ touch config.py
This file will define a key called SECRET_KEY whose value will be a secret, only sourced from the environment variables. Let us update it us follows:
# config.py

import os

basedir = os.path.abspath(os.path.dirname(__file__))


class Config(object):
    """All application configurations"""

    # Secret key
    SECRET_KEY = os.environ.get('SECRET_KEY') or 'difficult-key'
The value is located in another top-level file called .env which should not be committed to version control. Its content should remain a secret. Ensure you add it to a .gitignore file.
#.env

SECRET_KEY=0235619817f320f4d8aba819feba76e1
I was able to generate this very difficult-to-guess value by running the following command in the terminal.
(venv)$ python3 -c 'import secrets; print(secrets.token_hex(16))'
If the SECRET_KEY value cannot be found in the environment variables, then the application will default to using the string "difficult-key".
This configuration module needs to be registered in the application's instance within the app subfolder.
# app/__init__.py

from config import Config
# previous code

app = Flask(__name__)
app.config.from_object(Config)

# previous code
Form Template
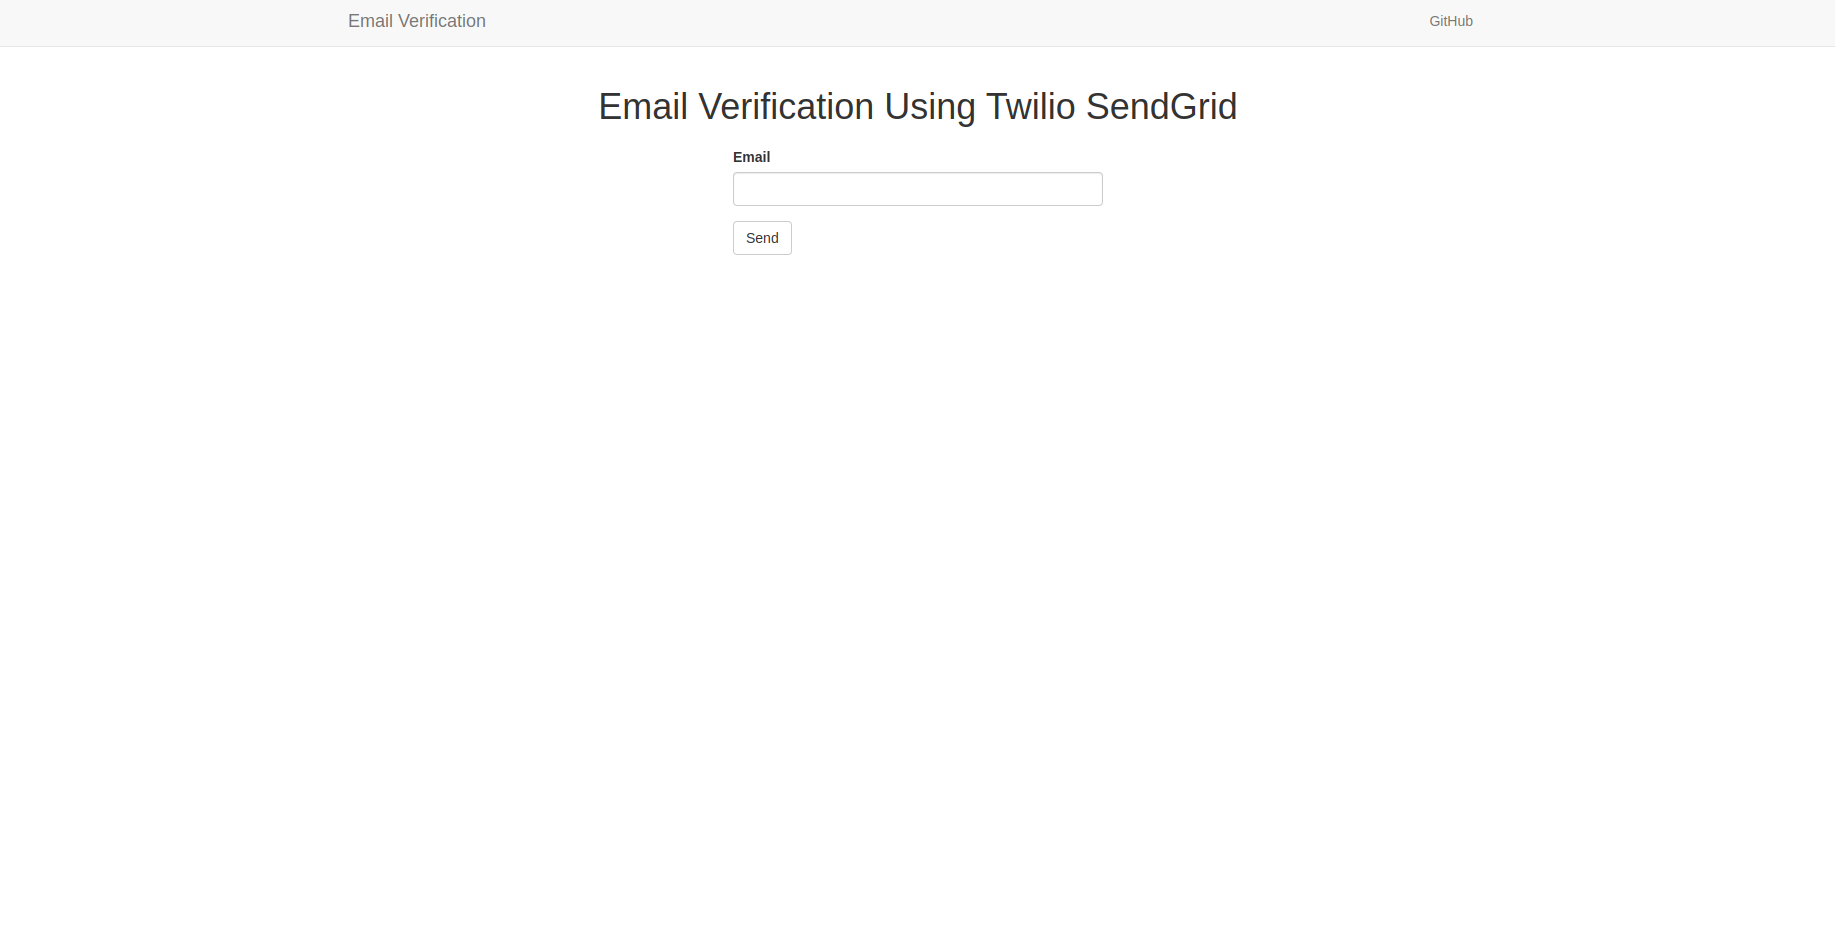
Our email form will be located in the home page. The home page's template is called index.html. Let us modify this file a little to display the email form.
<!-- app/templates/index.html -->

{% extends 'base.html' %}
{% import 'bootstrap/wtf.html' as wtf %}

{% block app_context %}
<div class="row">
    <div class="col-md-12 text-center">
        <h1>{{ title }}</h1>
    </div>
    <div class="row">
        <div class="col-md-4"><!-- Empty div --></div>
        <div class="col-md-4">
            <p>{{ wtf.quick_form(form) }}</p>
        </div>
        <div class="col-md-4"><!-- Empty div --></div>
    </div>
</div>
{% endblock %}
Flask-bootstrap provides the quick_form() which is used to quickly create our form for us. The argument form comes from the view function which will help render this form as seen below.
The dynamic data Email Verification Using Twilio SendGrid In Flask comes from the title passed when the template is returned.
Render The Email Form
The routes module is used to combine all logic related to view functions. We will need to update it for our form to be displayed.
# app/routes.py

from app import app
from flask import render_template
from app.forms import EmailForm


@app.route('/', methods=['GET', 'POST'])
@app.route('/index', methods=['GET', 'POST'])
def index():
    form = EmailForm()
    return render_template('index.html', form=form, title='Email Verification Using SendGrid')
We begin by importing our EmailForm from the forms module, then instantiate it using the variable form. It is this variable that is passed, the template, that is used to render our form. If your application is still running, you can refresh the home/index page to see the email form.
Email Verification
Now that we have our email form ready, we can start accepting users' emails. The verification process will require a user to enter a token sent to an email we hope they have access to before being redirected back to the index page.
To start this process, we will create a verify_email module within the app subfolder.
(venv)$ touch app/verify_email.py
This file will contain the logic needed to verify a user's email address. It contains Twilio Verify API keys necessary to connect to the service. Below, update the file with the following logic:
# app/verify_email.py

from app import app
from twilio.rest import Client, TwilioException


def _get_twilio_verify_client():
    """
    Get the Twilio Verify API client
    """
    return Client(
        app.config['TWILIO_ACCOUNT_SID'],
        app.config['TWILIO_AUTH_TOKEN']
    ).verify.services(app.config['TWILIO_VERIFY_SERVICE_ID'])


def request_email_verification_token(email):
    """Generate a token to be sent to client email"""
    verify = _get_twilio_verify_client()
    verify.verifications.create(to=email, channel='email')


def check_email_verification_token(email, token):
    """Client's token is verified"""
    verify = _get_twilio_verify_client()
    try:
        result = verify.verification_checks.create(to=email, code=token)
        return result.status == 'approved'
    except TwilioException as e:
        return False
To use the Verify API, we first need to get our service's client. This is handled by our helper method _get_twilio_verify_client(). You will need your Twilio account's SID and Auth token seen in your console. You will also need the Verify Service SID as discussed in the section Create a Verify Service.
Notice that they are all environment variables. So, we need to update our configuration file.
# config.py


class Config(object):
    # previous code

    # Twilio Verify
    TWILIO_ACCOUNT_SID = os.environ.get('TWILIO_ACCOUNT_SID')
    TWILIO_AUTH_TOKEN = os.environ.get('TWILIO_AUTH_TOKEN')
    TWILIO_VERIFY_SERVICE_ID = os.environ.get('TWILIO_VERIFY_SERVICE_ID')
    SENDGRID_API_KEY = os.environ.get('SENDGRID_API_KEY')
Since the values of these environment variables are a secret, we also need to update the .env file.
#.env

# previous value

TWILIO_ACCOUNT_SID=
TWILIO_AUTH_TOKEN=
TWILIO_VERIFY_SERVICE_ID=
SENDGRID_API_KEY=
The request_email_verification_token() method contacts Twilio Verify to request a verification token. A user's email is passed as an argument so that the email can be sent to their inbox.
The request process is handled by the index() view function as seen below:
# app/routes.py

from app.verify_email import request_email_verification_token
from flask import url_for, redirect, session

# ...

@app.route('/', methods=['GET', 'POST'])
@app.route('/index', methods=['GET', 'POST'])
def index():
    form = EmailForm()
    if form.validate_on_submit():
        user_email = form.email.data
        request_email_verification_token(user_email)
        session['email'] = user_email
        return redirect(url_for('verify_token'))
    return render_template('index.html', form=form)
Once a user submits their email, a verification token will be sent to their inbox. The application will redirect them to another page where they will enter the token received. This page is rendered by the view function verify_token(). Since it does not exist, we need to create it.
# app/routes.py
from app.forms import VerifyForm
from app.verify_email import check_email_verification_token

# ...

@app.route('/verify-token', methods=['GET', 'POST'])
def verify_token():
    form = VerifyForm()
    if form.validate_on_submit():
        user_email = session['email']
        check_email_verification_token(user_email, form.token.data)
        return redirect(url_for('index'))
    return render_template('verify_token.html', form=form, title='Verify Token')
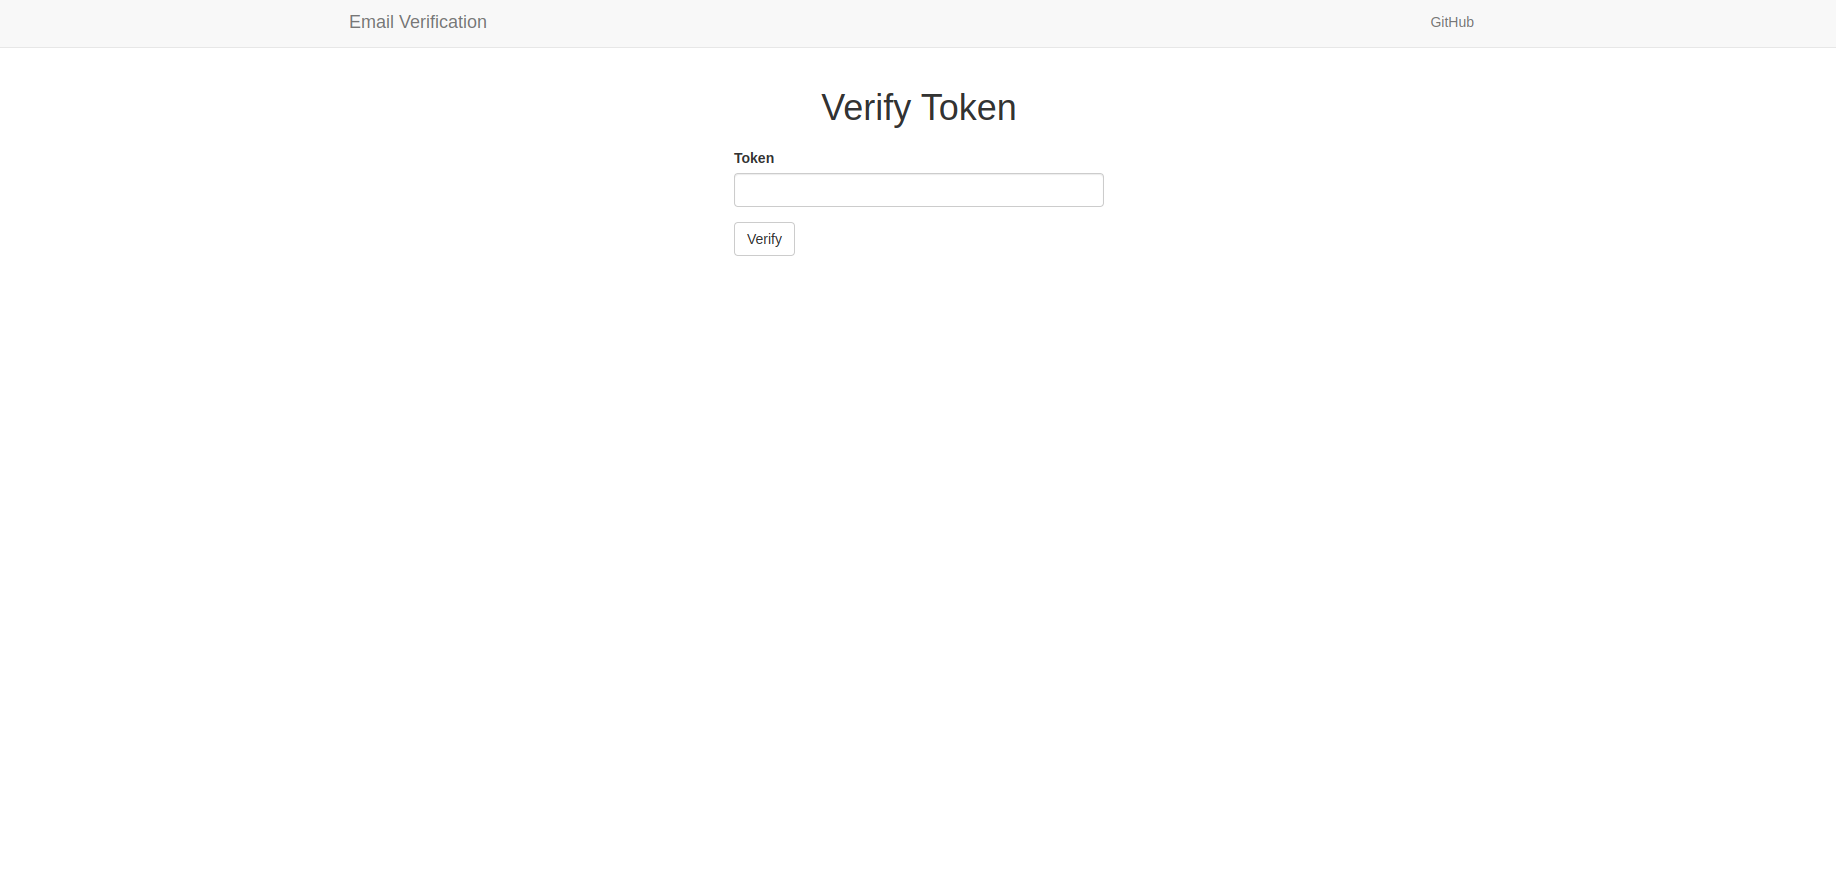
On the token verification page, there will be another simple form with only one field that accepts the numeric code received by a client. Once this form is submitted with the code, a call to the method check_email_verification_token() is made. If the token is verified, then the user will be redirected to the index page.
Let us begin by creating this new template. We can copy the content of the index.html and paste it into verify.html.
<!-- app/templates/verify.html -->

{% extends 'base.html' %}
{% import 'bootstrap/wtf.html' as wtf %}

{% block app_context %}
<div class="row">
    <div class="col-md-12 text-center">
        <h1>{{ title }}</h1>
    </div>
    <div class="row">
        <div class="col-md-4"><!-- Empty div --></div>
        <div class="col-md-4">
            <p>{{ wtf.quick_form(form) }}</p>
        </div>
        <div class="col-md-4"><!-- Empty div --></div>
    </div>
</div>
{% endblock %}
Then, to define our token verification form, we need to update the forms module as seen below.
# app/forms.py

# ...

class VerifyForm(FlaskForm):
    """Token form"""
    token = StringField('Token', validators=[DataRequired()])
    submit = SubmitField('Verify')
Navigate to the URL http://127.0.0.1:5000/verify-token to see the new page.
Testing Application Functionality
So far, that is all that is needed to verify an email address. You can test your application as seen below.
Share
If you enjoyed this article, you can share it with another person.
TweetNewsletter Subcription
Level up your skills.
We take your privacy seriously. Read our privacy policy. Unsubscribe | Resubscribe.