


Add Tags To Your Posts In Flask

Tags are a simple classification system that can be used in a blog post. A tag can be applied to multiple blog posts and, similarly, multiple blog posts can be related to one another outside their category. For example, a blog may have a tag called "Flask". People interested in reading posts related to "Flask" only can click on this link and they will find relevant posts. This article shows how to build the tag system project from scratch. However, if you would like to skip to the Tags section, you can begin from Working With A Database.
Table Of Contents
Requirements
Before you can begin implementing this feature, you will need the following:
- Python installed in your machine
- Flask knowledge
- Familiarity with working with a database
Building The Initial GUI Project
If you are on Ubuntu or any of the Linux distributions, you do not have to worry about having Python on your machine. It comes with it right out of the box. Same to Mac OS. However, if you are on Windows, you may need to check for its availability first and install it if you do not have it. The most recommended way to develop this application on Windows is by using the Windows Subsystem for Linux.
The completed project can be found in the GitHub repository tags for your blog posts in flask. The project in the repository uses Tailwind CSS rather than Bootstrap.
Project Structure
Let us utilize this project structure while building the application:
folder
    | --- config.py
    | --- main.py
    | --- requirements.txt
    | --- .flaskenv
    | --- .gitignore
    | --- .env
    | --- .env-template
    | --- app/
            | --- routes.py
            | --- __init__.py
            | --- models.py
            | --- forms.py
            | --- errors.py
            | --- templates/
                        | --- base.html
                        | --- index.html
                        | --- tags.html
Following the principle of separation of concerns, each application's function will be classified in a module of its own. You can use your text editor's GUI to create the project's structure, or Linux commands in your terminal. An example is touch main.py which creates an empty file called main.py.
Start The Flask Server
With the structure in place, we will need to configure the application to begin utilizing Flask and relevant Flask packages. The first thing we will need to do is to create and activate a virtual environment.
$ python3 -m venv venv
$ source venv/bin/activate

# Terminal changes to:
(venv)$
The first command used venv to create a virtual environment called venv (you can call this anything you want). The second command activates the virtual environment you have just created. You will see a folder called venv in the root directory of your project.
What is a virtual environment and why use it?
"A virtual environment is a Python environment such that the Python interpreter, libraries, and scripts installed into it are isolated from those installed in other virtual environments, and (by default) any libraries installed in a “system” Python, i.e., one which is installed as part of your operating system"
Imagine a scenario where you installed Flask V1 to your global Python library. Later on, there is an update to Flask and you end up installing Flask V2 which may be having some breaking changes. When you try to run your initial project with Flask V2, both of which are present in your global Python environment, you are most likely to get all sorts of errors.
A virtual environment is used to isolate the needs of one project from another and also helps to declutter our global Python environment. This way, we can run applications smoothly. An alternative method of working with virtual environments is by using virtualenvwrapper. It is an enhancement to the way we can work with virtual environments. For instance, the command mkvirtualenv venv not only creates but activates a virtual environment called venv for us.
With the virtual environment active, we can install the following packages:
(venv)$ pip3 install flask flask-sqlalchemy flask-migrate flask-wtf flask-moment flask-bootstrap python-dotenv email-validator
Next, we will need to create an instance of Flask:
app/__init__.py: Create an instance of Flask
from flask import Flask


app = Flask(__name__)


from app import routes, models, errors
To ensure that everything works, we can test out if the application can render something on a page:
app/routes.py: Return text
from app import app

@app.route('/')
@app.route('/index')
def index():
    return 'Hello, world!'
Above, we want the string "Hello, world!" to be returned when we navigate to either / or /index URLs. The Flask server expects certain environment variables to be set before serving the relevant content. To make our work easier, we will define all environment variables in .flaskenv. These variables are needed before the Flask server fires up.
.flaskenv: Flask's environment variables
FLASK_APP=main.py
FLASK_ENV=development
FLASK_DEBUG=True
The Flask server will need to know where to start. Remember, we created a Flask instance in __init__.py. This file is used as an instance of the application. We need to find a way to point to this file. Let us update the main.py file so that it can act as an entry-point file by pointing to the application's instance.
main.py: Entry point
from app import app
At this point, we are now ready to fire up the Flask server. Run the command below to start the server.
(venv)$ flask run
For the command to work, ensure you are in the root directory of the project. You will see the localhost URL http://127.0.0.1:5000 in your terminal. Paste it in your favorite browser. You should see the text "Hello, world!" returned. This means that everything works as expected. If you encountered an error, kindly review the steps to get here once more.
Web Forms
To post data, it is convenient to use a form. This way, a user will know what data they need to post. Below, we are going to define one.
app/forms.py: Create a post form
from flask_wtf import FlaskForm
from wtforms import StringField, SubmitField, SelectMultipleField, \
    TextAreaField
from wtforms.validators import DataRequired, Email, Length


class PostForm(FlaskForm):
    """Form to add a blog post"""
    username = StringField(
        'Username',
        validators=[DataRequired()],
        render_kw={"placeholder": "muthoni"})
    email = StringField(
        'Email', validators=[DataRequired(), Email()],
        render_kw={"placeholder": "muthoni@email.com"})
    title = StringField(
        'Title', validators=[DataRequired()],
        render_kw={"placeholder": "Tags System"})
    body = TextAreaField(
        'Body',
        validators=[DataRequired(), Length(min=0, max=140)],
        render_kw={"placeholder": "Say something ..."})
    tags = SelectMultipleField(
        'Tag Name',
        validators=[DataRequired()],
        choices=[
            ('Python', 'Python'),
            ('Flask', 'Flask'),
            ('Database', 'Database')
        ])
    submit = SubmitField('Post')
The form above is called PostForm(). It has the username, email, title, body, and tags fields. The tags field uses SelectMultipleField to allow for the selection of more than one user input.
To ensure that this form gets displayed, we will need to update our index.html file. We have another file called base.html which we can use to define styles and layouts we want to be applied and reused across all other templates, hence the name "base". Let us first begin by defining these reusable styles and layouts.
templates/base.html: Base styles and layout
{% extends 'bootstrap/base.html' %}

{% block title %}
    {% if title %}
        {{ title }}
    {% else %}
        Tags System
    {% endif %}
{% endblock %}

{% block navbar %}
    <nav>
        <ul>
            <li>
                <a href="{{ url_for('index') }}">Home</a>
            </li>
        </ul>
    </nav>
{% endblock %}

{% block content %}
    <div class="container">
        {% with messages = get_flashed_messages() %}
            {% if messages %}
                {% for message in messages %}
                    <div class="alert alert-success">
                        {{ message }}
                    </div>
                {% endfor %}
            {% endif %}
        {% endwith %}

        <!-- Child templates -->
        {% block app_content %}{% endblock %}
    </div>
{% endblock %}

{% block scripts %}
    {{  super() }}
    {{ moment.include_moment() }}

{% endblock %}
I have added a "flash" message which will be useful in letting a user know of the status of an action they have taken. Blocks have been used to lay out the different reusable parts of the application. The block app_content will be used by child templates to define their template-specific content. Let us display our web form in index.html.
templates/index.html: Display home page
{% extends 'base.html' %}
{% import 'bootstrap/wtf.html' as wtf %}

{% block app_content %}
<div class="row text-center">
  <div class="col-md-12">
    <h1>{{ title }}</h1>
    <p>
      Use the form below to post something and add tags to your post.
      Currently, there are {{ num_posts }} posts.
    </p>
  </div>
</div>
  <div class="row">
      <div class="col-md-4"></div>
        <div class="col-md-4">
            <!-- Form -->
            <p>
              {{ form.username.label }} <br>
              {{ form.username() }} <br>
              {% for error in form.errors.username %}
                <span style="color: red;">{{ error }}</span>
              {% endfor %}
            </p>
            <p>
              {{ form.email.label }} <br>
              {{ form.email() }} <br>
              {% for error in form.email.username %}
                <span style="color: red;">{{ error }}</span>
              {% endfor %}
            </p>
            <p>
              {{ form.title.label }} <br>
              {{ form.title() }} <br>
              {% for error in form.title.username %}
                <span style="color: red;">{{ error }}</span>
              {% endfor %}
            </p>
            <p>
              {{ form.body.label }} <br>
              {{ form.body() }} <br>
              {% for error in form.body.username %}
                <span style="color: red;">{{ error }}</span>
              {% endfor %}
            </p>
            <p>
              {{ form.tags.label }} <br>
              {{ form.tags() }} <br>
              {% for error in form.tags.username %}
                <span style="color: red;">{{ error }}</span>
              {% endfor %}
            </p>
            <p>{{ form.submit() }}</p>
            <!-- End -->
        </div>
      <div class="col-md-4"></div>
  </div>
{% endblock %}
The templates currently define Bootstrap-specific styling that we have not yet initialized. We will do so in the Facelift below. To see these templates, we have to render them. This is usually done in the routes module.
app/routes.py: Render the post form
from flask import render_template
from app.forms import PostForm
from app import app

@app.route('/', methods=['GET', 'POST'])
@app.route('/index', methods=['GET', 'POST'])
def index():
    form = PostForm()
    return render_template(
        'index.html',
        title='Post Something',
        form=form)
The only change made is the use of render_template() function from Flask. This function takes the template name, a form variable, and an optional template title.
Web Form Configuration
Web forms are a very sensitive building block of any web application. Users use it to post data, some of which are personal such as passwords and credit card details. Given the sensitivity of a web form, Flask expects us to set a SECRET_KEY. This key will be used by the web form to protect it from a nasty attack called Cross-Site Request Forgery (CSRF). Without it, we will get a RuntimeError: A secret key is required to use CSRF.
We have a module called config. We shall be using it to define the application's configuration. Let us head over to the config.py file and update it with the following changes:
config.py: Define application configurations
import os


class Config(object):
    SECRET_KEY = os.environ.get('SECRET_KEY') or 'difficult-key'
We need to ensure that the application can read this configuration. We, therefore, will register this module in the application's instance.
app/__init__.py: Register configurations
from flask import Flask
from config import Config


app = Flask(__name__)
app.config.from_object(Config)


from app import routes, models, errors
If you refresh your web page, you will get the Template Not Found: jinja2.exceptions.TemplateNotFound: bootstrap/wtf.html error from the debugger.
Facelift
To get rid of the error and ensure the Bootstrap-specific styles are applied, we will need to initialize a bootstrap variable in the application's instance.
app/__init__.py: Initialize bootstrap
from flask import Flask
from flask_bootstrap import Bootstrap
from config import Config


app = Flask(__name__)
app.config.from_object(Config)

bootstrap = Bootstrap(app)


from app import routes, models, errors
At this stage, you should be able to see your Index page displayed, albeit with minimal styling.
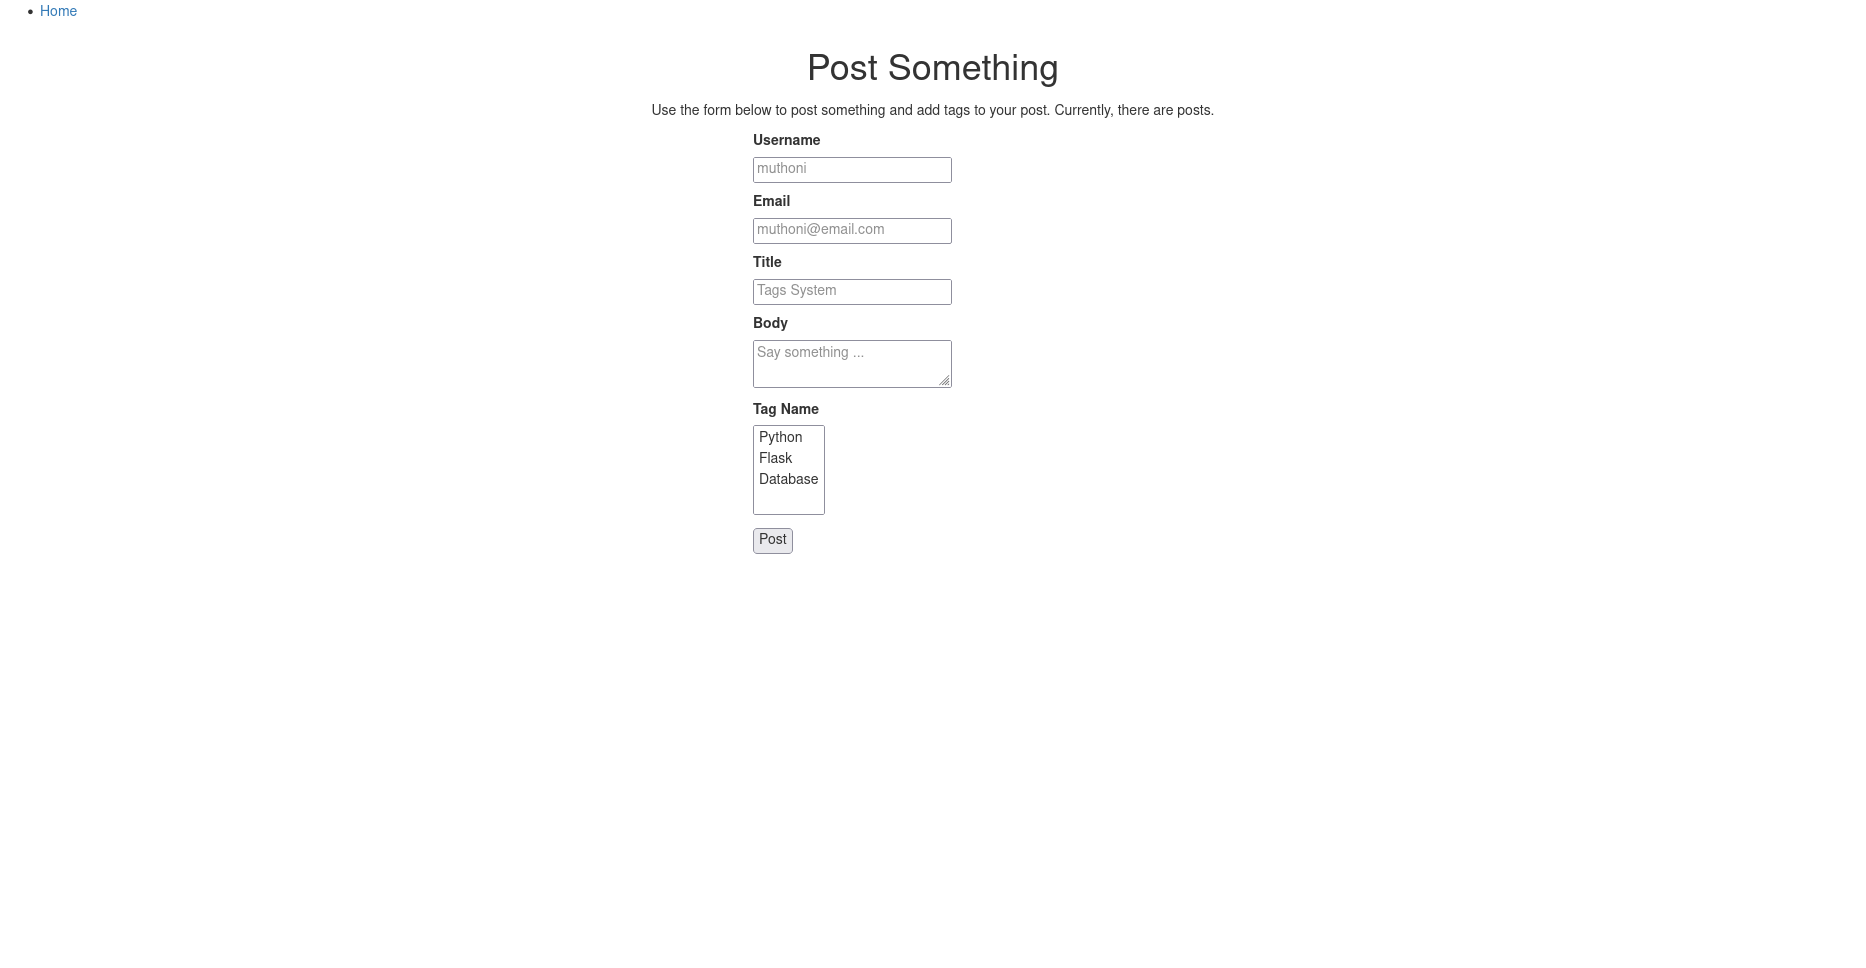
You can agree with me that the design leaves something to be desired. Below, let us add some enhancements to the user interface.
templates/base.html: Facelift
{% extends 'bootstrap/base.html' %}

<!-- The title of our application is defined here -->
{% block title %}
    {% if title %}
        {{ title }} - Tags
    {% else %}
        Tag System
    {% endif %}
{% endblock %}

<!-- This is the navbar -->
{% block navbar %}
<nav class="navbar navbar-default">
    <div class="container">
        <div class="navbar-header">
            <button type="button" class="navbar-toggle collapsed" data-toggle="collapse" data-target="#bs-example-navbar-collapse-1" aria-expanded="false">
                <span class="sr-only">Toggle navigation</span>
                <span class="icon-bar"></span>
                <span class="icon-bar"></span>
                <span class="icon-bar"></span>
            </button>
            <a class="navbar-brand" href=" {{ url_for('index') }} ">Tags System</a>
        </div>
        <div class="collapse navbar-collapse" id="bs-example-navbar-collapse-1">
            <ul class="nav navbar-nav navbar-right">
                <li><a href=" https://github.com/GitauHarrison/tags-for-your-blog-posts-in-flask " target="_blank">GitHub</a></li>
            </ul>
        </div>
    </div>
</nav>
{% endblock %}


{% block content %}
<div class="container">
    <!-- Flash messages -->
    {% with messages = get_flashed_messages() %}
        {% if messages %}
            <div class="alert alert-info">
                {% for message in messages %}
                    {{ message }}
                {% endfor %}
            </div>
        {% endif %}
    {% endwith %}

    <!-- Contents of all our pages will go here -->
    {% block app_content %}{% endblock %}
</div>
{% endblock %}


<!-- All scripts will go here -->
{% block scripts %}
    {{  super() }}

{% endblock %}
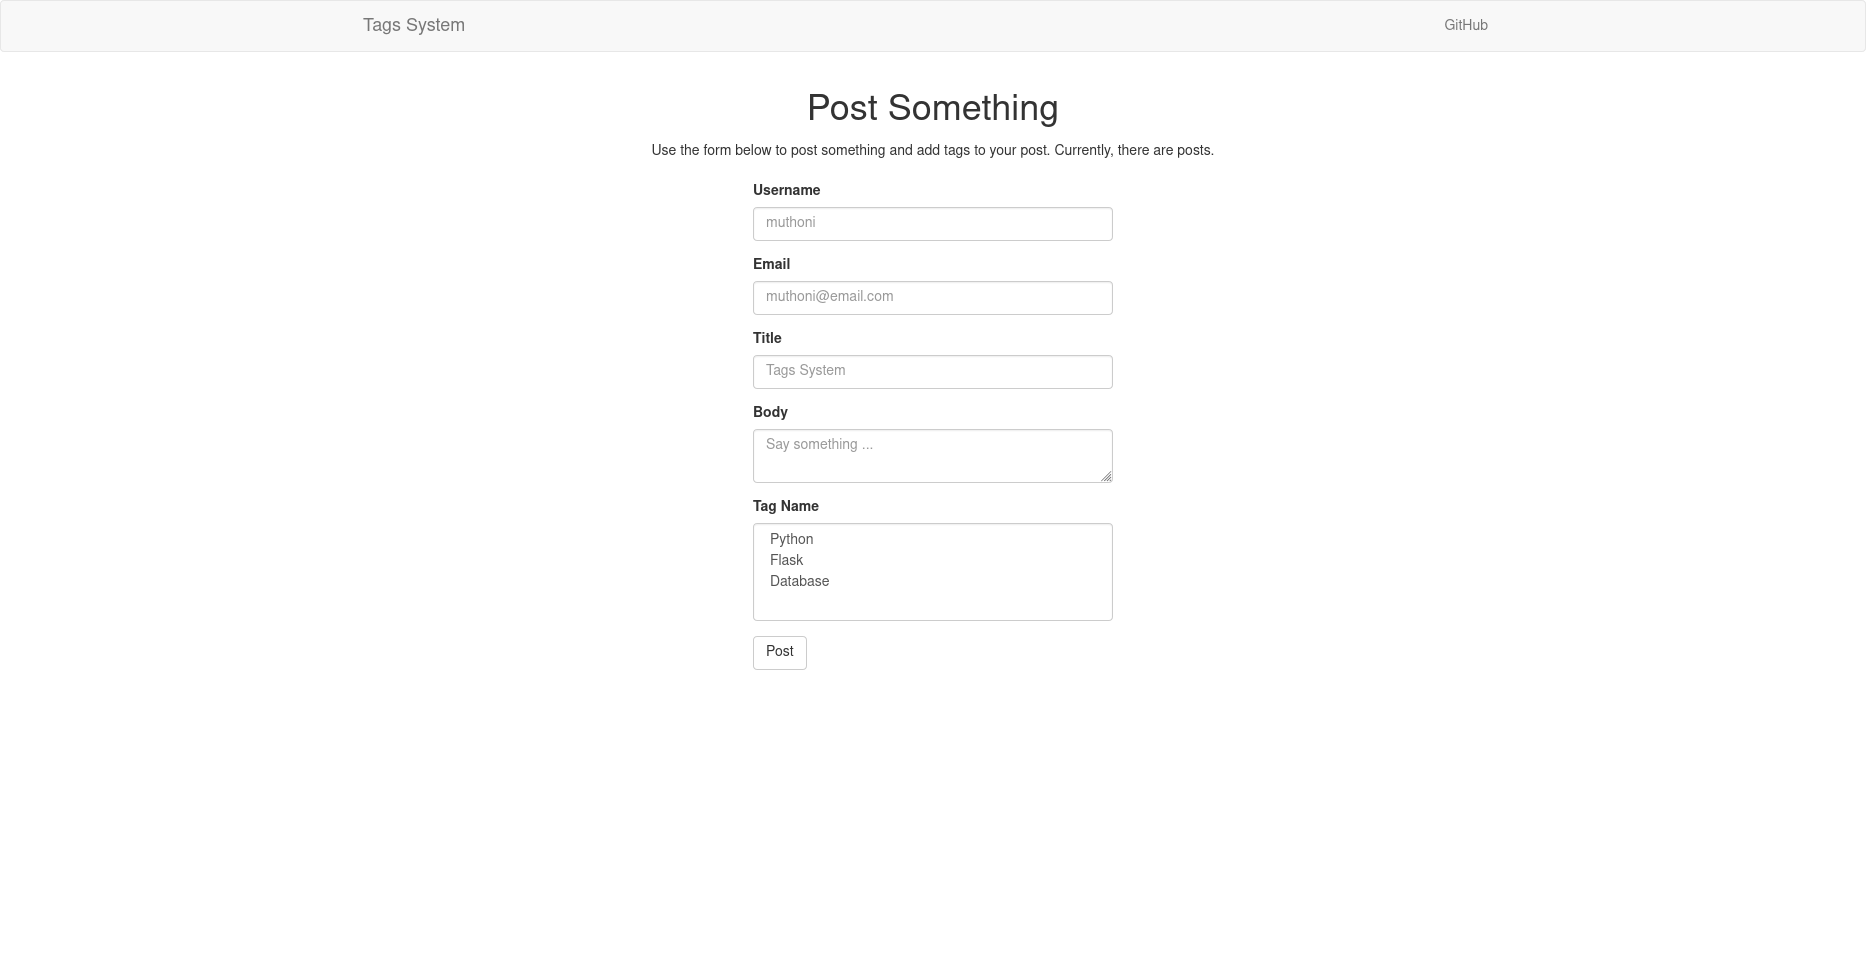
The base template now has some proper style and the navigation bar seem a lot more refined than before. We can also style the PostForm() using Bootstrap.
templates/index.html: Style web form using Bootstrap
{% extends 'base.html' %}
{% import 'bootstrap/wtf.html' as wtf %}

{% block app_content %}
<div class="row text-center">
  <div class="col-md-12">
    <h1>{{ title }}</h1>
    <p>
      Use the form below to post something and add tags to your post.
      Currently, there are {{ num_posts }} posts.
    </p>
  </div>
</div>
  <div class="row">
      <div class="col-md-4"></div>
        <div class="col-md-4">
            <!-- Form -->
            <p> {{ wtf.quick_form(form) }} </p>
            <!-- End -->
        </div>
      <div class="col-md-4"></div>
  </div>
{% endblock %}
Bootstrap provides the quick_form() function to quickly display a form with all its fields. All that is needed from us is to pass the form variable (or whatever else you called it) to it.
Display User Data
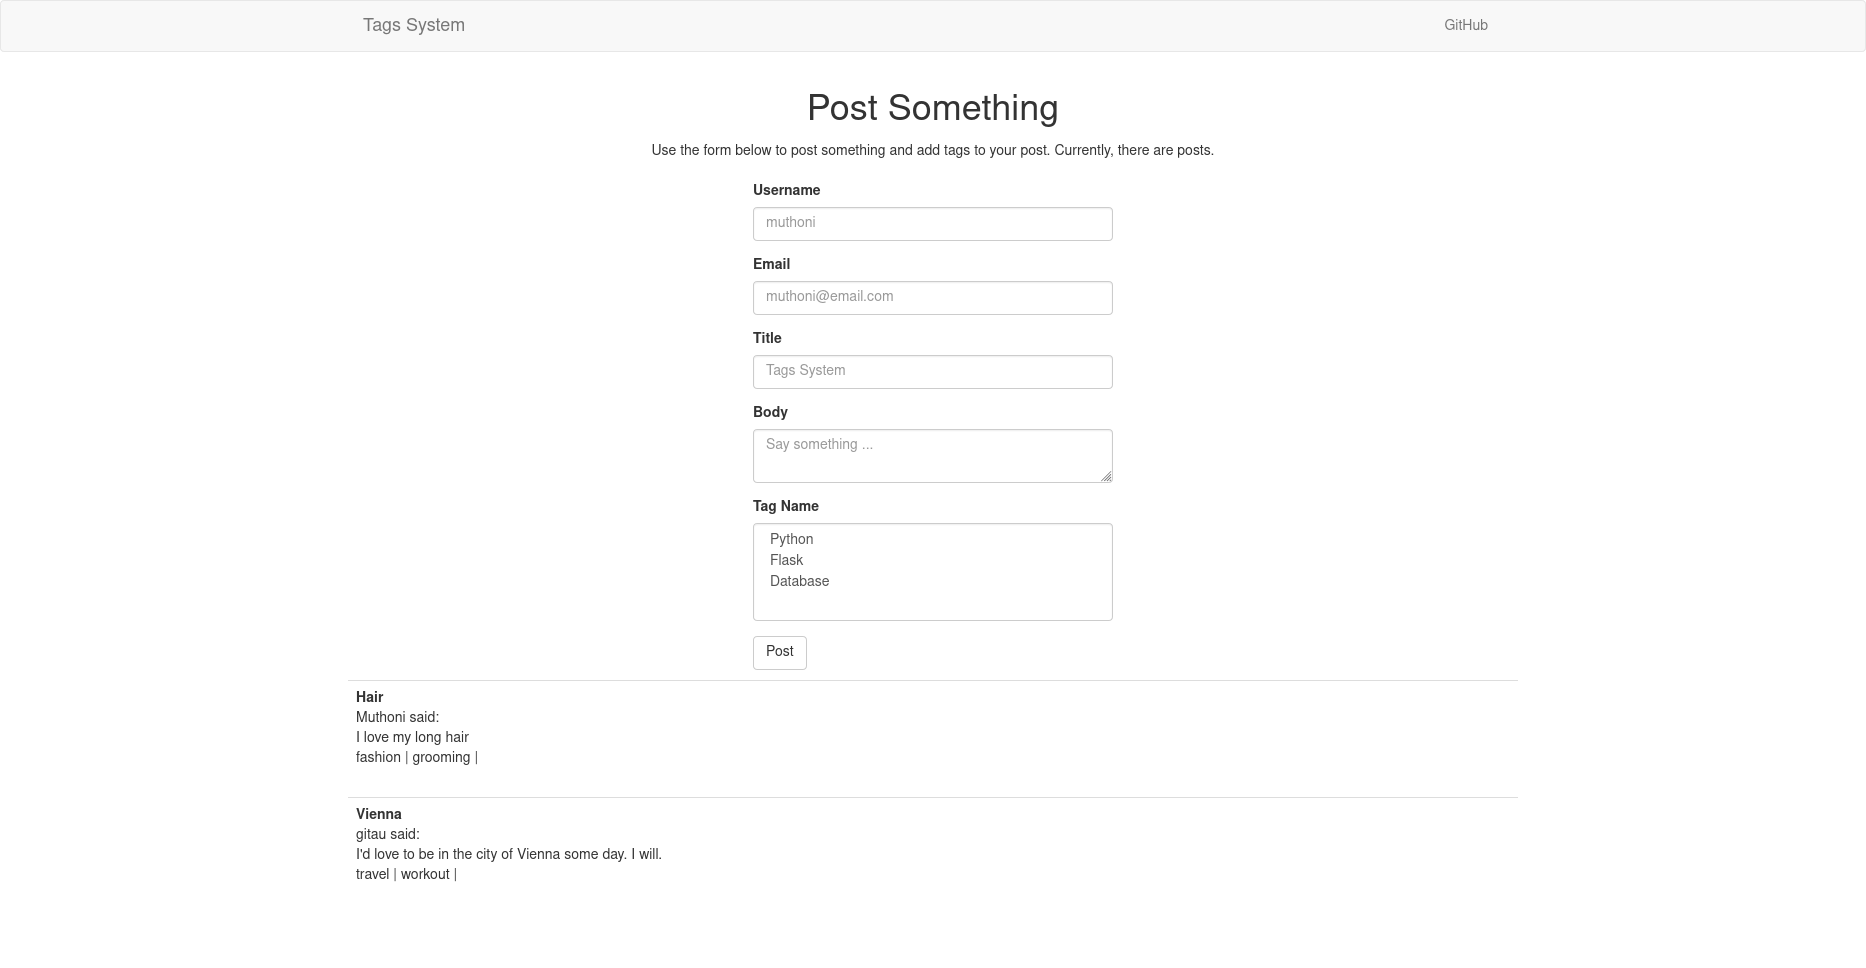
We can utilize some dummy post data to test how each user's post will look like.
app/routes.py: Render user post
from flask import render_template
from app.forms import PostForm
from app import app

@app.route('/', methods=['GET', 'POST'])
@app.route('/index', methods=['GET', 'POST'])
def index():
    form = PostForm()
    posts = [
        {
            'author': {'username': 'Muthoni', 'email': 'muthoni@email.com'},
            'title': 'Hair',
            'body': 'I love my long hair',
            'tags': ['fashion', 'grooming']
        },
        {
            'author': {'username': 'gitau', 'email': 'gitau@email.com'},
            'title': 'Vienna',
            'body': 'I\'d love to be in the city of Vienna some day. I will.',
            'tags': ['travel', 'workout']
        }
    ]
    return render_template(
        'index.html',
        title='Post Something',
        form=form,
        posts=posts)
The posts variable contains a list of dummy user data I have hard-coded. It is passed to the templates so that individual data can be accessed.
templates/index.html: Display user post
{% extends 'base.html' %}
{% import 'bootstrap/wtf.html' as wtf %}

{% block app_content %}
<div class="row text-center">
  <div class="col-md-12">
    <h1>{{ title }}</h1>
    <p>
      Use the form below to post something and add tags to your post.
      Currently, there are {{ num_posts }} posts.
    </p>
  </div>
</div>
  <div class="row">
      <div class="col-md-4"></div>
        <div class="col-md-4">
            <!-- Form -->
            <p> {{ wtf.quick_form(form) }} </p>
            <!-- End -->
        </div>
      <div class="col-md-4"></div>
  </div>
  <div class="row">
    <div class="col-3"></div>
    <div class="col-6">
      {% for post in posts %}
        <table class="table table-hover">
            <tr>
              <td>
                <strong>{{ post.title }}</strong> <br>
                <strong>{{ post.author.username }}</strong> said: <br>
                {{ post.body }} <br>
                {% for tag in post.tags %}
                  {{ tag }} |
                {% endfor %}
              </td>
            </tr>
        </table>
      {% endfor %}
    </div>
    <div class="col-3"></div>
  </div>
{% endblock %}
The Jinja2 templating engine allows us to loop through the posts variable, just like we would in Python, to access a user's details, including what they said and their associated tags. Notice that for me to attach relevant tags to each post, I have to loop through the list of each post's tags as post.tags. tags is the key used to access the list of tags in each post.
In case you are wondering what email is used for, it will come in handy later when we want to associate an avatar with each user's post. We will generate an avatar for each user based on their email addresses.
Working With A Database
Databases allow for the persistence of data through storage. Besides, relational databases have ways to help us interact with the data the way we want. In this article, I will be using the SQLite database. It is so easy to set it up and is especially ideal for the scope of our project.
Instead of using raw SQL commands, we will be using classes, methods, and objects to define and interact with SQLite, thanks to SQLAlchemy, a very popular Object Relational Mapper (ORM). Flask-sqlalchemy is a flask-friendly wrapper we shall utilize for the database. We will also need flask-migrate extension to help manage the actual creation and application of changes to a database schema. Let us begin by installing both in our active virtual environment.
(venv)$ pip3 install flask-sqlalchemy flask-migrate
Thereafter, we will need to register these two extensions with our application's instance as follows.
app/__init__.py: Create migrate and db objects
from flask import Flask
from flask_bootstrap import Bootstrap
from config import Config
from flask_moment import Moment
from flask_migrate import Migrate
from flask_sqlalchemy import SQLAlchemy


app = Flask(__name__)
app.config.from_object(Config)

bootstrap = Bootstrap(app)
moment = Moment(app)
db = SQLAlchemy(app)
migrate = Migrate(app, db, render_as_batch=True)


from app import routes, models, errors
Notice that models has been imported at the bottom of the file. render_as_batch=True allows us to do migrations when moving data to a new table, thereby overcoming the typical SQLite error No support for ALTER of constraints in SQLite dialect.
Database Configuration
Our database also needs to be configured, just as we did for the web form. In particular, Flask expects the variable DATABASE_URL to be set, pointing to the location of the database.
config.py: Database configurations
import os
from dotenv import load_dotenv

basedir = os.path.abspath(os.path.dirname(__file__))
load_dotenv(os.path.join(basedir, '.env'))


class Config(object):
    # Web form
    SECRET_KEY = os.environ.get('SECRET_KEY') or 'you-cannot-guess'

    # Database
    SQLALCHEMY_DATABASE_URI = os.environ.get('DATABASE_URL') or \
        'sqlite:///' + os.path.join(os.path.dirname(__file__), 'app.db')
    SQLALCHEMY_TRACK_MODIFICATIONS = False

    # Pagination
    POSTS_PER_PAGE = 5
basedir allows for the creation of the database in the root folder of the project. In the event the value of DATABASE_URL is not found, we fall back to using the disk-based SQLite database appropriately named app.db. This database file will also be located in the application's root directory. Setting SQLALCHEMY_TRACK_MODIFICATIONS to False, we disable Flask-sqlalchemy's feature where we constantly get signals about changes to the database. POSTS_PER_PAGE will be used to limit the number of posts we want to be displayed on each web page number.
Define Your Models
Finally, we can define the models that will be used to create the database. From our web form, we want to capture a user's username, email, title, body, and tags. These fields help us know what columns we would want to have in the schema of our database.
app/models.py: Define database models
from app import db
from datetime import datetime
from hashlib import md5


tags_table = db.Table(
    'tags_association',
    db.Column('post_id', db.ForeignKey('post.id'), primary_key=True),
    db.Column('tag_id', db.ForeignKey('tag.id'), primary_key=True),
)


class User(db.Model):
    id = db.Column(db.Integer, primary_key=True)
    username = db.Column(db.String(64))
    email = db.Column(db.String(64))
    posts = db.relationship('Post', backref='author', lazy='dynamic')

    def __repr__(self):
        return f'User: {self.username}'

    def avatar(self, size):
        digest = md5(self.email.lower().encode('utf-8')).hexdigest()
        return 'https://www.gravatar.com/avatar/{}?d=identicon&s={}'.format(
            digest, size)


class Post(db.Model):
    id = db.Column(db.Integer, primary_key=True)
    title = db.Column(db.String(64))
    body = db.Column(db.String(140))
    timestamp = db.Column(db.DateTime, index=True, default=datetime.utcnow)
    user_id = db.Column(db.Integer, db.ForeignKey('user.id'))

    tags = db.relationship(
        'Tag',
        secondary=tags_table,
        backref=db.backref('posts', lazy='dynamic'))

    def __repr__(self):
        return f'Post {self.title}'


class Tag(db.Model):
    id = db.Column(db.Integer, primary_key=True)
    name = db.Column(db.String(64))
    timestamp = db.Column(db.DateTime, index=True, default=datetime.utcnow)
    user_id = db.Column(db.Integer, db.ForeignKey('user.id'))

    def __repr__(self):
        return f'Tag: {self.name}'
There are three models with self-explanatory fields. These are User used to store a user's data, Post stores what they said and the Tag is to be used to save tags posted by a user with each blog post. As mentioned earlier, a user's email comes in handy when we want to generate an avatar for each user. The avatar() method uses the Gravatar service to generate an avatar based on a user's email address.
Understanding The Association Table
The most important models are the Post and the Tag models. A post can have many tags, and a single tag can belong to many posts. In SQLAlchemy jargon, we call this a many-to-many relationship. This kind of relationship is typically defined using an association table. Think of it as a middle table, not really a true database table, linking the many side of the blogs to the many side of the tags. All this table does is to get the ids of each side of the relationship as foreign key constraints. Using the id of each table is recommended since this value is unique for each entry, thereby preventing the persistence of duplicate rows.
app/models.py: The association table
tags_table = db.Table(
    'tags_association',
    db.Column('post_id', db.ForeignKey('post.id'), primary_key=True),
    db.Column('tag_id', db.ForeignKey('tag.id'), primary_key=True),
)
We begin by giving the table a name, in our case it is called tags_association, then we create two columns each with the ids of tables in the relationship. Notice how they both are primary_keys.
As soon as the association table is correctly assembled, the last bit is to add a relationship between the two models. I have added the tags relationship to the Post model.
app/models.py: Relationship between tables
class Post(db.Model):
    # ...

    tags = db.relationship(
        'Tag',
        secondary=tags_table,
        backref=db.backref('posts', lazy='dynamic'), lazy='dynamic')
Tagis the right-side entity of the relationship while thePostmodel is the left side.secondaryconfigures the association table that is used for this relationship.backrefdefines how the relationship will be accessed from the right-side entity.- From the left side, the relationship will be called
tags - From the right side, the relationship will be called
posts
- From the left side, the relationship will be called
lazyis the execution mode for this query. A mode ofdynamicsets up the query not to run until specifically requested- The first
lazyapplies to the first side of the relationship, theTag. - The second
lazyapplies to the left side of the relationship, thePost.
- The first
Apply Your Changes
The changes to the database now need to be recorded in a new database migration. In your terminal run these commands to apply the changes:
(venv)$ flask db init                    # Create a migration folder in the root directory
(venv)$ flask db migrate -m 'all tables' # Create migration version, appropriately called 'all tables'
(venv)$ flask db upgrade                 # Apply the changes
The flask command should be run from the root directory, so ensure that you are in your project's root directory.
Filtering Data Using Tags
Before we can access any data, we will need to make changes to our index() view function which handles the PostForm and the display of all user posts. At the moment, we have dummy data that we have been using for demonstration purposes. It is time we allow a user to use the web form to post data.
app/routes.py: User data
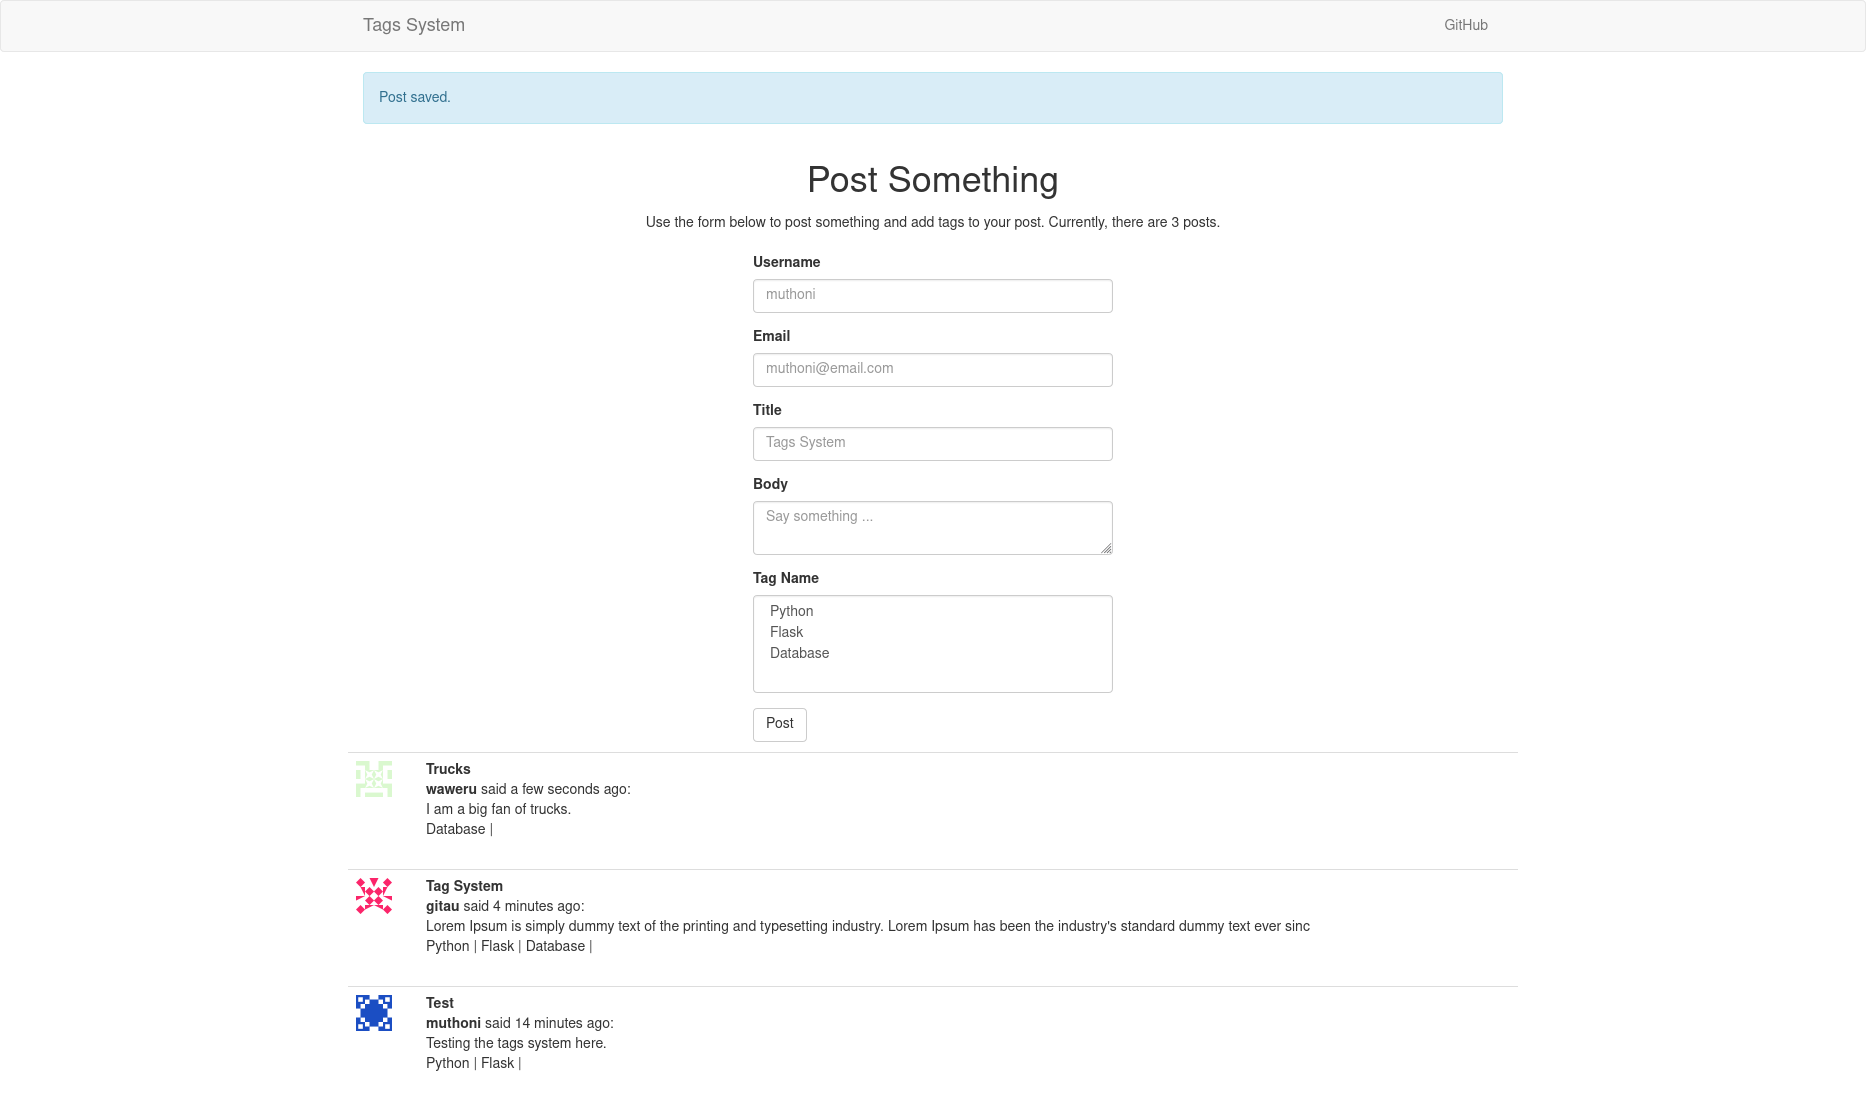
from flask import render_template, flash, url_for, redirect, request
from app.forms import PostForm
from app.models import User, Post, Tag
from app import app, db

@app.route('/', methods=['GET', 'POST'])
@app.route('/index', methods=['GET', 'POST'])
def index():
    form = PostForm()
    if form.validate_on_submit():
        user = User(username=form.username.data, email=form.email.data)
        post = Post(title=form.title.data, body=form.body.data, author=user)
        # Loop through the tags entries in the form, then add each to a post's tags list
        for tag in form.tags.data:
            post.tags.append(Tag(name=tag)) # tags is the relationship seen in Post model
        db.session.add(user)
        db.session.add(post)
        db.commit()
        flash('Post saved.')
        return redirect(url_for('index'))

    # List all user posts based on when they were posted
    page = request.args.get('page', 1, type=int)
    posts = Post.query.order_by(Post.timestamp.desc()).paginate(
        page=page, per_page=app.config['POSTS_PER_PAGE'], error_out=False)

    # Get number of user posts
    num_posts = len(Post.query.all())

    # Pagination
    next_url = url_for('index', page=posts.next_num) \
        if posts.has_next else None
    prev_url = url_for('index', page=posts.prev_num) \
        if posts.has_prev else None

    return render_template(
        'index.html',
        title='Post Something',
        form=form,
        posts=posts,
        num_posts=num_posts,
        next_url=next_url,
        prev_url=prev_url)
To associate a post to a user, we pass author=user. This will be useful especially when we want to relate a post to a user. All the variables are passed to the templates for further processing.
Add Tags To Your Blog Post
With the variables accessible from the index.html template, we can not display each user's post and the related tags.
templates/index.html: Display user posts
{% extends 'base.html' %}
{% import 'bootstrap/wtf.html' as wtf %}
{% block app_content %}
<div class="row text-center">
<div class="col-md-12">
<h1>{{ title }}</h1>
<p>
Use the form below to post something and add tags to your post.
Currently, there are {{ num_posts }} posts.
</p>
</div>
</div>
<div class="row">
<div class="col-md-4"></div>
<div class="col-md-4">
<!-- Form -->
<p> {{ wtf.quick_form(form) }} </p>
<!-- End -->
</div>
<div class="col-md-4"></div>
</div>
<div class="row">
<div class="col-md-3"></div>
<div class="col-md-6">
{% for post in posts %}
<table class="table table-hover">
<tr>
<td width="70px">
<img src="{{ post.author.avatar(36) }}" alt="{{ post.author.username }}">
</td>
<td>
<strong>{{ post.title }}</strong> <br>
<strong>{{ post.author.username }}</strong> said {{ moment(post.timestamp).fromNow() }}: <br>
{{ post.body }} <br>
{% for tag in post.tags %}
<a href="{{ url_for('tag', name=tag.name) }}" target="_blank">{{ tag.name }}</a> |
{% endfor %}
</td>
</tr>
</table>
{% endfor %}
</div>
<div class="col-md-3"></div>
</div>
<div class="row">
<div class="col-md-12">
<nav aria-label="...">
<ul class="pager">
<li class="previous{% if not prev_url %} disabled{% endif %}">
<a href="{{ prev_url or '#' }}">
<span aria-hidden="true">←</span> Newer posts
</a>
</li>
<li class="next{% if not next_url %} disabled{% endif %}">
<a href="{{ next_url or '#' }}">
Older posts <span aria-hidden="true">→</span>
</a>
</li>
</ul>
</nav>
</div>
</div>
{% endblock %}
We begin by looping through the contents of posts to retrieve individual data as post. We can then get data related to each post such as the title as post.title. As we saw in the index() view function, to access each tag related to a post, we have to loop through post.tags to get a tag's name. This is what gets displayed to the end user. Head over to your index page in your browser, and post some things to see the update.
View Blog Posts Based On Select Tags
Finally, it is time to know what blog posts are associated with each tag. When a user clicks on a tag, they should be redirected to another page with relevant blog posts. First, let us begin by defining a view function that will redirect us to relevant tag posts.
app/routes.py: Tag view function
# ...

@app.route('/tag: <name>')
def tag(name):
    page = request.args.get('page', 1, type=int)
    tags = Tag.query.filter_by(name=name).order_by(
        Tag.timestamp.desc()).paginate(
            page=page, per_page=app.config['POSTS_PER_PAGE'], error_out=False)

    # Pagination
    next_url = url_for('tag', name=name, page=tags.next_num) \
        if tags.has_next else None
    prev_url = url_for('tag', name=name, page=tags.prev_num) \
        if tags.has_prev else None

    return render_template(
        'tags.html',
        title=f'Posts Related To {name}',
        tags=tags.items,
        next_url=next_url,
        prev_url=prev_url)
We get all the tags from the Tag model in descending order of when they were posted. This is what gets passed to the tag.html template. To ensure that a tag redirects us to a list of its post, we will need to add a link to the actual tag.
templates/index.html: Add a link to a tag's posts
{% for tag in post.tags %}
    <a href="{{ url_for('tag', name=tag.name) }}" target="_blank">{{ tag.name }}</a> |
{% endfor %}
This ensures that the relevant posts are to be shown once a tag is clicked. Finally, let us update the tags.html template with the layout of how we want each post to appear.
templates/tags.html: Display posts associated with a tag
{% extends 'base.html' %}
{% block app_content %}
{% extends 'base.html' %}
{% block app_content %}
<div class="row text-center">
<div class="col-md-12">
<h1>{{ title }}</h1>
</div>
</div>
<div class="row">
<div class="col-md-3"></div>
<div class="col-md-6">
{% for tag in tags %}
{% for post in tag.posts %}
<table class="table table-hover">
<tr>
<td width="70px">
<img src="{{ post.author.avatar(36) }}" alt="{{ post.author.username }}">
</td>
<td>
<strong>{{ post.title }}</strong> <br>
<strong>{{ post.author.username }}</strong> said {{ moment(post.timestamp).fromNow() }}: <br>
{{ post.body }} <br>
</td>
</tr>
</table>
{% endfor %}
{% endfor %}
</div>
<div class="col-md-3"></div>
</div>
<div class="row">
<div class="col-md-12">
<nav aria-label="...">
<ul class="pager">
<li class="previous{% if not prev_url %} disabled{% endif %}">
<a href="{{ prev_url or '#' }}">
<span aria-hidden="true">←</span> Newer posts
</a>
</li>
<li class="next{% if not next_url %} disabled{% endif %}">
<a href="{{ next_url or '#' }}">
Older posts <span aria-hidden="true">→</span>
</a>
</li>
</ul>
</nav>
</div>
</div>
{% endblock %}
First, we loop through all tags. Once each tag is accessible, we use the posts backref to access the posts related to each tag. Remember we said that the backref called posts is to be used to access entities on the right side of the relationship, which in this case is a post. We then loop through all relevant posts associated with select tags to get the details of the post.
That is it. In your next blog project, you can consider adding tags to each blog post.
Share
If you enjoyed this article, you can share it with another person.
TweetNewsletter Subcription
Level up your skills.
We take your privacy seriously. Read our privacy policy. Unsubscribe | Resubscribe.Comments (1)

|
#3
tes3awy
said :
|
Hi Gitau, I really appreciate your work in this blog post but I want to modify it a little bit.
I read the tags from the database where the Tag model has id and name columns only. tags are queried from the database to be viewed in SelectMultipleField choices from Flask-WTF.
tags = db.session.scalars(sa.Select(Tag)) form.tags.choices = [(tag.id, tag.name) for tag in tags]
This references the tag by its ID when submitted and makes the tag name be its id on form submission.
How can I avoid this behavior while having the tag to be referenced by it ID?