


Two-factor Authentication Using Twilio Verify API in Flask
One of the most effective ways to reduce identity theft of online accounts is to enable two-factor authentication (2FA) on an account. It adds a layer of security to the authentication process by making it harder for attackers to gain access to a person's devices or online accounts because, even if the victim's password is hacked, a password alone is not enough to pass the authentication check. Below, you can choose what method you want to use to authenticate an account.
- Time-based two-factor authentication
- SMS two-factor authentication (this article)
- Push two-factor authentication
Twilio offers multiple ways to implement two-factor authentication. In this article, you will learn how to enable optional two-factor authentication in your flask application. I say optional because a user can choose to not enable it and will still have access to their account.
Welcome to Twilio Verify
Using the Twilio Verify API allows you to authenticate users using verification codes over their preferred channels with a single API call. The available channels are SMS, Voice, email, push notification, WhatsApp, and even time-based one-time passwords. A user will receive a verification code via their preferred channel.
Things We Will Do
- Set up the Twilio Verify API
- Create a simple flask application with basic form validation
- Integrate Twilio Verify with your flask application
The completed and working project is available at GitHub. To test it live, click here.
Requirements
- A Twilio account
- A working phone number
- Python3+
Set Up the Twilio Verify API
- Create a free Twilio account now.
- Once the account is created, navigate to the Twilio Console
- Click Explore Products on the left sidebar.
- Find and click on Verify in the Account Security section (You can pin for easy access).
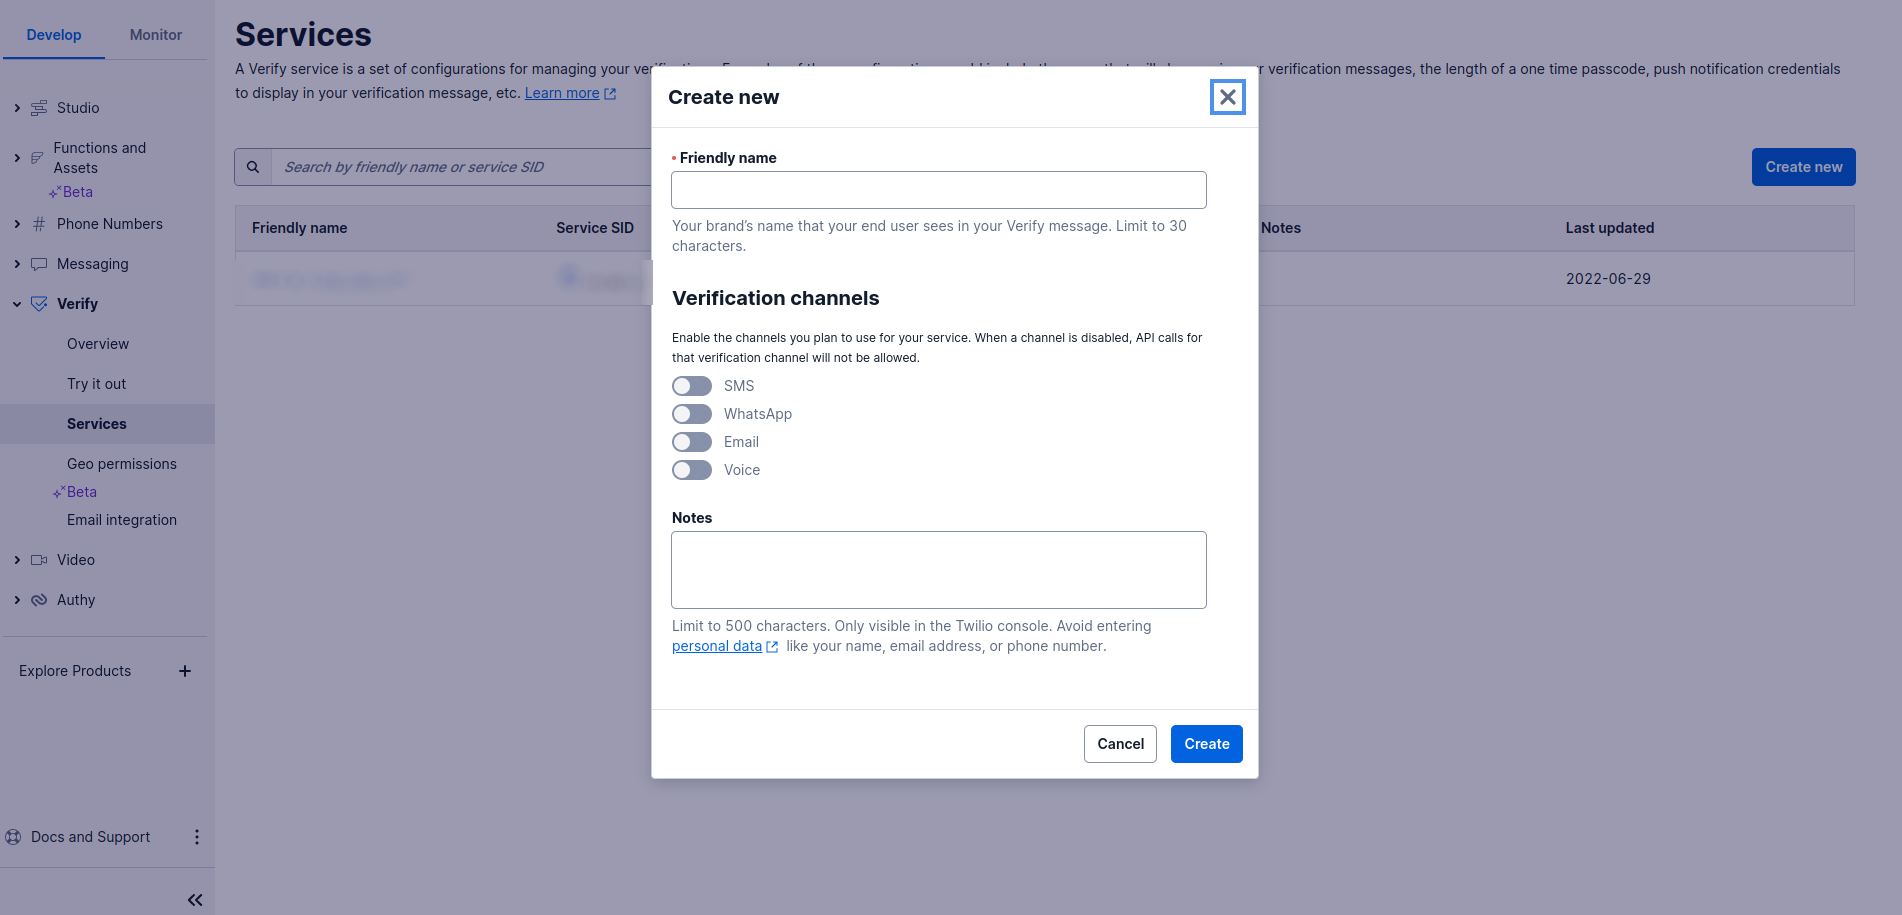
- Create a new service by clicking on the blue "Create new" button.
- Provide a friendly name for the service.
- Toggle the SMS channel on.
- Click the "Create" button
-
Note:
You will be provided with a Service SID. This is a unique identifier for the service.
You will also need your Account SID and Auth Token. These are unique identifiers for your account. To find Account SID and Auth token, head over to your Twilio Console. We will use them later in the article.
Note that these keys are private and should not be committed to version control. In the event the keys are exposed, you risk having someone else use your service. Rotate your keys immediately.
Create a simple flask application with basic form validation
I will not go into the details of how to create a simple flask application. If you are new to Flask, I recommend that you begin here. A complete flask starter project is available on GitHub. You will also need to learn how to create and work with web forms, a database, and user sessions to complete this project.
Integrate Twilio Verify with your flask application
When a user first creates an account, they will have the option to enable two-factor authentication on their profile page. When they click the "Enable 2FA" link, they will be requested to provide their phone number which will be used to get a verification code. Subsequent logins will require them to enter the verification code before they can access their accounts.
Once you have your project up and running, you will need to install twilio in your virtual environment.
(venv) $ pip3 install "twilio>=6.17.0"
Table of contents on Integration
- Testing
- Configure flask to use Twilio Verify
- Phone form
- Verify the client
- Disable 2FA
- Update login logic to include 2FA
Testing
From the terminal, let us see how the Twilio Verify API works. Run the following commands in your Python interpreter:
>>> from twilio.rest import Client
>>> client = Client('account_sid', 'auth_token')
>>> service = client.verify.services(service_sid)
>>> service.verifications.create(to='+254700111222', channel='sms')
You should be able to see an AUTHMSG of "Your
>>> result = service.verification_checks.create(to='+254700111222', code='000000')
>>> result.status

# Output
'pending' or 'approved'
Configure flask to use Twilio Verify
As mentioned earlier, Twilio keys should remain private. You should not add them to your application. To do so, you will need to create a hidden environment variable file called .env in the project's top-level directory.
(venv) touch .env
This file will contain the actual keys found in your Twilio Console.
.env: Secret Twilio keys
# Pass in the actual key values

TWILIO_ACCOUNT_SID=
TWILIO_AUTH_TOKEN=
TWILIO_VERIFY_SERVICE_ID=
To access this file, we need to update the config.py file which is also found in the top-level directory of the project.
config.py: Environment variables
import os


class Config(object):
    # ...

    # Twilio Verify
    TWILIO_ACCOUNT_SID = os.environ.get('TWILIO_ACCOUNT_SID')
    TWILIO_AUTH_TOKEN = os.environ.get('TWILIO_AUTH_TOKEN')
    TWILIO_VERIFY_SERVICE_ID = os.environ.get('TWILIO_VERIFY_SERVICE_ID')
The python-dotenv library is used to load the .env file. So, make sure that you also install it in your virtual environment.
(venv) $ pip3 install python-dotenv
To ensure that you do not accidentally commit this file to version control, create a .gitignore file in the top-level directory of the project and add .env. This will prevent git from tracking the .env file.
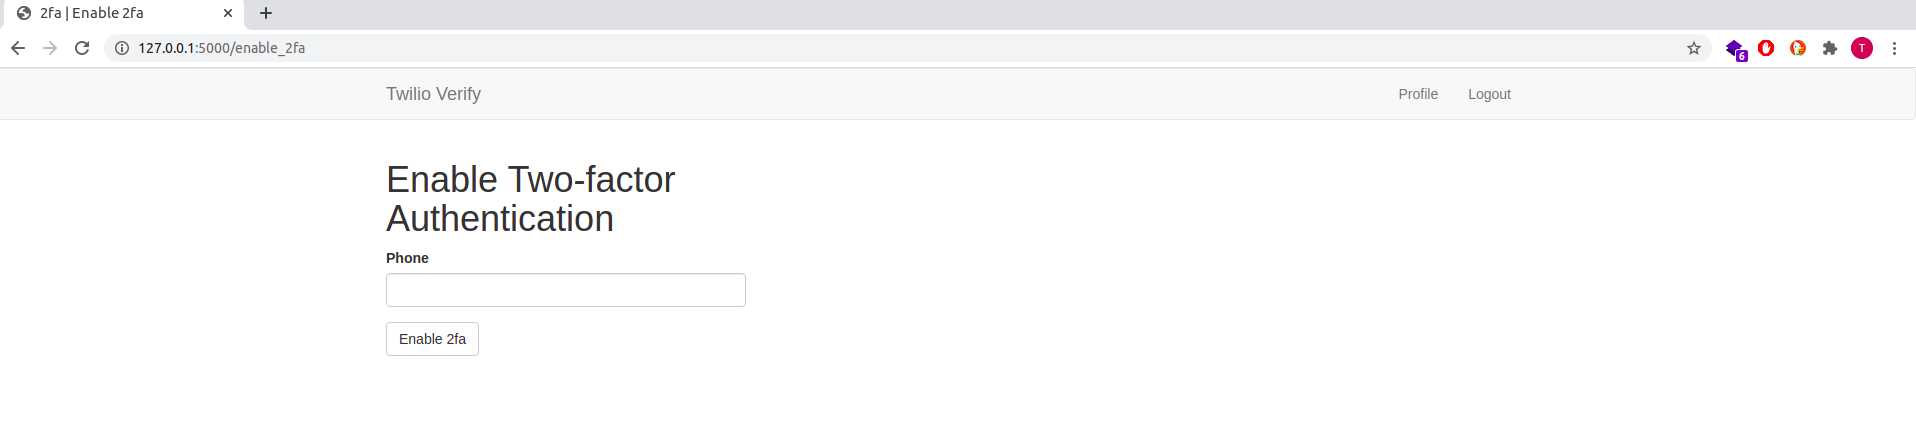
Phone form
A user will be able to enter their phone number in a form once they click on the Enable 2FA link. To get started, we need to create a new page called enable_2fa.html.
enable_2fa.html: Display phone form
{% extends 'base.html' %}
{% import 'bootstrap/wtf.html' as wtf %}

{% block app_content %}
        <div class="row">
            <div class="col-md-12 text-center">
                <h1>Enable 2FA on your Account</h1>
            </div>
        </div>
        <div class="row">
            <div class="col-md-12 text-center">
                {{ wtf.quick_form(form) }}
            </div>
        </div>
{% endblock %}
I am using flask-bootstrap's wtf library to quickly create the form with all the nice validations and styling. You can manually create your form, though.
The next step would be to define the fields we want to use in the form. Here, we will only need a phone number.
app/forms.py: Form definitions
from flask_wtf import FlaskForm
from wtforms import SubmitField, StringField
from wtforms.validators import DataRequired, ValidationError
import phonenumbers


class PhoneForm(FlaskForm):
    verification_phone = StringField('Phone', validators=[DataRequired()])
    submit = SubmitField('Add Phone')

    def validate_phone(self, phone):
        p = phonenumbers.parse(phone.data)
        try:
            if not phonenumbers.is_valid_number(p):
                raise ValueError()
        except (phonenumbers.phonenumberutil.NumberParseException, ValueError):
            raise ValidationError('Invalid phone number.')
Notice that I am using the phonenumbers library to validate the phone number. This library is used to validate phone numbers in the helper validate_phone method. Before you can use it, you have to install it in your virtual environment.
(venv) $ pip3 install phonenumbers
Typically, its usage is as follows:
>>> import phonenumbers
>>> p = phonenumbers.parse('+254700111222')
>>> phonenumbers.is_valid_number(p)
True
You can choose to format a given phone number to either E164 (+254700111222) or international format (+254 700 111 222) or national (0700111222).
>>> phonenumbers.format_number(p, phonenumbers.PhoneNumberFormat.E164)
'+254700111222'
>>> phonenumbers.format_number(p, phonenumbers.PhoneNumberFormat.INTERNATIONAL)
'+254 700 111 222'
>>> phonenumbers.format_number(p, phonenumbers.PhoneNumberFormat.NATIONAL)
'0700 111222'
You can learn more about the phonenumbers library from their documentation. This form will be rendered by the enable_2fa() view functions.
app/routes.py: Render phone number form
from app.forms import PhoneForm
from app.twilio_verify_api import request_verification_token
# ...

@app.route('/enable-2fa', methods=['GET', 'POST'])
@login_required
def enable_2fa():
    """
    Generate a one-time token
    """
    form = PhoneForm()
    if form.validate_on_submit():
        session['phone'] = form.verification_phone.data
        request_verification_token(session['phone'])
        return redirect(url_for('verify_2fa'))
    return render_template('enable_2fa.html', form=form)
The request_verification_token function is used to generate a one-time token. A call to this function is defined below. For now, let us focus on creating this template.
Improved phone number form
Since users of the application may be from different nationalities, it would help improve their experience if they could enter their respective phone numbers in the international format.
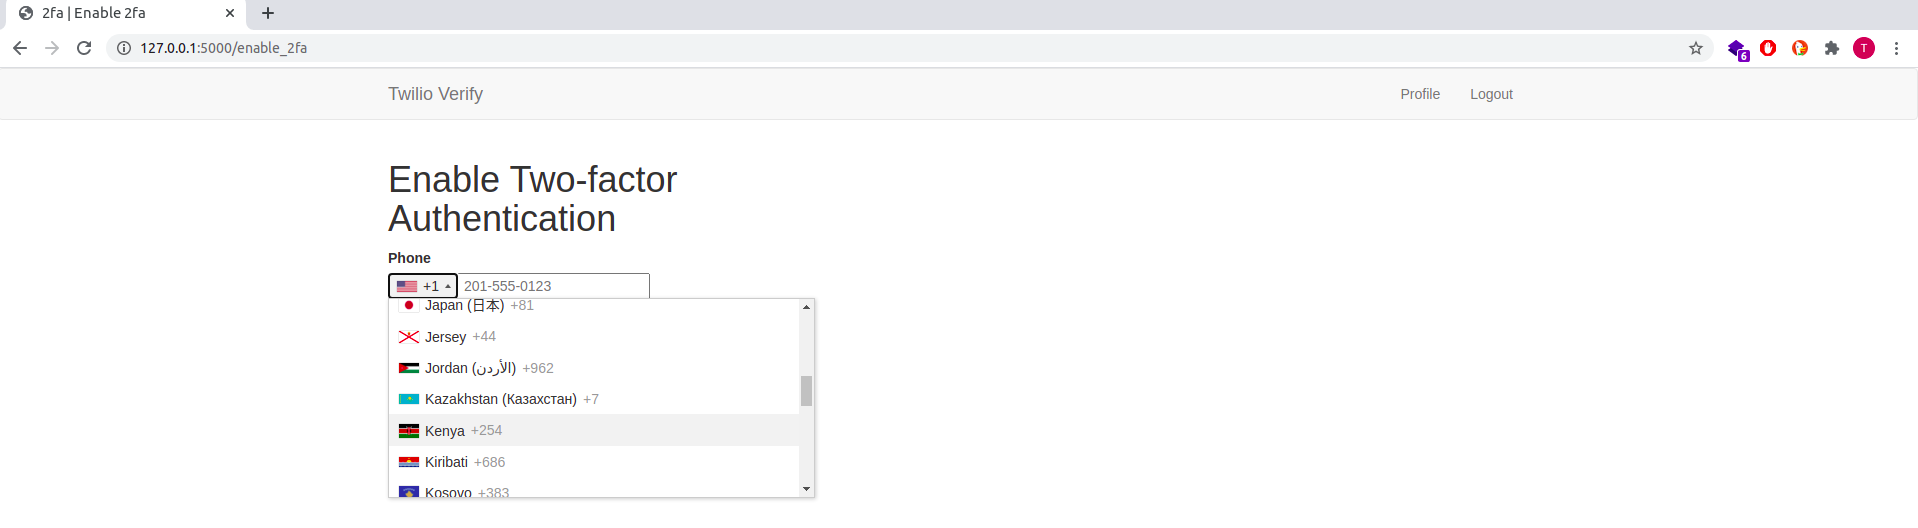
Using a little JavaScript, we can update the phone field to accept international phone numbers. This change will apply to every instance of the phone form in the application, which currently is only used in the enable_2fa.html template.
app/templates/base.html: Improved phone field
{% extends 'base.html' %}
{% import 'bootstrap/wtf.html' as wtf %}

{% block styles %}
    <link rel="stylesheet" href="https://cdnjs.cloudflare.com/ajax/libs/intl-tel-input/16.0.4/css/intlTelInput.css">
{% endblock %}

{% block scripts %}
    <script src="https://cdnjs.cloudflare.com/ajax/libs/intl-tel-input/16.0.4/js/intlTelInput-jquery.min.js"></script>

    <script>
        $("#verification_phone").css({position: 'absolute', top: '-9999px', left: '-9999px'});
        $("#verification_phone").parent().append('<div><input type="tel" id="_verification_phone"></div>');
        $("#_verification_phone").intlTelInput({
            separateDialCode: true,
            utilsScript: "https://cdnjs.cloudflare.com/ajax/libs/intl-tel-input/16.0.4/js/utils.js",
        });
        $("#_verification_phone").intlTelInput("setNumber", $('#verification_phone').val());
        $('#_verification_phone').blur(function() {
            $('#verification_phone').val($('#_verification_phone').intlTelInput("getNumber"));
        });
    </script>
{% endblock %}
The JavaScript library used in this example is intl-tel-input. The library provides such a wonderful user interface that allows a user to properly key in their phone numbers. Remember to add their CSS and JS links before targeting the verification_phone DOM. You can learn more about it from their GitHub repo.
Verify the client
When the user submits their phone number, that data will be stored in a flask session and it will be used as an argument to the request_verification_token function. We have not implemented the request_verification_token function, but we will do so now.
Let's create a module called twilio_verify_api.py within the app directory. This module will contain all the logic used when working with the Twilio Verify API.
(venv)$ touch app/twilio_verify_api.py
Get twilio verify client
We need to first get the API client from the Twilio Verify API. Using this client, we can then make calls to the Twilio Verify API service.
app/twilio_verify_api.py: Twilio Verify API client
from app import app
from twilio.rest import Client, TwilioException


def _get_twilio_verify_client():
    """
    Get the Twilio Verify API client
    """
    return Client(
        app.config['TWILIO_ACCOUNT_SID'],
        app.config['TWILIO_AUTH_TOKEN']
    ).verify.services(app.config['TWILIO_VERIFY_SERVICE_ID'])
Request verification token
The client is sourced from environment variables as defined in the config.py file. To request a verification token, we need to make a call to the request_verification_token method.
app/twilio_verify_api.py: Request verification token
# ...

def request_verification_token(phone):
    """
    Request a verification token
    """
    verify = _get_twilio_verify_client()
    try:
        verify.verifications.create(to=phone, channel='sms')
    except TwilioException as e:
        verify.verifications.create(to=phone, channel='call')
Verify the token
Once the user has requested a verification token, they will be redirected to another page called verify_2fa.html where they need to confirm the token received. This page will have a form with a token field and a submit button.
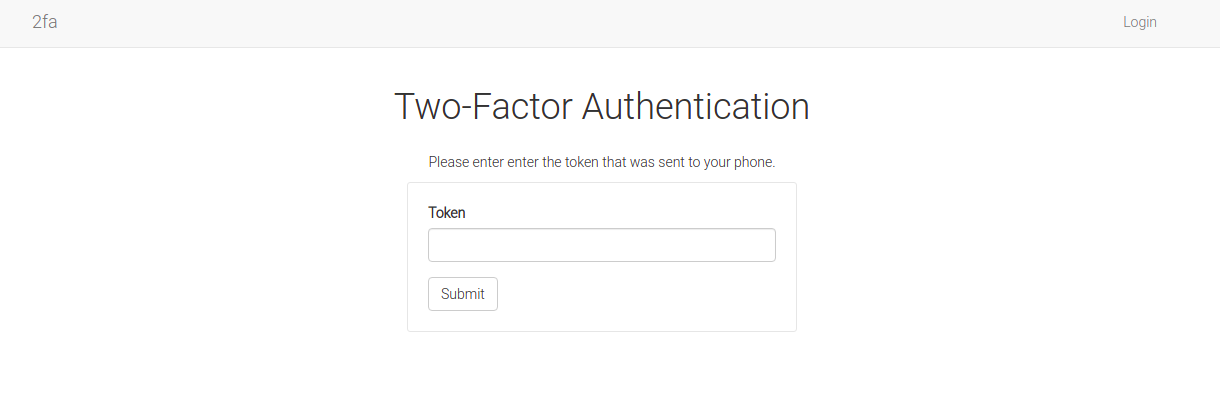
We can use the same template as that of the enable_2fa.html page for verification.
app/verify_2fa.html
{% extends 'base.html' %}
{% import 'bootstrap/wtf.html' as wtf %}

{% block app_content %}
        <div class="row">
            <div class="col-md-12 text-center">
                <h1>Verify Token Received</h1>
            </div>
        </div>
        <div class="row">
            <div class="col-md-12 text-center">
                {{ wtf.quick_form(form) }}
            </div>
        </div>
{% endblock %}
We will need to create a new form called VerifyForm with only a token input field and a submit button.
app/forms.py: Verify form
# ...

class VerifyForm(FlaskForm):
    token = StringField('Token', validators=[DataRequired()])
    submit = SubmitField('Verify')
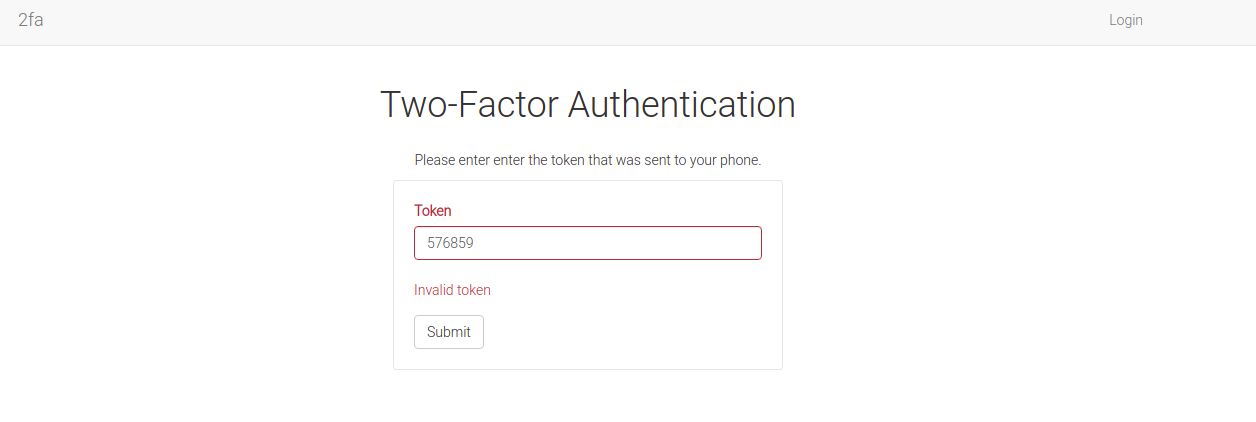
The verify_2fa view function will be responsible for handling the form submission.
app/routes.py: Verify the token received
from app.forms import VerifyForm
from app.twilio_verify_api import check_verification_token


@app.route('/verify-2fa', methods=['GET', 'POST'])
def verify_2fa():
    """
    Verify the token received
    """
    form = VerifyForm()
    if form.validate_on_submit():
        phone = session['phone']
        if check_verification_token(phone, form.token.data):
            del session['phone']
            if current_user.is_authenticated:
                current_user.verification_phone = phone
                db.session.commit()
                flash('You have enabled 2FA.', 'success')
                return redirect(url_for('user', username=current_user.username))
            else:
                username = session['username']
                del session['username']
                user = User.query.filter_by(username=username).first()
                next_page = request.args.get('next')
                remember = request.args.get('remember', '0') == '1'
                login_user(user, remember=remember)
                return redirect(next_page or url_for('user', username=user.username))
        form.token.errors.append('Invalid token.')
    return render_template('verify_2fa.html', form=form)
The view function above handles two scenarios based on the logged-in state of the user. In the event the user is already logged into their account, then, scenario #1 would be to enable 2FA. In this case, the user's phone number will be added to the database. This value in the database is used to determine if a user has enabled 2FA. The other scenario where a user will be required to confirm the verification token would be when they are trying to log into their account. In this case, they are anonymous. The logic used will automatically determine that the user is anonymous and will log them in once the token is verified.
Update phone number field in database
Before we can implement the check_verification_token function, note that our database will need a column to store the phone number. An updated user model will look like this:
app/models.py: User model
# ...


class User(UserMixin, db.Model):
    # ...
    verification_phone = db.Column(db.String(20))

    def two_factor_enabled(self):
        return self.verification_phone is not None
Run your migrations to apply these new updates.
(venv)$ flask db migrate -m 'phone number field'
(venv)$ flask db upgrade
Display link based on state of 2FA
The application can now use the two_factor_enabled method to determine if a user has enabled 2FA. This will be done on the user's profile page where the link exists.
app/templates/user.html: Determine the state of 2FA
{% extends 'base.html' %}

{% block app_content %}
<div class="row">
    <div class="col-md-12 text-center">
        <!-- title -->
        <h1>Profile</h1>
    </div>
</div>
<div class="row">
    <div class="col-md-12 text-center">
        <p>Hi {{current_user.username}}, do you want to enable two-factor authentication?</p>
    </div>
</div>
<div class="row">
    <div class="col-md-12 text-center">
        <!-- Two-factor authentication -->
        {% if not user.two_factor_enabled() %}
            <p>
                <a href="{{ url_for('enable_2fa') }}">Enable 2FA</a>
            </p>
        {% else %}
            <p>
                <a href="{{ url_for('disable_2fa') }}">Disable 2FA</a>
            </p>
        {% endif %}
    </div>
</div>
{% endblock %}
Check verification token
We can now update the function used to verify a user's token.
app/twilio_verify_api.py: Check verification token
def check_verification_token(phone, token):
    """
    Verify token received by user
    """
    verify = _get_twilio_verify_client()
    try:
        result = verify.verification_checks.create(to=phone, code=token)
        return result.status == 'approved'
    except TwilioException as e:
        return False
Disable 2FA
With the state of 2FA updated, we can now implement the disable_2fa view function. This will allow a user to disable 2FA by removing his phone number from the database.
app/routes.py: Disable 2FA
from app.forms import DisableForm


@app.route('/disable-2fa', methods=['GET', 'POST'])
def diable_2fa():
    form = DisableForm()
    if form.validate_on_submit():
        current_user.verification_phone = None
        db.session.commit()
        flash('You have disabled 2FA.', 'success')
        return redirect(url_for('user', username=current_user.username))
    return render_template('disable_2fa.html', form=form)
We will need to define the DisableForm class in the forms.py module.
app/forms.py: Disable form
# ...


class DisableForm(FlaskForm):
    submit = SubmitField('Disable')
Just like the enable_2fa view function, this route will redirect the user to another page that has a form.
app/templates/disable_2fa.html: Disable 2FA
{% extends 'base.html' %}
{% import 'bootstrap/wtf.html' as wtf %}

{% block app_content %}
        <div class="row">
            <div class="col-md-12 text-center">
                <h1>Disable 2FA on your Account</h1>
            </div>
        </div>
        <div class="row">
            <div class="col-md-12 text-center">
                {{ wtf.quick_form(form) }}
            </div>
        </div>
{% endblock %}
Update login logic to include 2FA
We need to expand the basic login logic to include 2FA. When a user with two-factor authentication enabled tries to access their account, they will be redirected to a verification page where they need to enter a token received on their phone.
app/routes.py: Login with 2FA
@app.route('/login', methods=['GET', 'POST'])
@login_required
def login():
    # ...
    if user.two_factor_enabled():
        request_verification_token(user.verification_phone)
        session['username'] = user.username
        session['phone'] = user.verification_phone
        return redirect(url_for(
            'verify_2fa',
            next=next_page,
            remember='1' if form.remember_me.data else '0'))
    login_user(user, remember=form.remember_me.data)
    return redirect(next_page)
All needed user information is stored in a flask session to preserve their data until their token is verified.
Conclusion
I hope you enjoyed working with Twilio Verify API! In your next application, consider integrating two-factor authentication using Twilio Verify API.
Share
If you enjoyed this article, you can share it with another person.
TweetNewsletter Subcription
Level up your skills.
We take your privacy seriously. Read our privacy policy. Unsubscribe | Resubscribe.